If you’ve been following along with our RV office space remodel, you read my post about how to remove the RV sofa and saw the custom RV office desk I built from lumber we milled up while workamping at Vickers Ranch. As a bonus I shared steps for how to install a USB charging socket in the RV wall. I’m now officially calling the project done. And as promised, here are a few of the finishing touches…
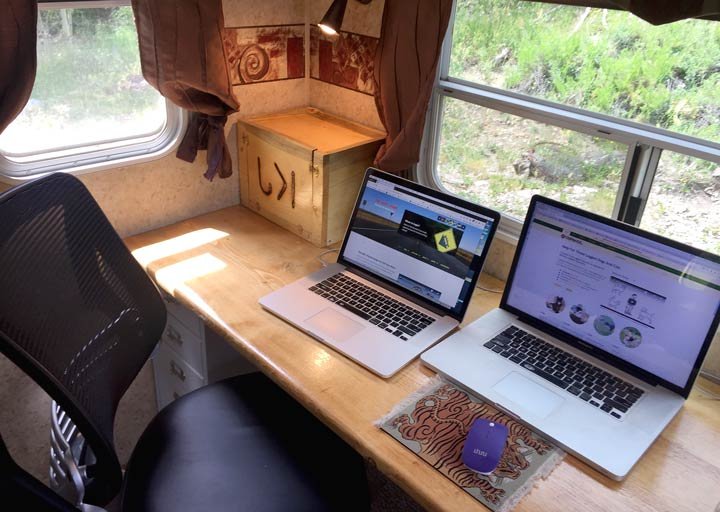
After 12+ years on the road, I finally have a proper workstation, with an ergonomic office chair. After searching for the perfect chair within our price range, to fit our small space, I discovered there is no perfect chair. But I came very close by selecting this Mesh Back and Vinyl Seat Office Chair with flip-up arms. It is much more comfortable than the dinette cushions I’ve been sitting on for years, and flipping up the arms allow me to stow it out of the way under the desk.
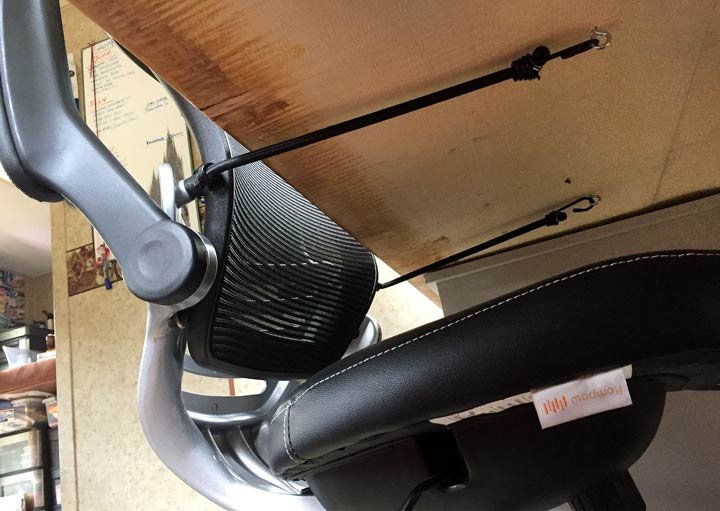
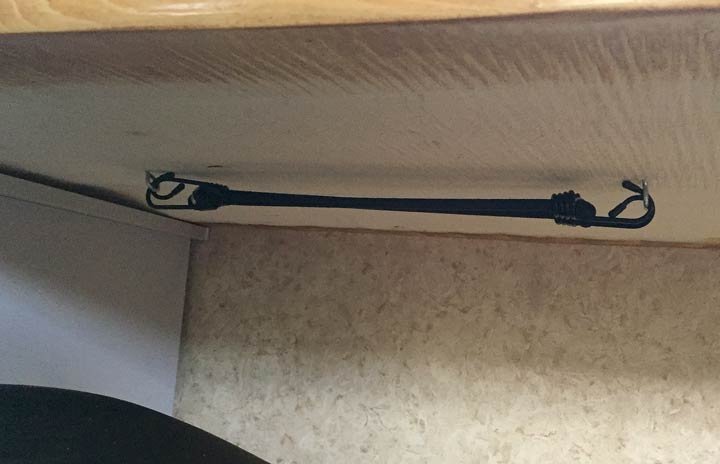
I installed two small eye-bolts under the desk to use a couple of 12″ bungee cords for securing the chair while in transit. I anchored the bolts just far enough apart to stow the cords out of the way while working at the desk.
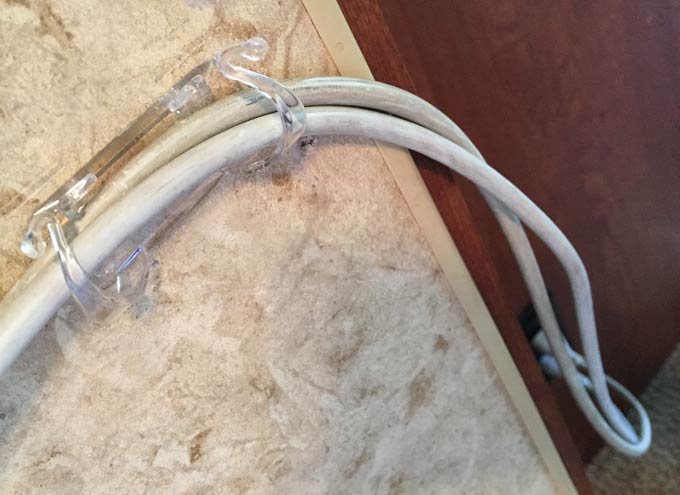
After installing the new AC outlet, power cord management was still an issue. While searching for some sort of hooks to tidy up the cords running my laptop, I discovered 3M makes an ideal solution with their Command Cord Clips.
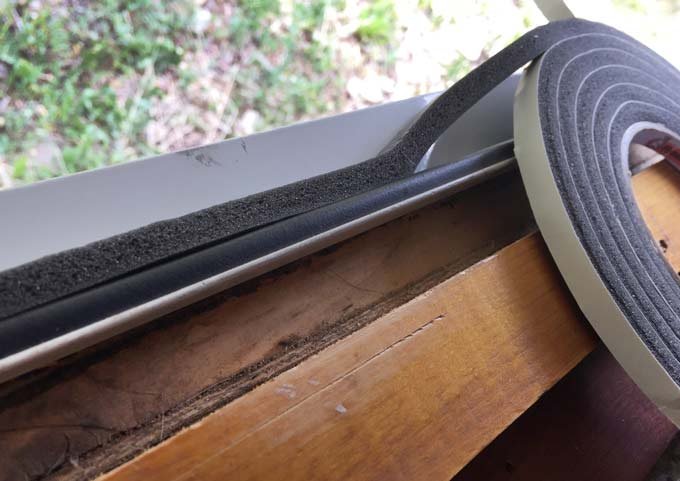
Finally, I added some extra self adhesive weatherstripping around the storage bay door I concealed to prevent drafts since there was a noticeable gap even with the door locked.
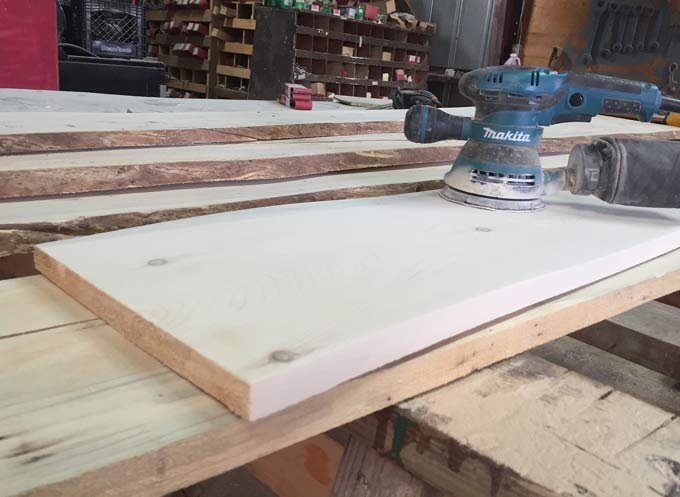
Then came the fun part. I enjoy woodworking, and there’s no better place than a working ranch to do it – where you have access to a big shop, all the right tools, and an unlimited supply of natural wood.
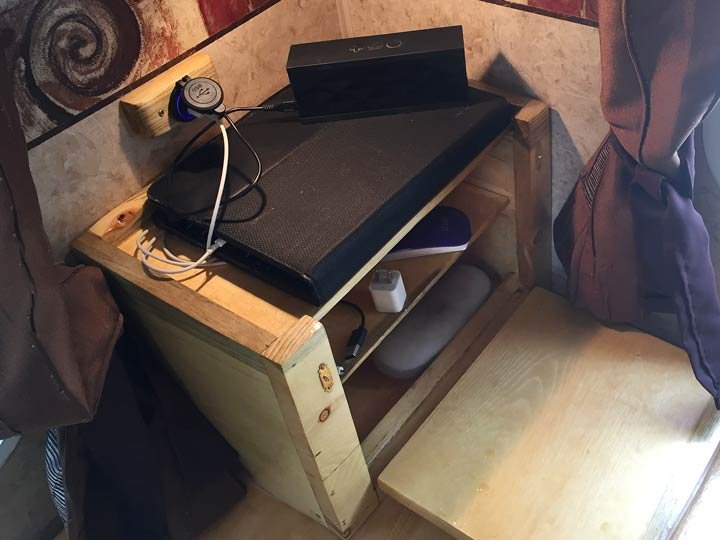
That USB wall outlet I installed sits right above this custom wood shelf I built to create a convenient and tidy charging station.
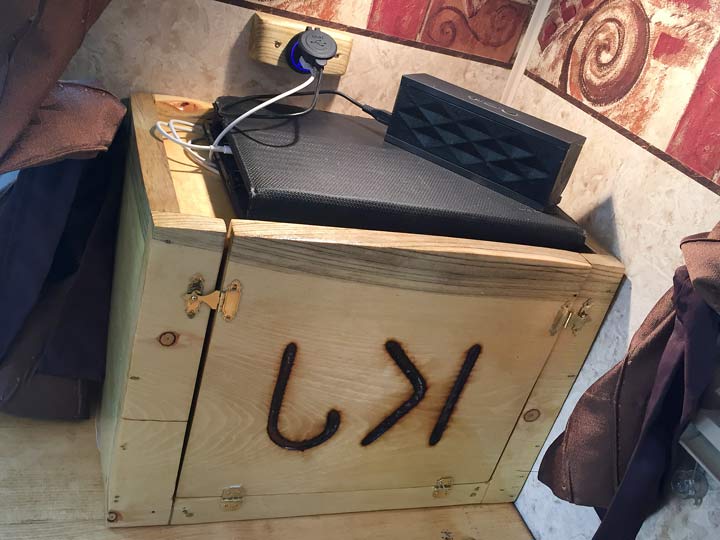
The size turned out just right to fit a few mobile devices, with a hidden shelf to stow accessories and office supplies out of sight to reduce clutter.
I must admit, it is a bit more attractive than any Chinese plastic bin we we could have found at crapmart. And while I have the pride and fond memory of making it at the ranch, I also admit my design would have earned a better grade than my production. To my credit, working with uneven, checked wood milled on a Woodmizer can present its challenges. Of course, I had to adorn the finished project with the Vickers brand – like that custom log fireplace mantle I created for one of their cabins a few years ago.
We did do another one of those this year, but you’ll have to wait for my round-up of random ranch workamping photos when our stay comes to an end. Subscribe here to be notified of new posts, or check out all our workamping articles here.
Don’t Miss:
RV Office Workstation Remodel – Part 1: Couch Removal
Nice job Jim with the final touches, I love the little cabinet. When you retire, you can take up fly tying and that cabinet will hold all your tying shit.
You might even have enough room for a small portable ice maker under the desk as well. Can’t have too much ice for cocktails.
Its funny, that you waited 12 years for the workstation, LOL
When we bought our 3rd moho, we took about 8 years to do all the custom work to get it the way we wanted it, but we only kept it for another 2 years. We asked ourselves why we waited so long to customize it. When we bought our current (4th) motorhome, we did all the custom work, within the first year because we knew exactly want we wanted, and this time we got to enjoy it for nine years and counting, for many years to come.
To address Codie’s comment, buy it, remodel it and enjoy it. As long as the rig can handle the wait, make it yours, make it pretty. You won’t get any more or any less on a trade. If you sell it privately and it looks good, you may get more.
That work space turned out so nice! I’m lucky as there is a work space in front of the passenger seat and all my office junk fits in a bin in a cabinet. Customizing our RV is ongoing for most RVers. Today I had to redo and reconnect some silver insulation in our windows. It has been so hot!!
Thanks! Never-ending project indeed…
JIm-Your new workstation is both beautiful and functional!! It is also providing me with inspiration. Since the rig of our dreams, even used, generally remains out of our price range we are looking at other, older models with an eye to how they could be DIYed to suit us better. Like, oh we can remove that ugly uncomfortable couch and build a platform dog bed with storage underneath. Or it comes with a table and chairs so we can build a dinette booth instead. Your blog is invaluable to wannbe newbies like us!
Thanks! Consider an older bunkhouse model, which provided all sorts of opportunity for our RV workshop remodel.