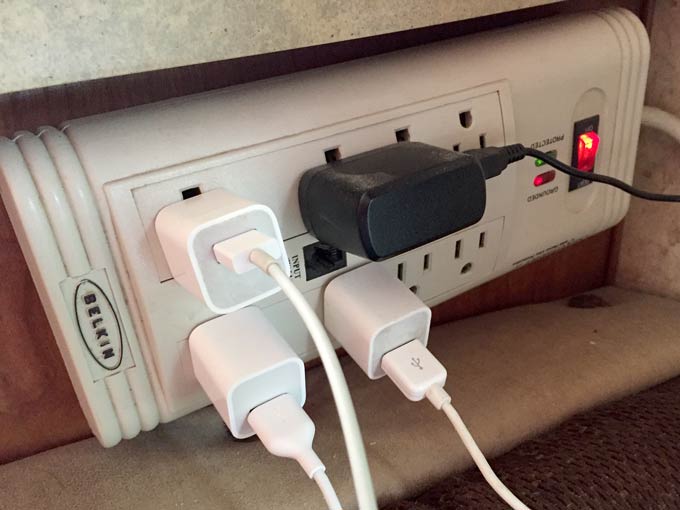
With the multitude of mobile devices digital nomads need to charge in their RV, cable management can become cumbersome. In addition, the standard charging cables require AC power which is a bother when you don’t care to run your inverter or generator while boondocking.
DC Powered USB Charger RV Wall Outlet Installation Tips
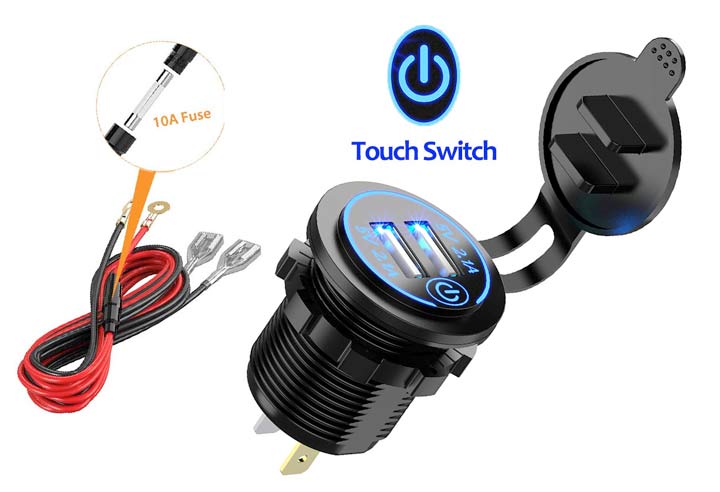
After searching for the best USB charger wall outlet, I selected this Dual USB Car Charger Socket with Touch Switch for various reasons. For starters, it includes two USB charging ports, and was rather inexpensive. I like how it has a cover to hide the LED illumination at night, but better yet, it has a touch switch to turn off the LED so it does not draw any power when not in use. It has an inline fuse to protect any sensitive devices being charged – even included a spare – and looked easy to install.
 ?
?
I considered purchasing a combination wall outlet with USB charger, since I needed to install a new outlet for my RV office desk remodel project. All those I found, however, used the AC connection to power the USB outlets. I wanted a DC powered USB charger outlet.
Connect DC Power to nearby RV Light or Switch
Select a location for your USB wall outlet near and existing interior light, fan, or switch that is run off your DC power circuit. I chose a reading light conveniently located above my new desk, which was on the wall above the RV couch I removed. The USB outlet would be mounted about a foot below the light, just above a custom cubby I am building to sit atop the desk. Remove the light fixture or switch to expose the DC wiring.
Pick your outlet position carefully. Press or knock on the wall to ensure their is no studs or supports behind the paneling. A 1.25″ hole saw was the perfect size to fit my new USB charger outlet, designed to be installed in a car dashboard or console. Use very light pressure when drilling the hole to ensure you do not pierce the exterior skin of your RV wall. You only want to create an opening through the interior paneling.
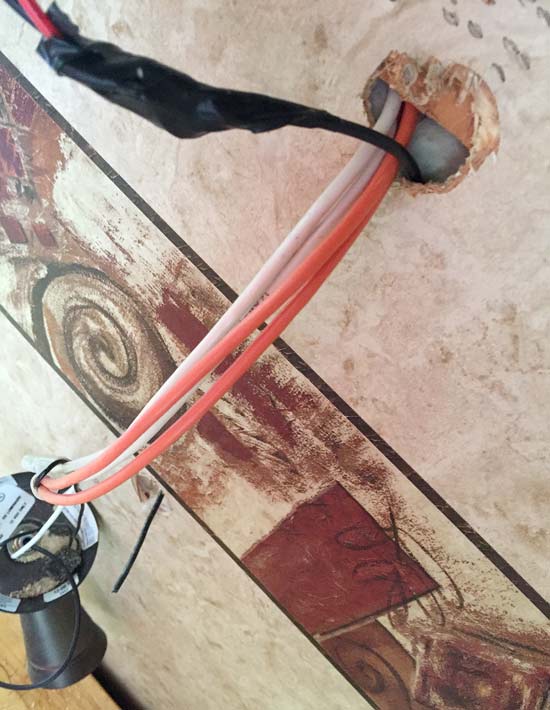
Feed a stiff wire or hanger through the hole you cut toward and out of the existing hole for the fixture you removed. Securely attach the two wires provided with the USB outlet to that wire and pull them back down and through the hole where you will mount the new outlet.
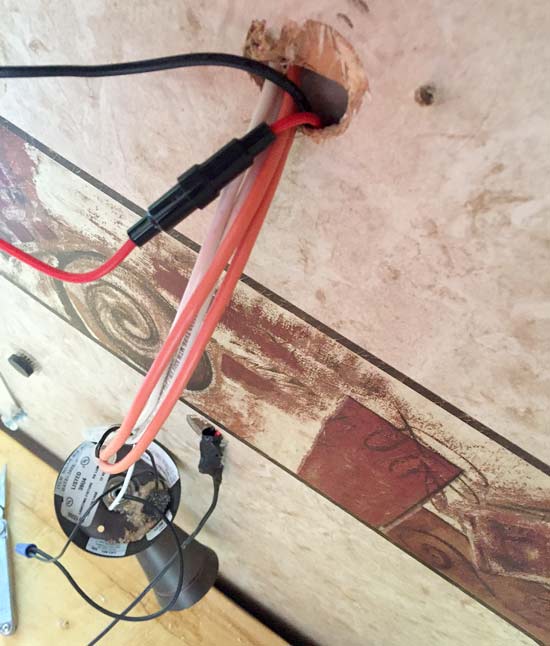
Connect the new USB charger leads to your DC power circuit by tapping into the positive and negative wires using small wire nuts, butt connectors, or solder and shrink tubing if you are a perfectionist. Pay close attention to ensure you connect the positive lead provided to your positive DC power circuit, and same goes for the negative wires. The color of wiring in your rig may be different, but white is usually the negative circuit.
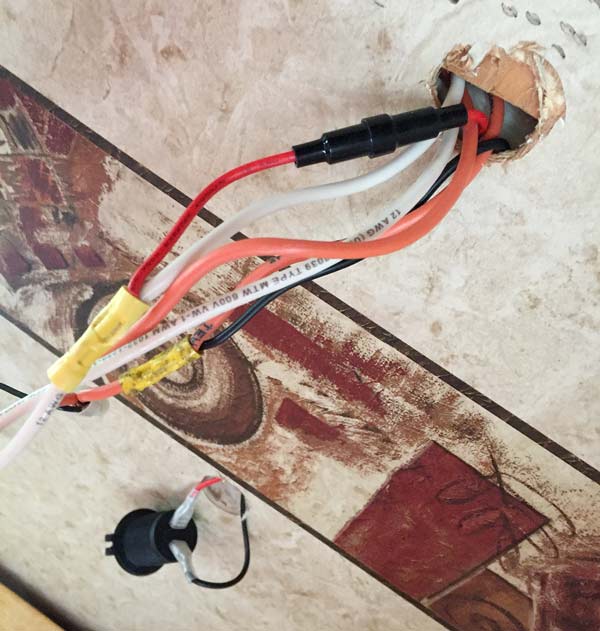
In these pictures, the wires included with the? YoHan dual USB car outlet are black (positive) and red (negative), while our rig wiring at this location is orange (positive) and white (negative).
Measure Carefully before Installing RV Wall Outlet
I measured the thickness of our RV walls before purchasing the outlet, and knew the depth would be close to possibly fit the outlet without any sort of spacer. With the wires attached to the poles, it was indeed too long to fit neatly inside the wall. I used some of the same 1/2″ pine wood I’m using to build my device charging shelf to mount the outlet so it protrudes enough from the hole.
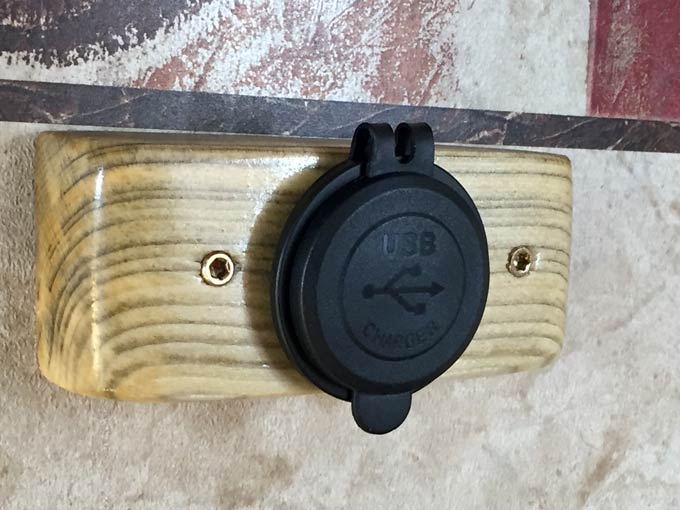
Using the same hole saw, I cut a socket in the wood for the outlet to fit snugly. A bit of heavy duty double sided tape around the threads on the outlet ensure it will never become loose or get pulled out by repeatedly removing USB plugs.
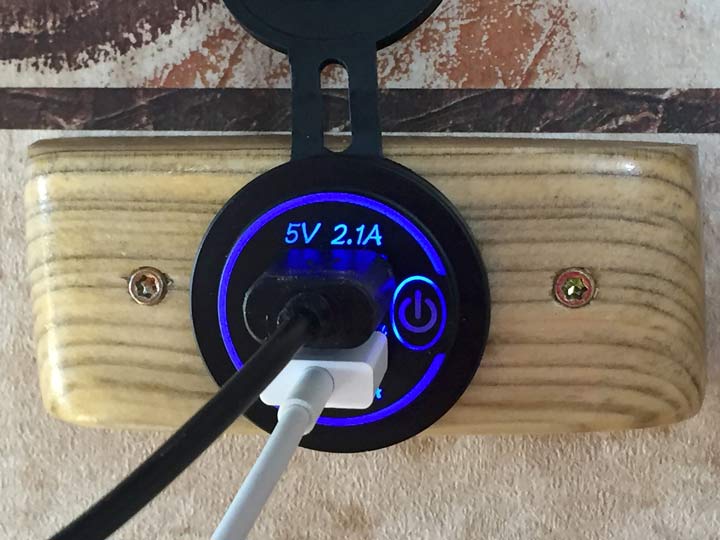
A bit more tape behind the spacer, ensured the block will stay in place with the two small brass screws I used to attach the assembly to the wall. We may now be able to get rid of the ugly power strip we’ve been using to charge all our devices and computers. Stay tuned for pictures of my finished office, complete with custom charging shelf and new ergonomic office chair! It’s about time…
Don’t Miss:
RV Office Workstation Remodel – Part 1: Couch Removal
3 thoughts on “How To Install USB Charger Wall Outlet in RV”