Yes, you can repair landing gears on your fifth wheel with an inexpensive rebuild kit. No, in the interest of full disclosure, I did not do this…yet. But as promised in my last post about how to fix fifth wheel legs, I can provide step by step instructions. And I have plenty of photos. How? Because I tore apart my seized landing gear leg to see how it works. I identified how all the parts are put together. As a result, I figured out just how easy it is to repair landing gears. If I ever need to do that on our own fifth wheel, that is. so…
Repair landing gears or replace them?
That was the big question I had before fixing the fifth wheel leg that seized up on us. Landing gear legs can stop working for only a few reasons. The gearbox may be broken. I wrote about my landing leg gearbox repair when that happened to us back in 2012. Otherwise, the landing gear legs are jacked up. As in messed up, not jacked up like they’re supposed to be when working properly.
Inside the fifth wheel leg, there are a few different landing gears. One set can be serviced, as I will explain here. Damage to the other would cause the entire leg to be replaced. As I explained in detail with Fix Fifth Wheel Legs: Part 1.
How Fifth Wheel Landing Gear legs Work
When fifth wheel landing gear legs work properly, they should work like this. Tap the switch and the legs extend. Push it the other way, they retract. We know that. But what is happening when you flip that button? The switch sends power to the gearbox motor. In turn, the gearbox turns the drive shaft on the Lead leg. This is the landing leg attached to the gearbox. The crank shaft tube connects to the opposite landing gear leg drive shaft. Inside each leg, the landing gear assembly is similar.
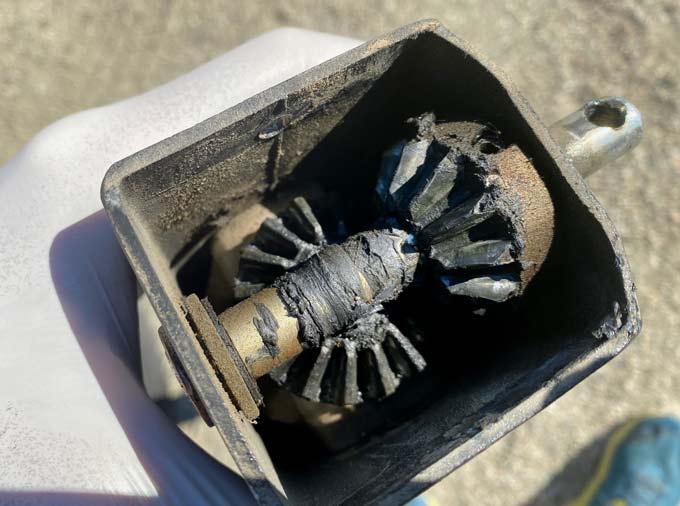
Attached to the drive shaft is a mechanical bevel gear. This gear drives an opposing bevel gear positioned at a 90º angle. And that gear is attached to the long worm drive shaft which extends the lower landing gear leg extension. The worm drive is threaded like a long strong screw which extends and retracts the leg. So, how do you repair landing gears in the leg?
Here is the big unknown:
If your landing gear leg is seized up, you don’t know which gear is causing the problem. You have to remove the leg and take it apart to find out. If you have the time to do this, and don’t need to move your trailer, great. You may be able to save some money.
How? You can repair landing gears, only if the top gears are causing the problem. If the worm drive shaft is stripped, you’ll need to replace the entire fifth wheel leg. (I have not been able to find a replacement worm drive shaft.) However, you can purchase a landing gear rebuild kit to repair landing gears. That is, if the top gears are the problem.
Save on fifth wheel landing gear rebuild kit.
When replacing our fifth wheel landing gear, I dismantled the seized leg. As a result, I confirmed the worm drive shaft was the problem. (Otherwise I could have used a rebuild kit to repair landing gears inside the leg.) I also discovered how all the gears fit together. So here are the steps you can take to repair landing gears for your fifth wheel
Determine Correct Replacement Parts
Different rebuild kits are available to repair landing gears in fifth wheel legs from different manufacturers. I basically built my own kit by salvaging the parts from our seized leg. If your landing leg top gears are damaged, you’ll need to purchase the appropriate rebuild kit to repair landing gears in your leg.
NOTE: The Lead Leg is attached to the gearbox and motor. And the Follow Leg is on the opposite side and attached to the Lead Leg with the long crank shaft tube.
Select Correct Rebuild Kit to Repair Landing Gears
The following are most common rebuild kits to repair landing gears for fifth wheel legs that won’t extend or retract. Be sure to select right kit for the Lead or Follow leg!
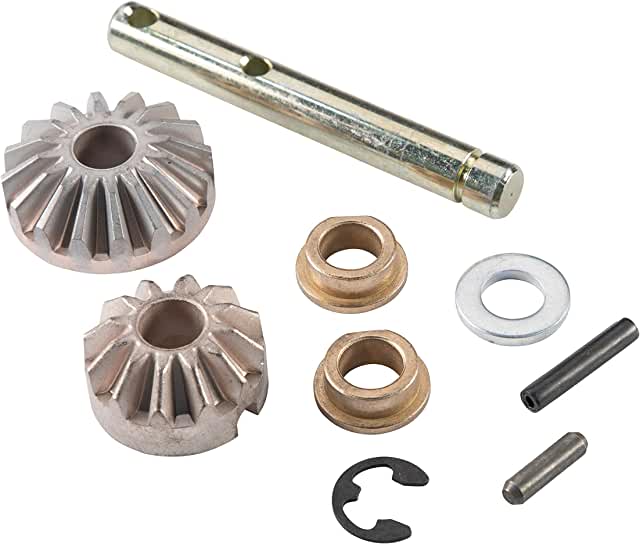
Lead Leg Lippert Fifth Wheel Landing Gear Repair Kit
Follow Leg Lippert Fifth Wheel Landing Gear Repair Kit
Use Rebuild Kit to Repair Landing Gears
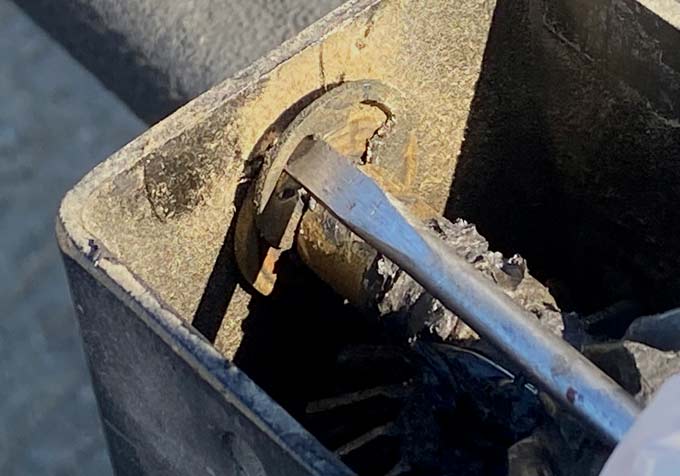
Once you’ve got the appropriate rebuild kit, follow these steps to rebuild landing gears in your broken fifth wheel leg. Please review my previous post about how to fix fifth wheel legs for detailed steps to remove the bad leg. You’ll also find helpful advice about supporting the trailer and important safety tips. After removing the seized leg, you’ll find it simple to remove the protective cap at the top. It will likely pry off easily with a screwdriver. Or, some have a small nut or screw holding the cap in place.
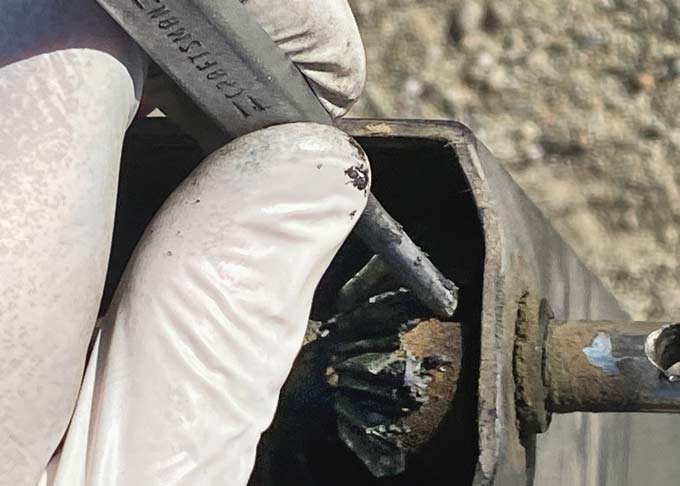
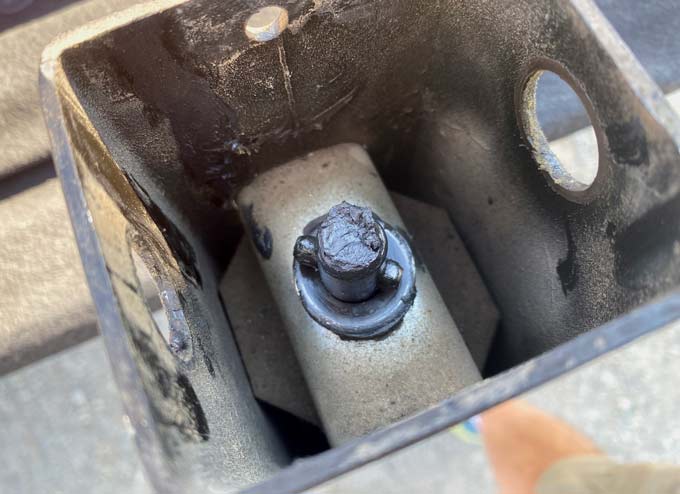
Remove cap at top to expose and repair landing gears inside fifth wheel leg.
Remove Landing Gears from Leg
As you can see, our top gears are in good shape. If you notice missing or warn down teeth, you can repair landing gears with the right repair kit.
Remove the retainer clip from top drive shaft. TIP: Place all parts in a small container or plastic bag! It’s always good to have a few spare parts. Don’t worry if parts fall down the leg, you’ll be able to shake them out later.
Remove Top Bevel Gear
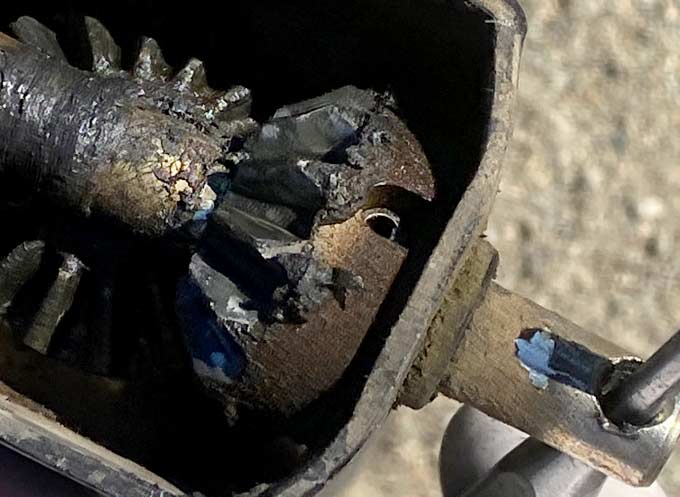
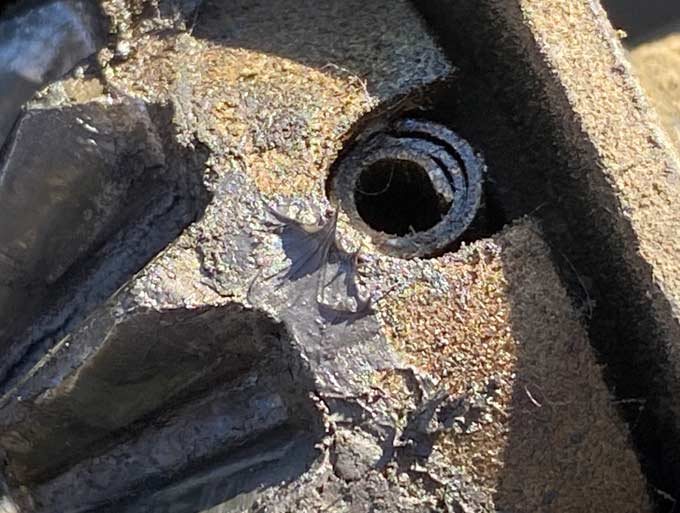
Next Step: Locate the shear pin holding the bevel gear in place on the top drive shaft. Shear pins are small parts design to break before the gears do. You may be in luck if only the shear pin is broken. If so, disassemble the leg and inspect all parts since you already have it apart anyway.
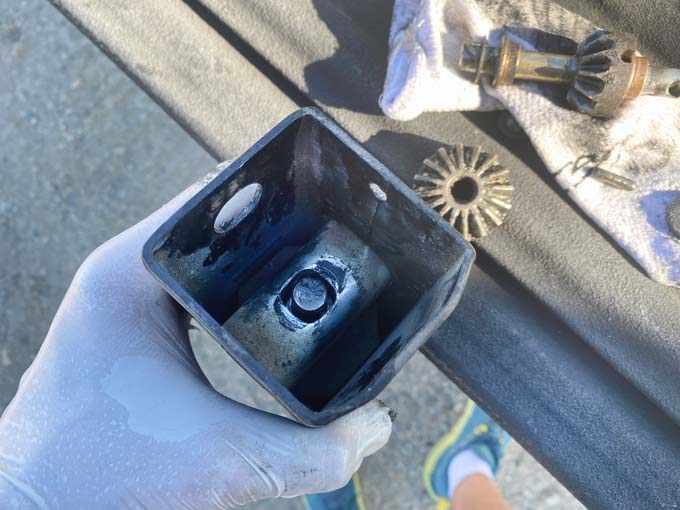
Use a punch and hammer to push the shear pin through the drive shaft. To prevent it falling out, push the pin only half way. Then turn the shaft and pull the pin out with pliers. This will allow you to release the gear and pull the drive shaft out through the hole. Then, you can remove the top bevel gear and drive shaft from the leg. TIP: Reassemble the top drive shaft and gear together with the pin and clip to keep the top gear assembly all together.
With the top bevel gear removed, you will reveal the bottom bevel gear. This sits atop the worm drive shaft. Remove that gear and you will notice another shear pin that spins this main worm drive shaft when the gear turns. If you want to remove or test the worm drive, tap out this shear pin and remove it with pliers. Set all parts aside.
Find correct landing gear repair kit.
At this point you can replace any or all the parts from the rebuild kit to repair landing gears that were no longer working. When reusing any good parts, clean them of any debris and grit.
Remove Landing Gear Leg Drive Shaft
NOTE: You may not be able to repair landing gears if they do not appear worn. In this case, you may have a seized worm drive shaft. That could require replacing the entire leg. To confirm this, you can tap out the retainer bracket holding the drive shaft in place inside the leg.
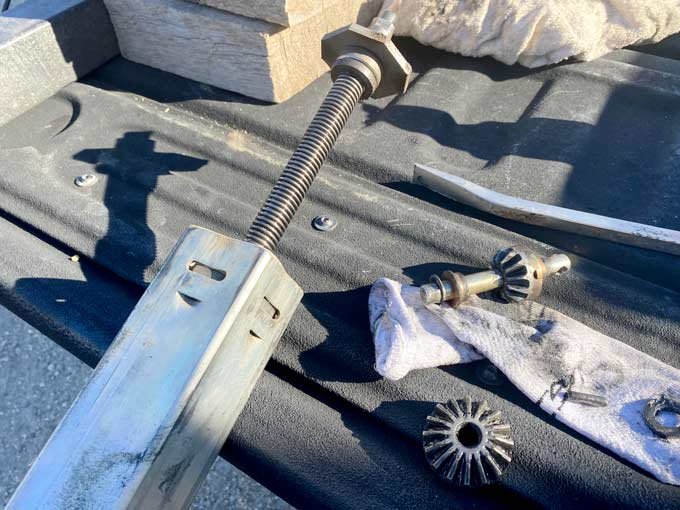
With the worm drive shaft exposed you can turn it to determine if it is seized. Do not grip the shaft directly with vice grips like I did. I had already determined the shaft was stripped, and replaced the good leg. If you think you may be able to clean the drive shaft. Be sure to protect the threads if using vice grips.
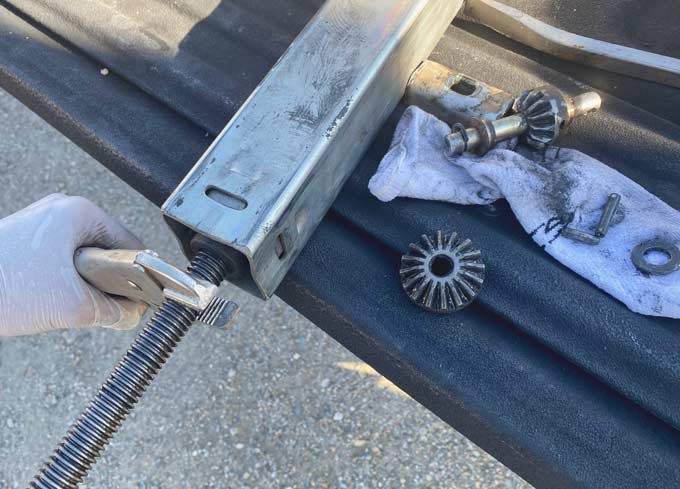
Helpful Tips & Documentation to Repair Landing Gears
I took my landing gear leg apart out of shear interest, and to show you how to repair landing gears in your fifth wheel leg. These steps will work, only if it is the top gears are worn. Or, maybe if a shear pin has broken. If so, you’re in luck! That’s what they’re designed to do. And you can pick up a replacement shear pin at your local hardware store for a few cents.
Helpful Landing Gear Documentation
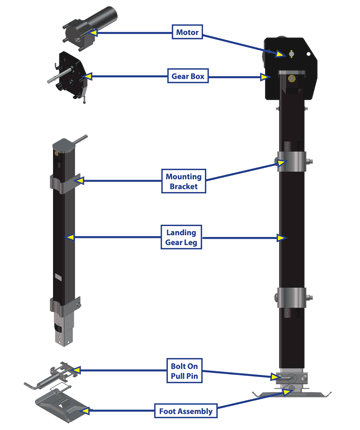
Use the following documents to identify fifth wheel leg parts and confirm correct replacement to fix fifth wheel leg that won’t lift.
Identify Fifth Wheel Landing Gear Parts
Reverse all these steps above to put everything back together. You now know how to repair landing gears on your fifth wheel with this cheap fix! Refer to my previous post for tips on reinstalling the leg. Or if you would rather just replace the leg for an easy easier fix.
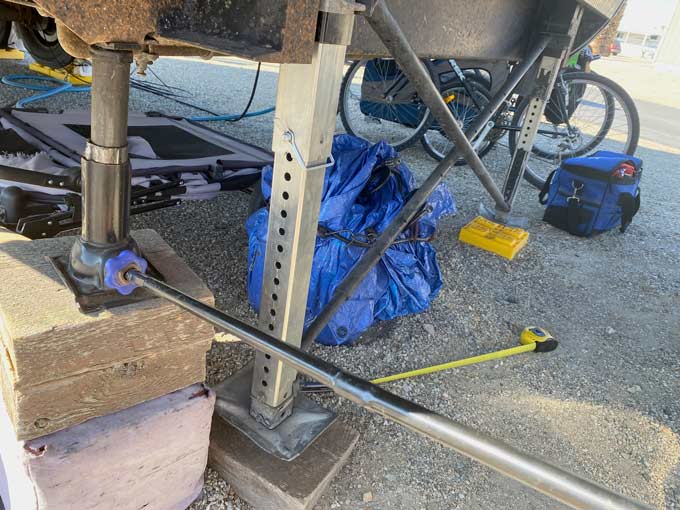
We’ll have the leg out and disassembled. Was as I figured the brass nut nut has stripped all the threads out. So off to A&B Steel on Friday to pick up a new one. The hard part was grinding the weld that holds the top gear on the screw. Also cutting the welds that on the top plate, one of three that sandwich the nut between them. The middle is punched to fit the nut preventing it from turning. If I can figure out how to load pictures I will do so.
I have some problem with my landing legs as well. Previously I had stripped the lower brass nut that fits into a plate on the top end of the leg that you lower and raise inserting the pin. Anyway these legs are on a 1979 wilderness fifth wheel by Fleetwood. They are original. The drive screw on mine is replaceable due to the fact it is a 3/4” ACME screw. The nut was a bit larger in the outer measurement, which caused some filing to make it fit into the keeper plate. Worked for several years. Now without having taken them out as yet I’m pretty sure the top end gears are stripped. Probably on both legs. They are currently still holding the trailer up, with the use of hydraulic jacks to raise it to lower the inner leg and insert the pins. Leaving the hydraulic jacks in place just in case. I have as an alternative taken a stabilizer jack,2-1/2 ton rating, to see if it would raise the trailer. It does, using a 1/2” drive socket wrench with a 3/4” socket works all right. No harder than cranking the trailer up using the legs. Anyway I will see how it goes, if I can repair them or junk them. Stayed tuned for further bulletins.
Good job MacGyver!
I have also had issues with my landing gear. One leg was not working so I disassembled it only to find the worm gear nut
was stripped due to lack of lub. It had seized and stripped when I tried lowering the gear ugh! Couldn’t find one anywhere and being a left hand thread made hacks impossible. So I bit the bullet and dropped the $300 for a new leg. ( Did not want a used one) Now here is my main reason for this comment. I have a little hack for making maintenance easy and preventing that erriplacable nut from stripping. While the top of the leg has a removable cap that gives access to the upper gears you can’t get at the jack screw or nut without removing and disassembling the whole leg. What I did was drill a 3/8″ hole about 2″ down from the cross shaft through the leg housing. This allows easy and direct access to the jack screw. Just squirt a little oil through the hole once or twice a year, easy peazy no seizy!
Thanks for the tip!