If you’re building a custom truck camper, the first step is to install a Bedrug. Read on to find out why, and check out our DIY Bedrug installation video below. Complete with bloopers, the video explains why you need a Bedrug. This was the very first step I took before completing the custom truck camper build I did for our Project M truck topper from Four Wheel Campers. Our truck is now a comfortable home sweet minimal home for all our adventure travels. Take it from me, I’ve lived in a fifth wheel for more than 16 years. So, when we downsized to a truck camper we wanted to make it as comfortable as possible.
Thanks to the Bedrug, we have a comfortable padded and insulated floor in the bed of our truck. In addition, we have had no issues with dust and moisture in the rig. I’ve read quite a few complaints from truck topper camper owners about dust getting in. This is because the bed of your truck is not sealed.
Road grime, dust and moisture gets into the truck bed when you drive. However, we drove all the way up the Alaska Highway. Much of the road is gravel or under construction. And all of it is dusty. However, we made it 3000+ miles from Colorado to Willow, Alaska without any dust problems. That is because we installed the full Bedrug Classic Bed Liner in our Dodge Ram 2500.
Why Install a Bedrug truck Bed Liner?
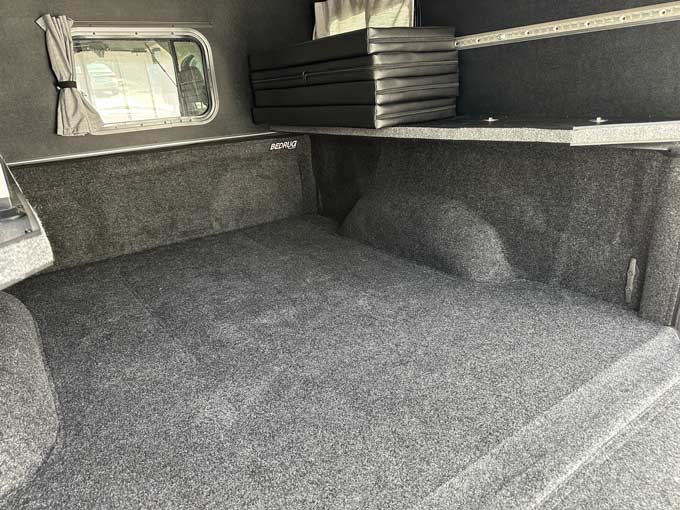
The Bedrug is made of thick foam with a soft surface that is durable, easy to clean, and water resistant. As a result, it feels great on the knees or bare feet. After all, you spend a lot of times crawling around the truck bed when living out of your truck in the back country. And, you don’t want to be wearing your muddy boots in the few square feet where you eat and sleep.
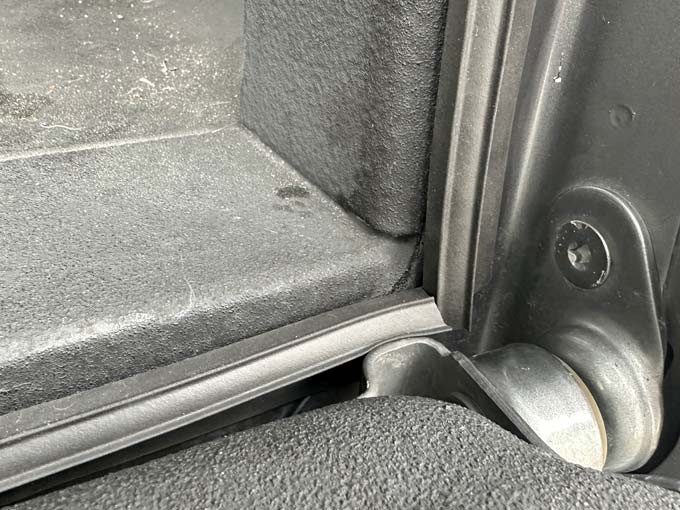
The Classic Bed Liner includes an attached section that extends out onto the tailgate. Subsequently, this provides an additional seal over the gap to keep dust out and warmth in. However, I also installed the Ultimate Tailgate Seal to provide more protection from dust and moisture. This self adhesive bulb seal I found from ESI fits all trucks, is easy to install, and makes a huge difference. That is, if the complaints I hear about dust getting into the Project M are true. It makes sense though.
With a slide-in truck camper, your living unit is sealed. The interior space is protected from the elements and road road grime. So, there is no need to install a Bedrug. On the other hand, the Project M is a truck topper. The pop-up shell sits on top of the bed rails. So, this allows you to use the bed of your truck. Or, build it out to meet your needs, like we did. Therefore the truck bed is left bare. And, without the tailgate seal and Bedrug, dust and moisture get in. Plus, so does the cold air.
Here are the products I found and recommend to install a Bedrug when building any DIY truck camper. Watch out installation below, and find step by step instructions with more photos.
To Install a Bedrug You Will Need
ESI Ultimate Tailgate Seal with Taper Gasket
Bedrug Spray Liner Adhesive Accessory Kit
Duct Tape or Flex Mend Belly Bottom Repair-Patch
Wire Brush or Burr/Grinder Bit for Drill (Optional)
Isopropyl Alcohol, Rags, Box Cutter (Optional)
NOTE: To install a Bedrug in any truck with a spray-in bed liner, you will need the additional adhesive accessory kit. This includes additional Velcro tabs and an adhesive promoter. As a result, the Bedrug will stick more securely and not detach from the truck bed.
TIP: Bedrug suggests roughing up the spray-in bed liner prior to applying the adhesive promoter and Velcro tape. That’s not easy. So, I recommend using a burr bit or wire brush drill attachment.
How to Install a Bedrug: Video & Tips
Watch this quick tutorial for tips and details about my Bedrug installation. This only took me a couple hours, if that. To install the Bedrug that is, not make the video. 😉
I installed the Bedrug in our Dodge Ram 2500 shortbed truck. They make many different Bedrug kits to fit practically any truck. There is also the less expensive drop in mat, but this does not provide nearly the protection of the full bed liner.
Step by Step Bedrug Installation.
1. Clean Truck Bed
If you have not yet installed your truck topper, pressure wash the bed of your truck and let it dry completely. I installed the Bedrug after our Project M installation. As a result, I only had to sweep out the truck bed and remove any remaining dirt with a wet rag.
Optional: Seal Truck Bed
We have four large holes in the bed of our truck where our fifth wheel hitch was mounted. I used RV Belly Bottom Repair Tape to seal these holes. Duct tape can get pretty messy. Use whatever method necessary to seal any large holes or gaps in the bed of your truck before you install a Bedrug.
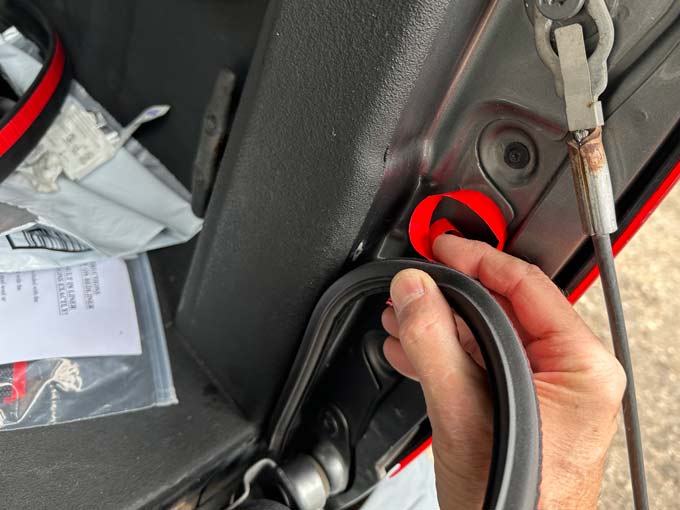
Install tailgate seal to keep out dust and moisture.
2. Seal Tailgate
Use an Ultimate Tailgate Seal or other adhesive bulb gasket to seal the gap between your truck bed and tailgate. This is where the majority of road grime and moisture can enter the truck bed. The ESI product I used came with two sizes of self-adhesive bulb seal. the smaller gasket does a good job sealing the bottom gap and sides.The larger gasket can then be cut up to fill in any remaining gaps.
The adhesive gasket seal can be lightly applied and re-positioned during installation. Apply a small piece to determine the best placement of the tape, with bulb up or down. Close and open the tailgate to inspect. Once certain the seal is tight, apply firm pressure to permanently affix the tape.
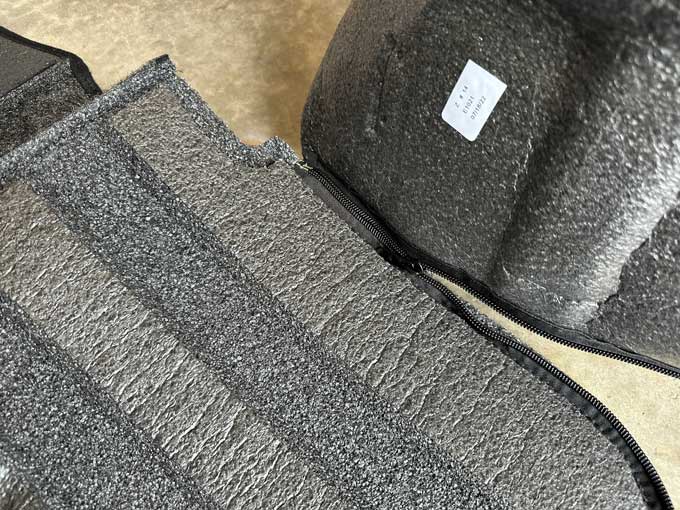
Connect Bedrug pieces together with zipper.
3. Connect Bedrug Pieces
The Bedrug ships in two pieces. One is for the bottom of the truck. The other wraps around the front and sides. Each piece has a zipper. Place the bottom piece upside down on the floor. This is with the rug side down. With the rug side facing outward, connect the zipper to attach the Bedrug together.
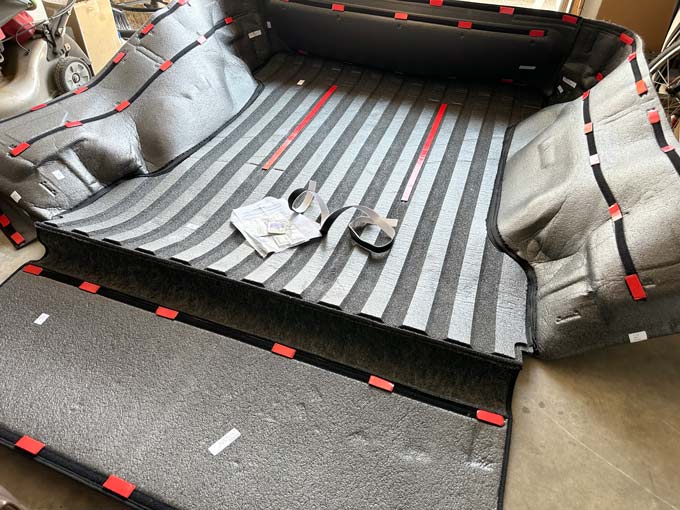
4. Apply Velcro Tape and Tabs
Attach the loop Vecro (fuzzy side) to the hook velcro on the underside of the Bedrug. Leave the red release line on the tape. If using the spray-in bed loner kit, apply the extra tabs and spread them out evenly. Hint: Count all the Velcro tabs and take some measurements to ensure equal distance between them.
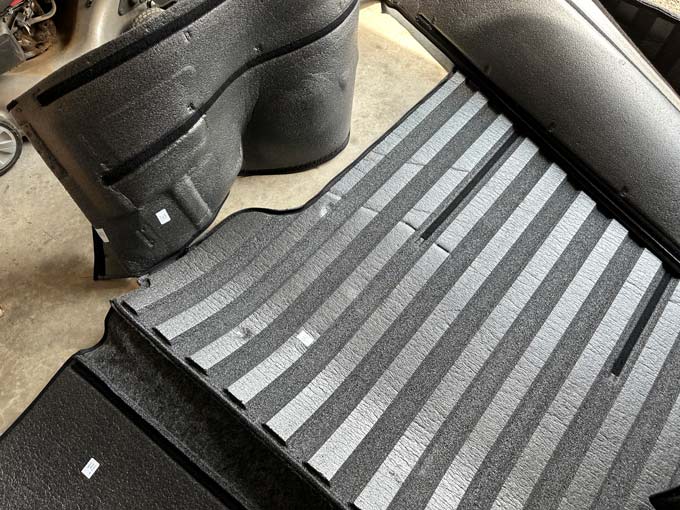
5. Install Bedrug in Truck
Turn the Bedrug right side up. this would be with the fuzzy sides facing up and in. Place the whole thing in the truck bed and align the form fitting parts over the wheel wells.
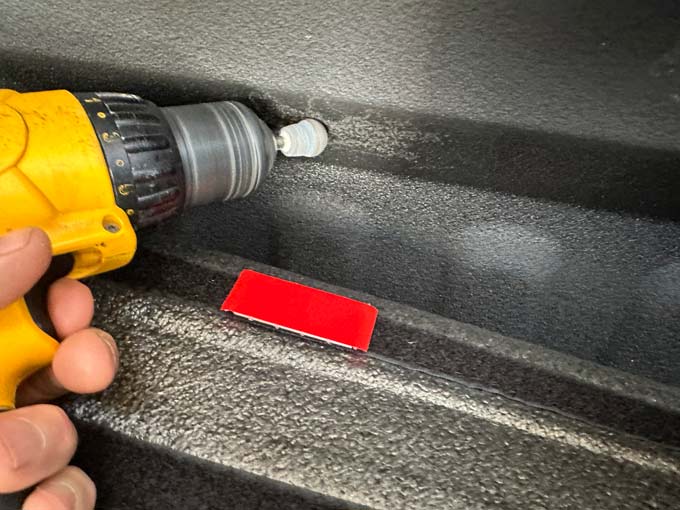

Prep area and use adhesive promoter if installing in truck with spray-in bed liner.
5. Attach Velcro Tape and Tabs
NOTE: If you have a spray-in bed liner, prepare the areas where the tape will be applied. So, I used a grinder bit on my portable drill to roughen up the surface a bit. Then apply the adhesive promoter to make sure the tape sticks well. Act quickly and dab it on, because the sponges can fall apart and dry up quickly.
TIP: Start from the middle of the Bedrug floor. Once in position, fold it back to remove the release liner from the tape. After that, place the rug back down, and check to confirm to positioning is good. Then, step along the top of the rug to firmly press the Velcro tape down.
The Bedrug is so form fitting, it’s padding is formed to fit within the grooves of the truck bed. Make sure they all line up well before continuing. And then, do this for remaining Velcro tape strips under the rug. Finally, repeat this procedure for all of the smaller Velcro tabs around the side walls of the truck.
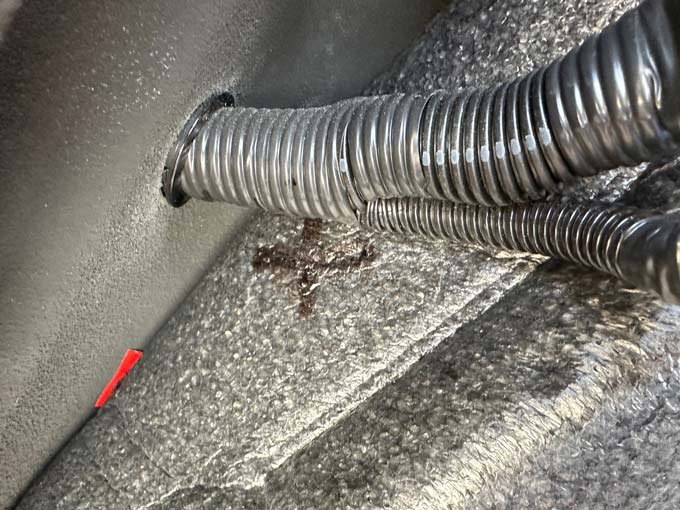
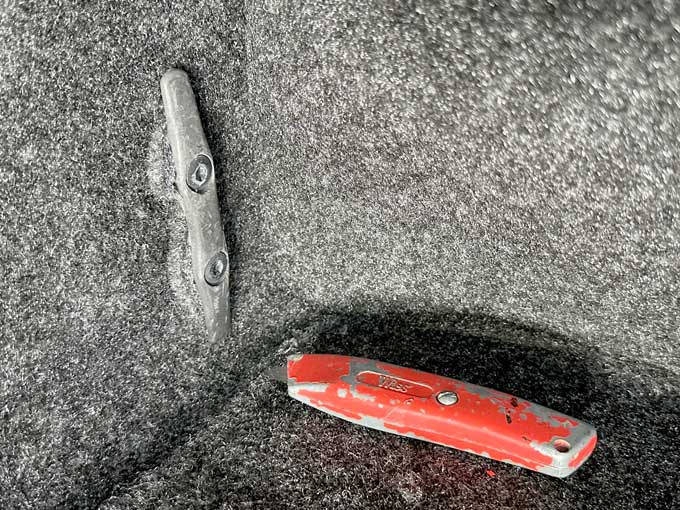
Cut Bedrug to position over wiring or cleats before affixing Velcro.
5. Customize to fit
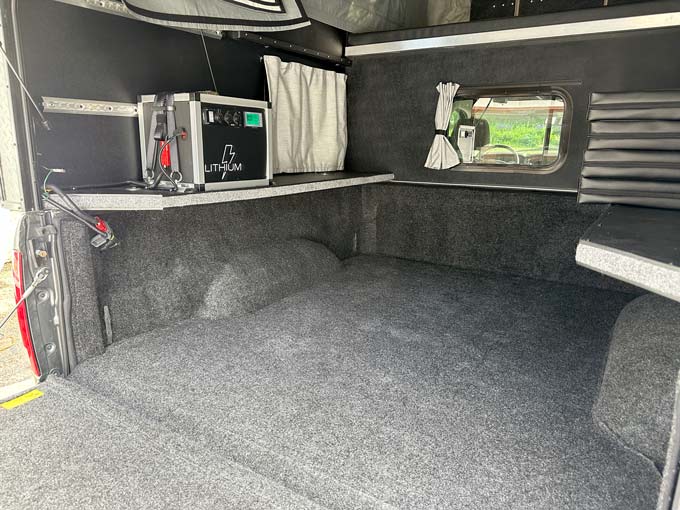
We opted for the 100ah Lithium battery pack and solar power package for our Project M. As a result, wiring is installed into the truck bed. In addition, we have cargo cleats that I did not want buried under our Bedrug. So, I cut the rug to fit. Luckily, all the wiring uses Anderson quick connect wire connectors. So, it was easy to remove and reconnect everything. For the wiring, I cut an X just large enough to fit the connector. For our cleats, I cut a slit smaller than their full length.
TIP: Position the Bedrug over whatever you want to poke through. Mark that area and make your cut. Push the rug over the item. Then, attach any Velcro tabs near the area.
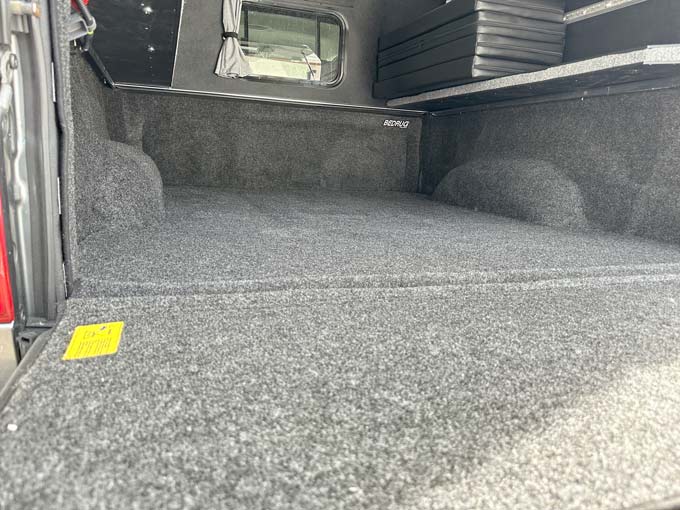
Enjoy the Ride!
With our Bedrug installed and tailgate sealed we’re enjoying the comfortable floor and insulated warmth in our Project M. \m/
Any questions?