One of the first steps when troubleshooting a brake controller warning is to confirm you have a good connection at the trailer cord plug and outlet. Since I detailed how to replace the 7-pin trailer cord outlet in our Dodge with a previous post, here are step by step instructions to replace the 7-pin plug attached to the cord on your trailer or fifth wheel.
Why Replace the 7-Pin Plug?
If you read my hydraulic trailer disc brakes installation review, you may have asked: did it really go that smoothly? Well, yes. And then there was this.
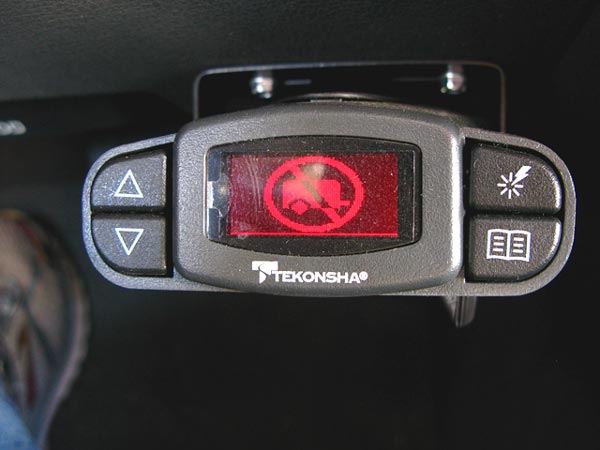
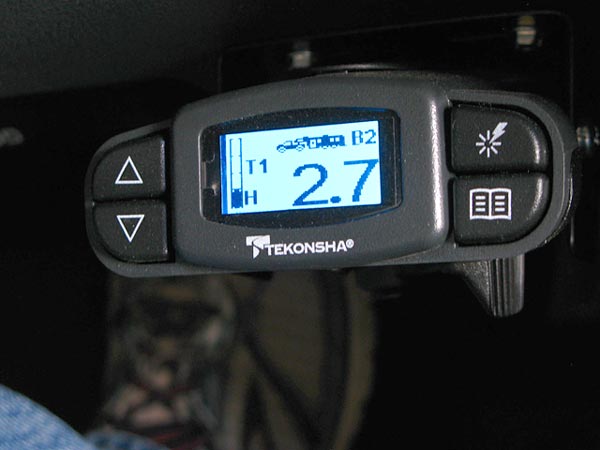
The Trailer Disconnected Warning on our new P3 Brake Controller had nothing with the fine job done by Performance Trailer Braking. In fact, John came back out and messed with the plug and socket terminals to fix the problem.
The issue returned a few days later.
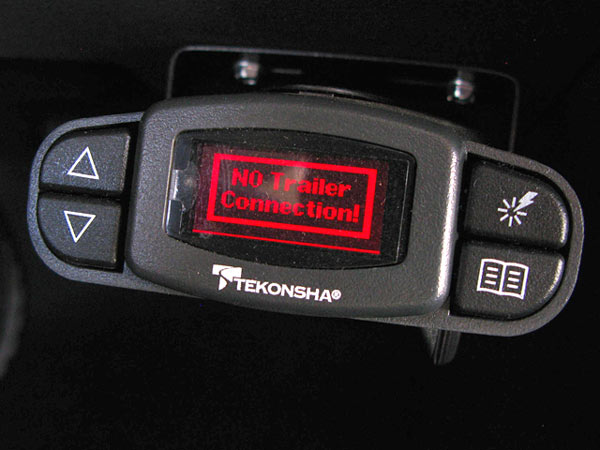
After messing with the connectors on the cord a few times, I decided to replace the plug and haven’t seen the message since. I like the Tekonsha P3![]() much better than our old controller, for various reasons, including the warning message capability. But this isn’t about that, you can read plenty of P3 reviews on Amazon.
much better than our old controller, for various reasons, including the warning message capability. But this isn’t about that, you can read plenty of P3 reviews on Amazon.
This is about replacing that old plug.
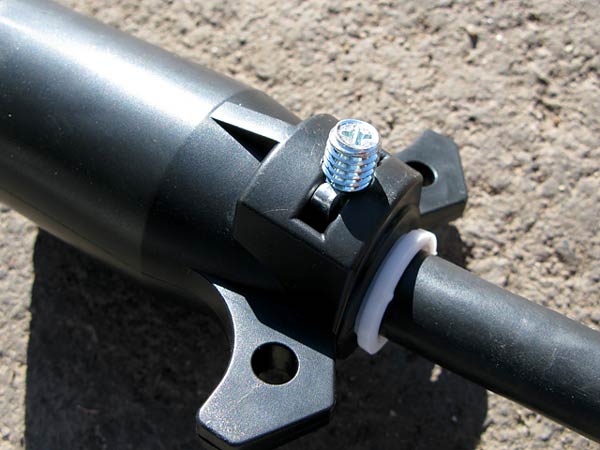
The connectors in the 7-pin plug had become bent and damaged. They were no longer making a tight connection when plugged into the socket.

The temporary fix was to pry the connectors inside the plug together so they seated more firmly onto the terminals inside the socket. The permanent solution is to replace the plug.

How to Fix 7-Pin Trailer Cord
Step 1: Remove old plug. Step 2: Replace with better plug. It really is that simple.
Get yourself a good 7 pin trailer plug. I chose the Curt 7 Pole Connector, because Curt Manufacturing makes great towing products and I like how this plug uses flat blade pole terminal connectors instead of the common squeeze type that clearly have a tendency to bend over time.
[twocol_one]
Got the plug? Grab a few tools and you’re good to go.
You will only need:
[unordered_list style=”tick”]
- Wire Cutters
- Box Cutter*
- Wire Stripper*
- Flat Head Screwdriver
- Phillips Screwdriver
[/unordered_list]
*Optional. You might get away with replacing all of the above with a decent Leatherman multitool.
[/twocol_one]
[twocol_one_last]

[/twocol_one_last]
Detailed Steps for Replacing 7-pin Plug:
1. Cut off the old plug and expose wires.
Use wire cutters to snip through all wires in the cord close to the plug. I used a box cutter to gently slice through the outer rubber shielding, being careful not to damage the inner wires. One slice lengthewise, and another around the cord a couple inches from the exposed end—but not all the way through—allowed me to tear off the rubber without cutting into any of the 7 wires inside.
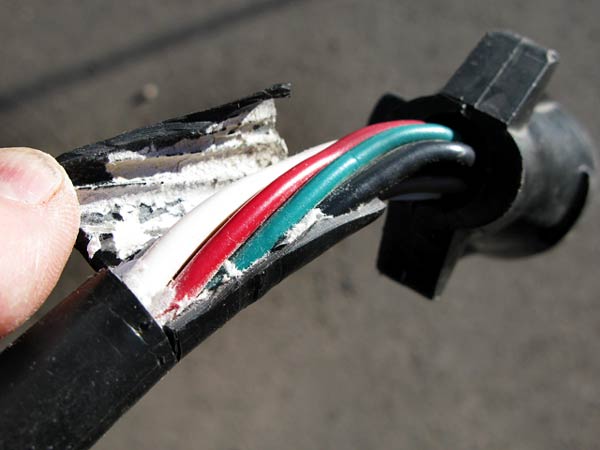
You can cut the plug off before or after you expose the wires. I just wanted to identify the colors first to make sure they were all different.
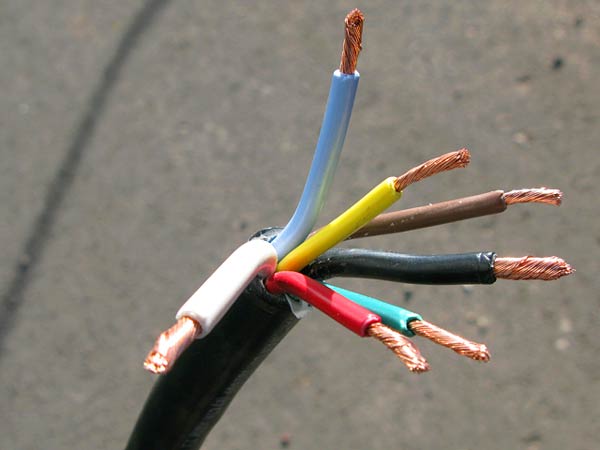
2. Remove shielding from all wires
Use wire strippers to remove the shielding from each wire. The length of copper to expose may differ depending upon your replacement plug. I trimmed back approximately 1″ off each wire, and removed enough rubber shielding to allow me to easily manipulate each colored wire into the new plug.
3. Insert cord into plug and attach center wire.
Slide the whole cord through the narrow end of the plug housing so the colored wires come out the wide end.


[box type=”alert” size=”large” style=”rounded” border=”full” icon=”https://liveworkdream.com/wp-content/themes/memorable/functions/images/ico-info.png”]NOTE: Refer to your trailer service manual and plug installation instructions to avoid wiring problems that may damage your trailer, brake controller or vehicle![/box]
4. Connect cord wires to plug terminals.
The Curt 7-pin plug I purchased had the color for each wire molded into the plastic under each corresponding terminal. I bet most plugs do. If not, proceed with caution.?When I had re-wire the D3 control cable plug on our old F2 satellite dish, I dissected the old plug to confirm which wire went where. If in doubt, do the same!


Attach each of the seven colored wires. Make sure the connections are tight, but do not torque the screws so much you bend the terminal clamps.
5. Seal plug assembly.
Slide the plug housing up the cord toward the terminal assembly you just wired together.


?
6. Secure plug housing.
Insert the crimp connector into the slot in the plug cover. Tighten it in place with the larger set screw.
7. Test your new plug.
Plug your newly re-wired cord into your 7-pin trailer outlet and test all your lights, including hazards and reverse. Check to see that you have no error messages on your brake controller. If your controller doesn’t have such a display function, get yourself a Tekonsha P3! They have models to fit all tucks.
Whether you have hydraulic disc brakes on your trailer, or traditional electric drum brakes, your controller is your lifeline for stopping safely. Repairing the 7-pin trailer cord plug and replacing the 7-pin outlet in the truck are two good places to start if ever you encounter issues with your controller.
Any questions?
Leave a comment to provide tips of your own or subscribe below to receive notification about future blog posts. Unsubscribe any time and keep your free gift!
I have had about 7 different trailers. All give me a trailer disconnect. I added a second plug in the bed of my truck. I was told that was my problem because I changed the resistance and the controller sees it as a problem. Was told I could get a dummy plug to fix the problem, but don’t remember what it was called. Is this correct?
I’ve never heard of that, and I’m not sure what you mean by dummy plug. But we too installed an outlet in the bed of our truck – not a second one, just in addition to the one on the bumper.
I totally agree with you when you said that the best solution to repair a trailer plug hitch is to replace it. My dad told me that he wanted to haul his boat to another location but his trailer is damaged. I will help him look for a professional company that can help us repair the damage in the trailer.
Roger that, good luck!
So I unplugged from shore power, and I have a battery master switch that I turned off. However when I go slide the wires through the collar they arc…
Disconnect the battery. Or, be careful and tape the wire ends.
I used this exact plug and have had consistent problems with water getting inside and corroding, bridging and leaking current between terminals. I know I have a problem when I see tail lights (LED) glowing. Have tried grease…
On mine, I chose to go with a commercial plug. As in semi trailer. (Actually 2 of them). I put a plug on the trailer and one on the truck. Though being that they are designed for 1,000’s of uses vs the tens to perhaps 100 of the Bargman. I also used commercial cable, as in 4-#12’s, 2-#10’s, and a #8 for ground (-12).
Even better than the Curt plug, heavier wire, no cord left on the hitch (it gets put in a compartment when parked). I made an adapter, commercial to Bargman for you to tow me, and one for me to tow you. We are heavy though so only a few can tow us, 5300 # pin weight.
Cool. Thanks for the note!
Thanks for a very informative post. I had the male part of the cable come detached. I tried to fix it with shoe goo. It held for a while, but I decided to get a new one. I’d hate to think of taking some of the mountains I’ve been on without reliable breaks. I’m book marking this post in case I have a problem in the future. Thanks, again.