I recently replaced our fifth wheel trailer plug and socket (again) as promised in my last post about How to Fix Trailer Tail Lights Not Working. I first replaced the trailer wiring connector in the bed of our truck back in 2014. I provided step by step instructions with photos of that job in this post: How to Replace 7-pin Trailer Cord Socket. Then in 2016, I repaired our trailer cord with a new plug and provided details here: How to Repair 7-pin Trailer Cord Plug.
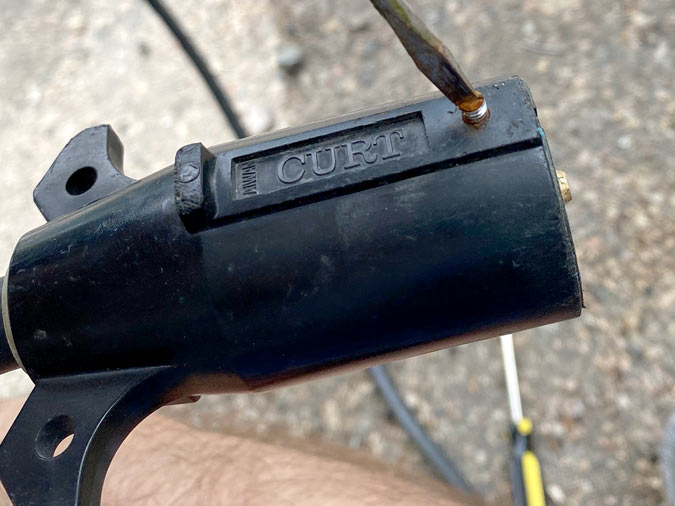
I really don’t care to do this yet again, so I purchased a Curt brand heavy duty trailer plug and socket. If you need to replace either the plug or socket connector for your trailer wiring, do yourself a favor and spend the couple extra bucks.
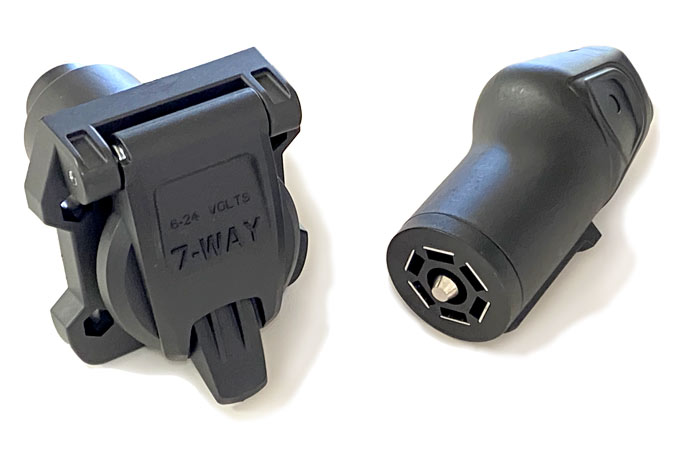
Best Heavy Duty Trailer Plug and Socket
Get the same brand trailer cord plug and a matching trailer wiring socket to ensure a good secure fit. Read on for some helpful tips and photos to save time and frustration when replacing both the trailer plug and socket.
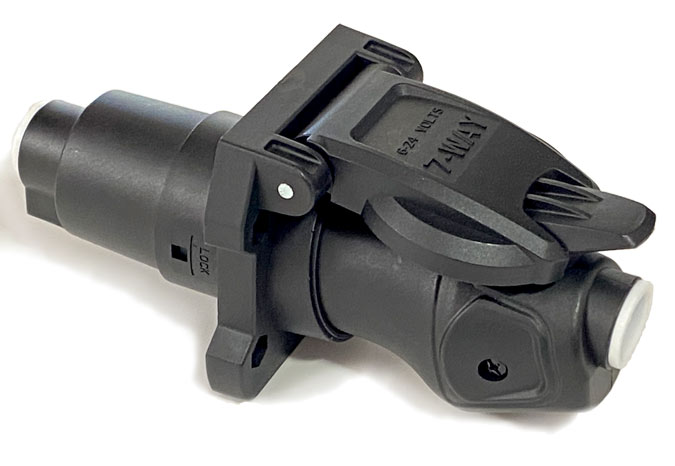
Recommended Plug: CURT 58145 Heavy-Duty Trailer-Side 7-Pin RV Blade Wiring Harness Connector?
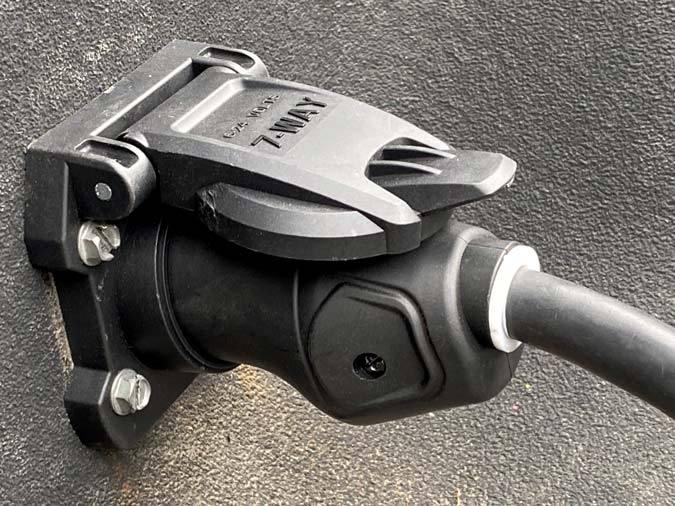
Recommended Socket: CURT 58155 Heavy-Duty Vehicle-Side 7-Pin RV Blade Trailer Wiring Harness Connector?
Why the Curt store doesn’t sell this trailer plug and socket together as a set, I don’t know. But I was happy I bought the matching pair. For starters, we now have working reverse lights on the trailer again. It turns out this could have been a simple fix. But I’m glad I installed this heavy duty trailer plug and socket, since I shouldn’t have to worry about them again. At least not for a long time.

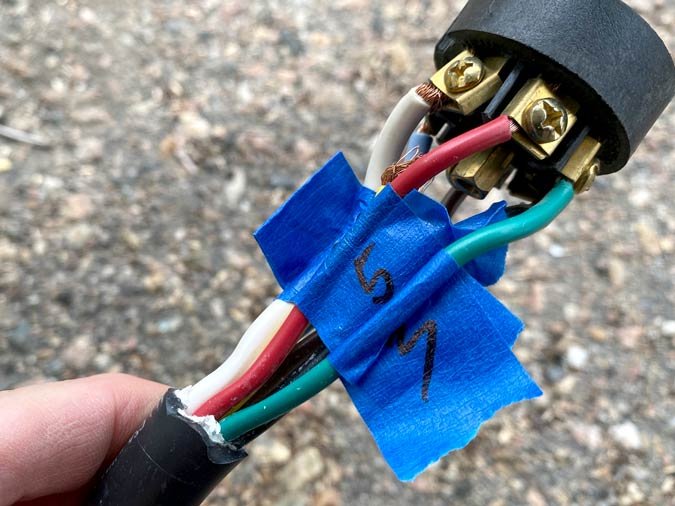
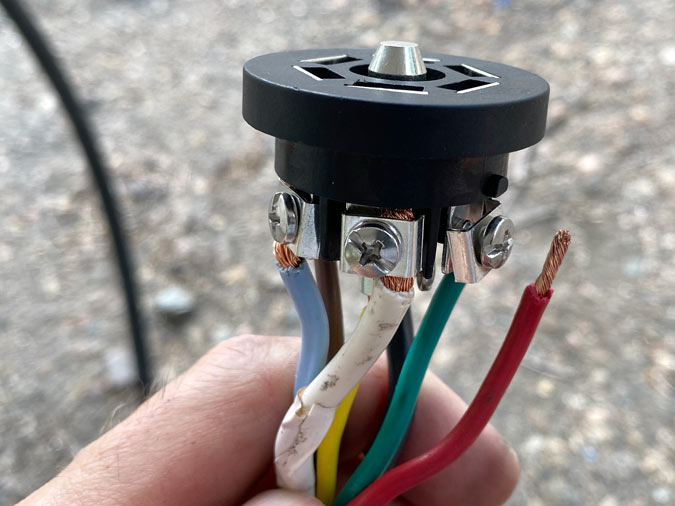
No wonder we had no working reverse lights! The center wire in our trailer cord plug had broken free from its connector. That’s the wire that powers the backup lights. Check my previous post for the detailed 7-pin connector wiring diagram. That will come in handy when doing this job. Because you can’t always trust the labeling of contacts in your new trailer plug and socket.
“Although my wiring is different than what is molded into this plug, I just followed the same pattern mine were already and used a paint marker to mark what wires go in each spot…”
– Curt Trailer Plug Review
I could have written that review! There were a few other similar reviews stating how the connectors are incorrectly marked on the Curt trailer plug. I figured it would be easy enough to reconnect correctly. You won’t have any problems either, if you pay attention to which wires go where when taking apart the old plug. Here’s one way to keep it simple.
Trailer Plug and Socket Wiring Repair Tips
Before disconnecting any wires, compare the numbering on the new trailer plug to your existing connections. Remove the plug housing to expose the trailer cord wiring. Mark each wire with the corresponding number using tape or a fine point sharpie. Taking pictures for reference also helps so you know exactly how everything goes back together. You can then safely disconnect the plug connector from the wiring.
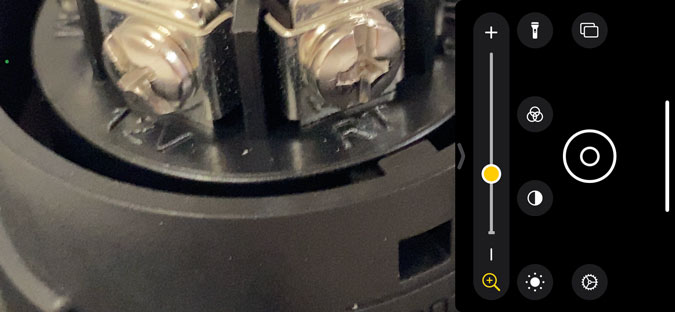
➡ Tip for those of us who no longer have such a sharp eye: Use the magnifier app on your smart phone. Zoom in on the tiny text molded into the trailer plug and socket. Use a pen or tape to create some actually legible labels.
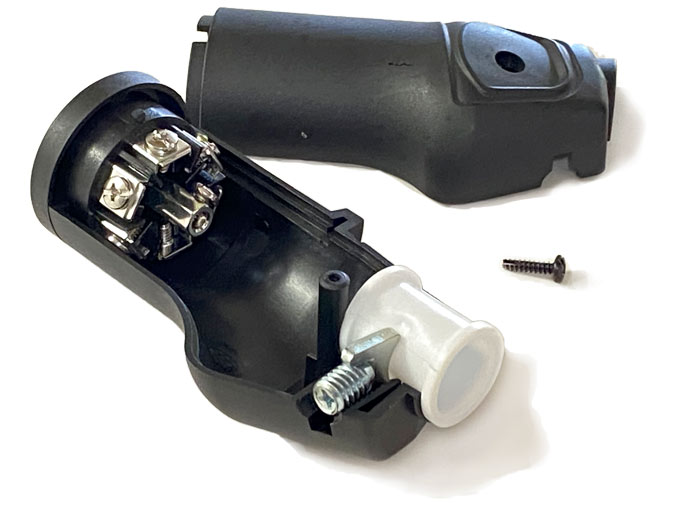
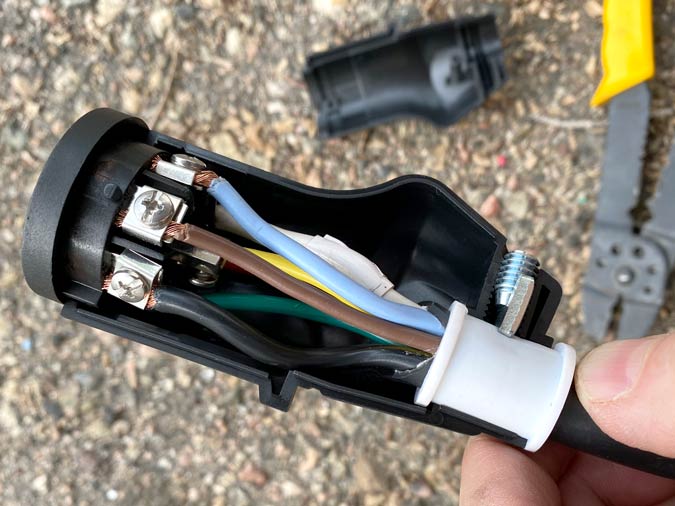
Carefully open the new trailer cord plug and note how the small retention pieces fit together. Find the small screw you dropped when opening the case. And before you forget, install the white rubber gasket onto your trailer cord.
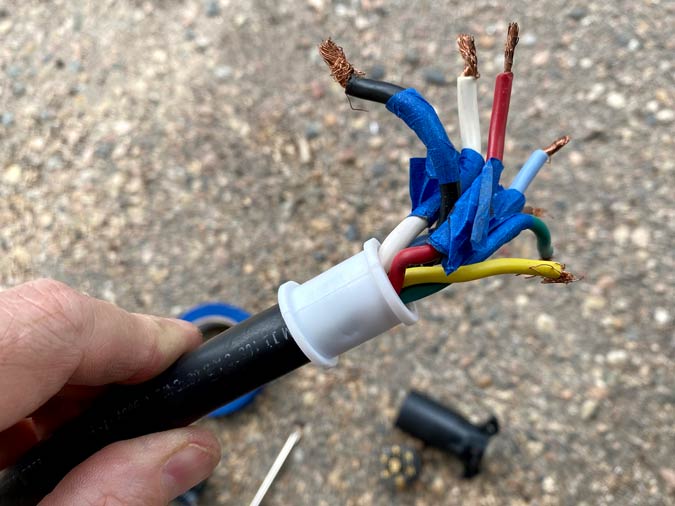
Insert the seven wires (tape and all) through the gasket, and slide it down the cord. You can’t put the gasket on after you attach the wiring! You will slide the gasket back up when reassembling the trailer plug.
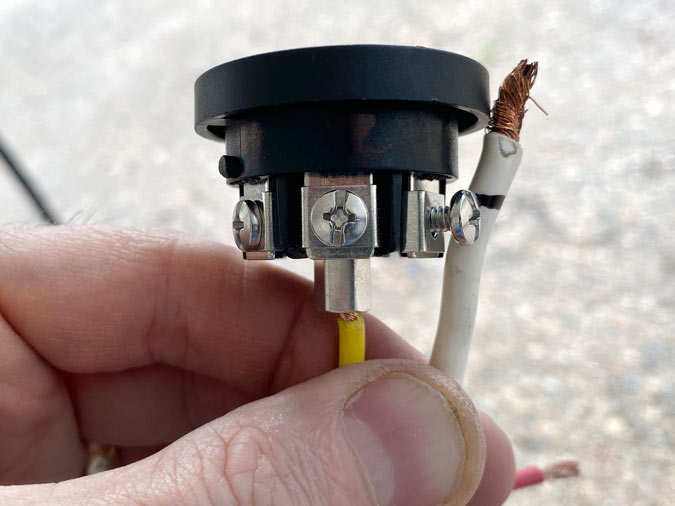
Connect the center wire into the middle connector first. Remove enough shielding from the copper to ensure a secure fit. The remaining wires will need to remain a bit longer to reach their connectors. Extend each wire and mark them where they’ll need to be cut. Then expose enough copper to firmly seat under the clamp.
Re-attach the wires to the corresponding posts and remove your tape, if you marked them. Ensure that no shielding is inserted under the clamps. Or, attach spade wire connectors and tighten directly under the clamp fastening screws.
Set the wired connector inside half the trailer plug housing. Slide the gasket into place and insert the retention clamp and set screw. Align the other half of the plug and screw them together. Tighten the set screw to firmly attach the plug to the cord.
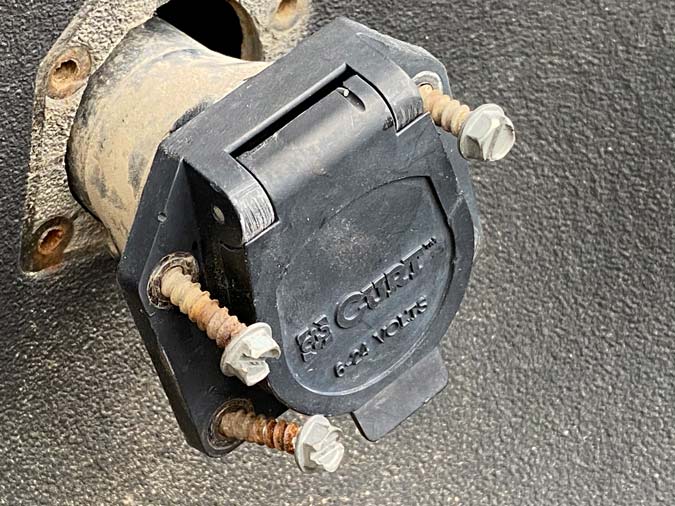
Replace Trailer Wiring Socket
Repeat the steps above in a similar fashion to replace the trailer cord socket. Remove the socket from the bed of the truck. Open the housing and note the locations of your existing wiring. The position of the seven wires and their corresponding posts within the socket will be a mirror image of those in the plug.
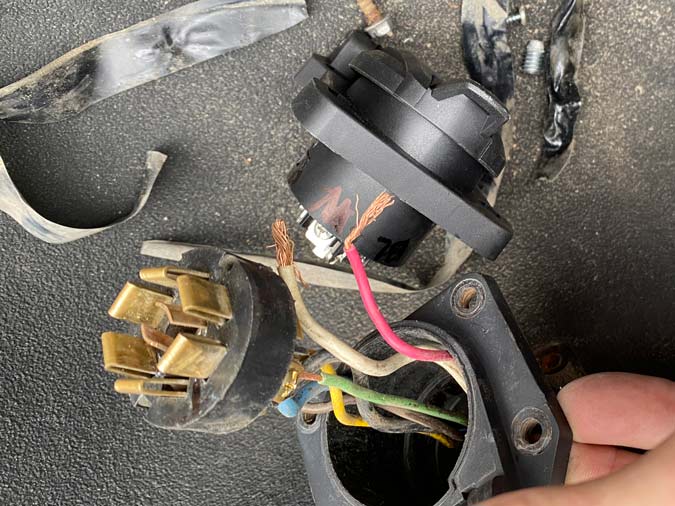
If necessary, mark the correct position of each colored wire on the new socket connector. Before you forget, be sure to push the wiring harness through the new trailer plug housing. Connect all the wires, being careful not to make contact with the 12v lead to any other wire. Attach the wiring harness connection to the plug outlet base and lock them together.
Reattach the new trailer cord outlet to the bed of your truck. With a new heavy duty trailer plug and outlet, all your trailer lights and turn indicators should work properly. These Curt trailer products are well built, and I’m confident they’re built to last. Talk to me again after another few years of full-time RVing.
Dose Curtis have an inline electric brake controller that you plug in at the 7 pin plug, only when towing a trailer
Henry: Check out the CURT 51180 Echo Electric Brake Controller.
FYI: I posted this CURT 51180 Review after we saw it at the 2019 SEMA show.