Proper preventive maintenance can prevent serious damage to your RV, or worse. When I first noticed our RV surge protector hissing upon plugging in our 30 amp RV electrical cord, I knew something needed to be fixed. When I saw smoke coming from the connection, I knew it needed to be done right now. But was it the surge protector, or the plug? Well, it’s cheaper to replace the RV plug than buy a new surge protector, so I started there.
NOTE: This job is similar to my post: How to Repair 7-pin Trailer Cord Plug – with a few less wires.
Cheap Easy Plug Repair to Prevent RV Electrical Fire
With a few simple tools, and an inexpensive 30 Amp RV plug, you can prevent serious damage (or worse) resulting from a faulty RV elecrtical cord. The stock RV electrical cord has a molded plug permanently attached to the end. Whether you have 30 amp or 50 amp power, replacement RV plugs are available for your cord.
Be sure you know what amperage plug you need before attempting this repair. All photos depict a 30 amp plug, though the procedure is very similar to replace the plug on a 50 amp cord.
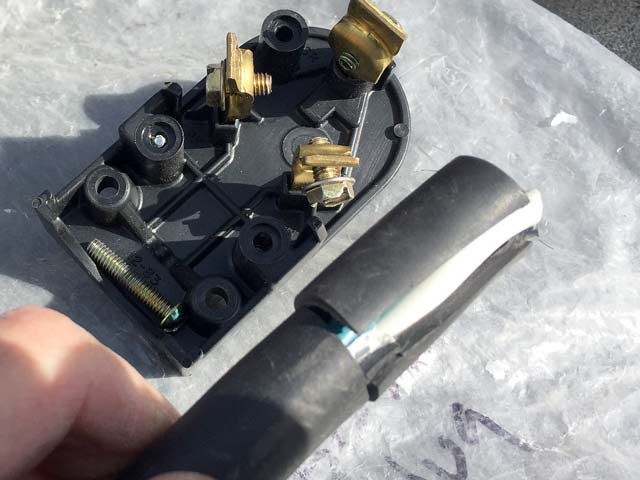
Remove all screws from the replacement plug to open the cap and inspect how it is constructed. Unplug your RV from shore power and remove the plug from the end of the cord. If permanently attached, you will need to cut the cord to remove the plug.
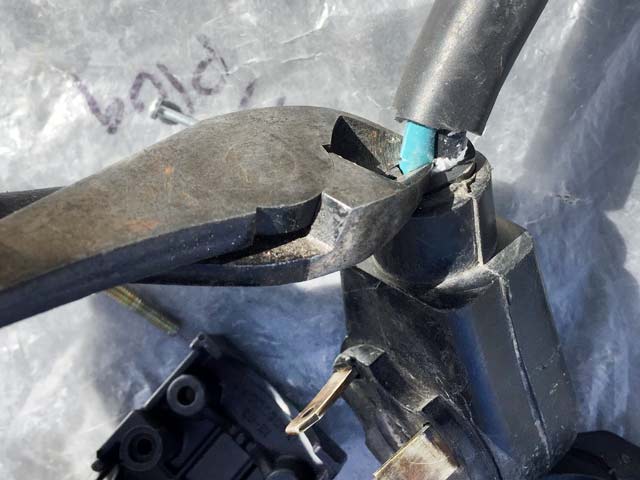
Slice the rubber insulation close to the plug with a razor, exposing the inner wires. Then cut each of the wires with wire cutters. Make a slit down the cord about a couple inches, being careful not to press all the way through the rubber outer insulation.
You do not want to cut into the inner wire insulation. Carefully cut around the cord at the end of the slit to expose the inner wires. You should be able to tear the outer insulation off cleanly by cutting almost all the way through the thick rubber.
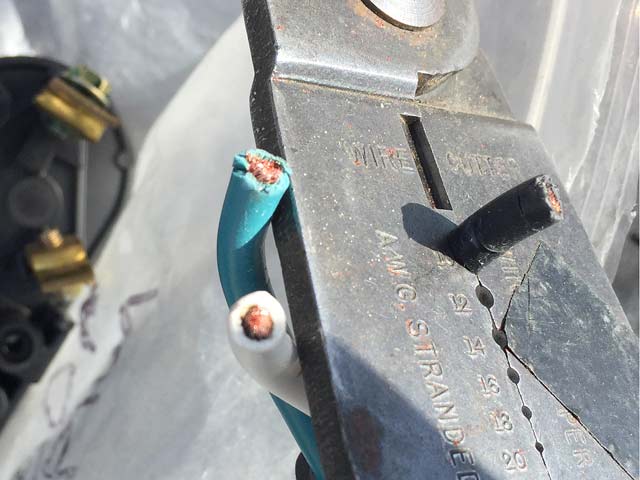
With inner wires exposed, use a stranded wire cutter/stripper to remove about an inch of insulation from each of the three wires – white, black and green. Using a blade to strip stranded wires can easily result in cutting copper strands. Wire strippers have clearly marked guides for easily stripping different gauges of wire.
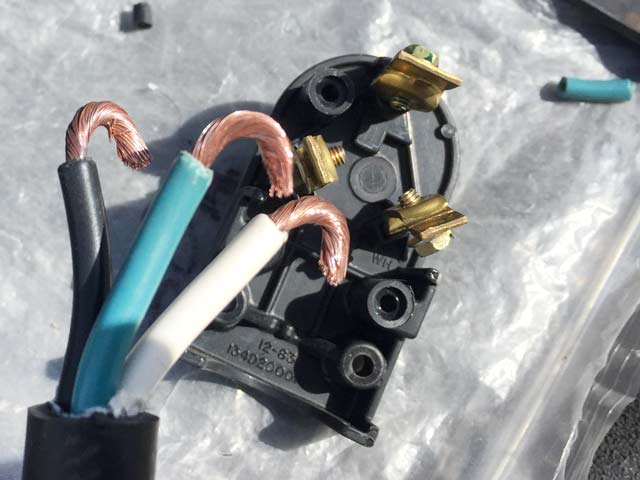
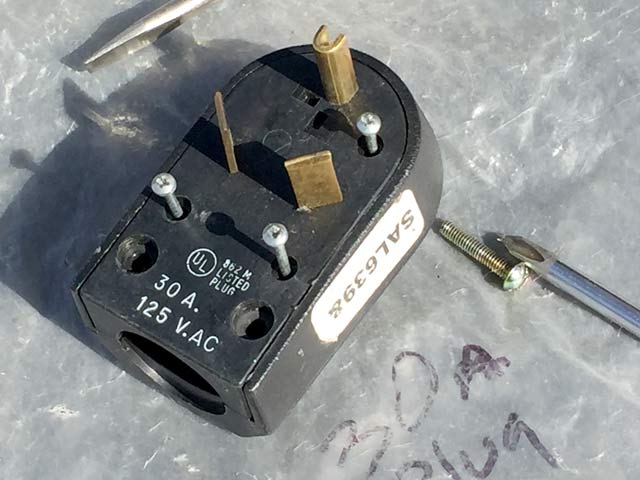
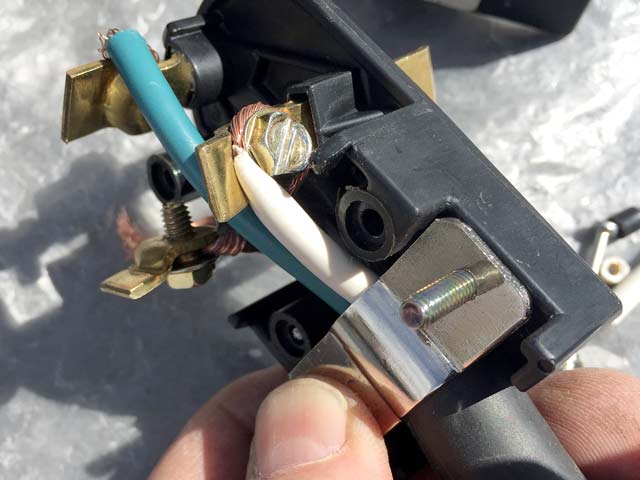
Gently twist and bend the exposed wires, and make note of the pole positions marked inside the plug casing. Two will be marked BLK and WHT, the third (centered) pole may just have a green head on the crimping nut to hold the ground wire.
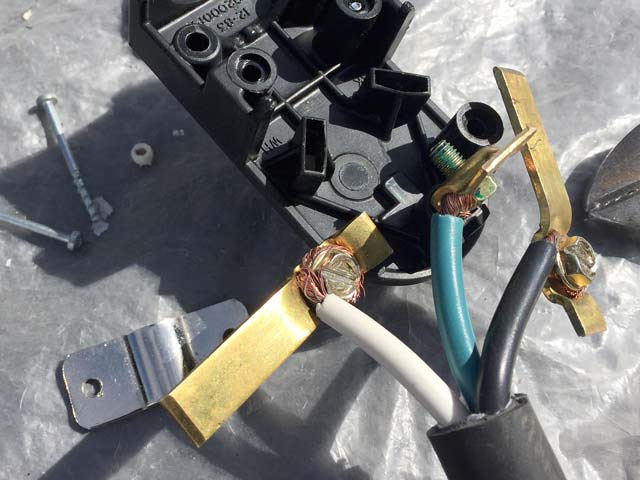
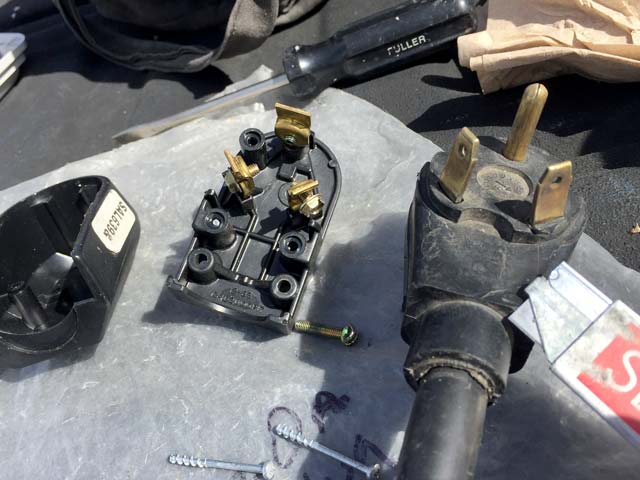
Most quality replacement RV plugs will allow you to remove the poles – or blades – from the slots for easily attaching the wires. The poles marked BLK and WHT are the same, and can be used for either black or white wires. Just be sure to insert them into the correct slots once the corresponding wires are attached.

Before sealing the plug cap, some replacement plugs will have a cord clamp that needs to be secured. If so, hold the metal strip in place around the cord and tighten with screws from the exterior side of the plug cap.
Double check to confirm the wire positions and ensure tight connections. You are ready to seal the plug by screwing the cap back together.
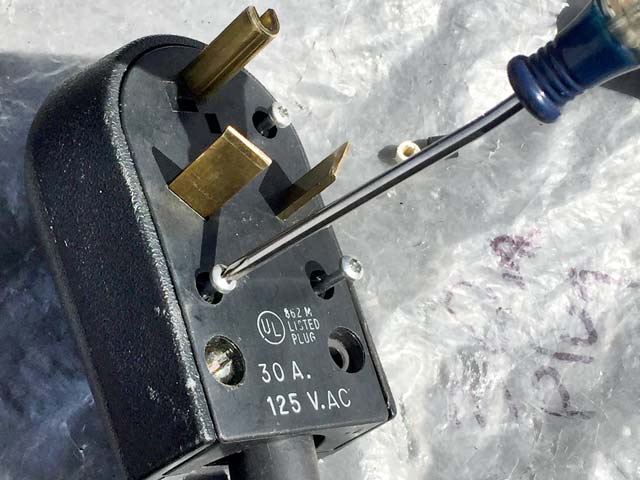
Tighten all the screws to secure the replacement plug to the RV electrical cord, and you are done. Upon plugging back into the power pedestal, I crossed my fingers.
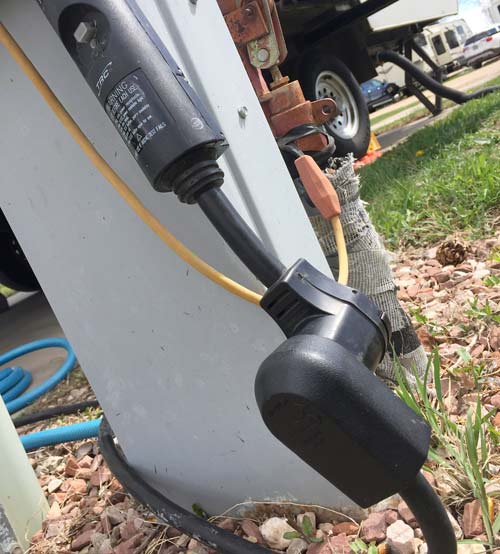
No hissing or crackling sound, with no wisps of smoke rising from the plug. That’s a good thing, it was the plug after all, and we do not need to invest in a new RV surge protector! Fantastic, another cheap fix to a potentially extremely expensive and traumatic situation. Thanks to thinking fast, and being prepared with a spare part on hand – and having the right tools for the right job – we avoided another RV electrical catastrophe. Or at least another close call.
Any questions?
UPDATE: Replace Electrical Socket When Contact Corrosion Occurs
IMPORTANT: Thanks to Steve for his important feedback regarding this project. (See first comment below.) Apparently when spark corrosion like this occurs, it is imperative to address both parts of the problem – in this case, both contacts, the plug and the socket. I may be able to address this by following the same steps I illustrate above to replace the 30 Amp female plug receptacle on our surge protector. If not, it’s time to research and purchase a new, higher quality RV surge protector.
Don’t miss this important follow-up:
https://liveworkdream.com/2019/05/08/why-you-need-an-rv-surge-protector/
Just fyi- the plug replacement renders the cord non-compliant. The original molded plug was sealed- allowing no moisture to enter. The only compliant repair would have been to replace the entire cord with the molded plug already there. I know many people simply replace plugs, and most of the time- that will be the end of that particular problem.
Point taken, thanks. We just ordered a new surge protector with cover.
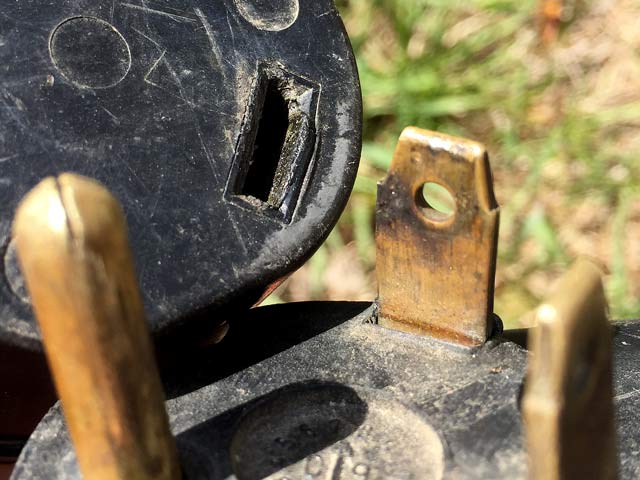
I’m an engineer with a lot of experience with power connectors. You’ve correctly diagnosed the problem but only addressed the lesser half of the solution. 2 common causes of connector failure are corrosion on the brass contacts and loss of contact pressure in the socket’s female contacts. The bigger problem is MOST COMMONLY the latter. When arcing becomes audible, it’s a sure sign of gaps between contacts that have been arcing for a while. Spark erosion and heat accelerated corrosion has degraded both sets of contacts. It’s easier and completely acceptable to address the plug part of the problem by cleaning the contact surfaces with fine grit sandpaper or a small wire brush in a rotary tool. Replacing just the plug is also fine BUT addressing only the plug portion of the problem only makes you feel better. The problem will recur and sooner rather than later. As I said before, the plug is less than half of the necessary solution. Cleaning the INSIDE of the receptacle or restoring contact pressure is not practical, even if the socket can be disassembled. Replacing the socket is virtually always required and is the most important part of a proper solution. The reason manufacturers put such a short cord on the surge protector is to keep the connection off the ground. It is barely long enough to put a new socket on but it is possible and is very necessary.
Excellent feedback Steve, thank you! Sounds like its time for a new surge protector, if I am unable to replace the socket.
I also wanted to make Drew’s comment as well but felt my comment was already too long. Molded connectors are considered NEMA 3 rated (essentially moisture resistant but not waterproof). Replacement connectors are considered NEMA 2 (usable outdoors only if protected). Since the short cord keeps the connection off the ground, all you realy need is put the socket through the bottom of a small, heavy plastic bag and tape tight around the cord above the socket to produce a built in umbrella. That will make a rain shield that provides and acceptable connection, even if both connectors are replaced..
The other thought is to just get rid of both plugs and make a waterproof splice connection. If you always use the surge protector on the cord, and the connectors are a problem, just cut the plug and socket out and directly spice your cable to the surge protector. Use 3 bare crimp terminals of the proper gauge with the proper crimper (or solder them) that are all staggered from each other. Put adhesive heat shrink over each splice. Then (my own recipe) put 3 large beads of hot glue along the length of the gaps between the 3 wires and put a large piece of adhesive heatshrink over the whole thing. My recipe helps with strain relief since when you heat shrink the outer tubing, it remelts the adhesive inside and fills the gaps as the tube shirinks over it. It is helpful if you do not cut out the ‘filler’ in the cable as the hot glue will bind them together from both cables. Also, adhesive heatshrink is double wall so don’t skimp and go with the standard stuff.
🙂 I always wrap the connection with a plastic bag and tape if ever any sign of rain or snow.