So, exactly what parts did I need to replace RV vent and add a fan? As usual, I tackled a few projects in one. We needed to place the cracked shroud for the RV vent in our bathroom. Rene wanted me to add a fan to the RV vent in her studio. And, we wanted to replace the light fixture above her workbench. I priced out the individual parts to add an RV vent fan. I would need the 12v DC vent fan and blade – and I’d have to configure some sort of mounting hardware. Then We’d need to purchase a separate RV vent shroud insert. It was cheaper to buy a new RV vent with fan. It comes with an interior shroud. I could then use her old one – which was still on good shape, to replace the RV vent insert in the bathroom.
How hard is it to replace RV vent?
If you think upgrading or replacing an RV vent and cover is a major undertaking, don’t panic. It’s a pretty simple project. No special tools are required. And, I provide detailed step by step instructions to replace RV vent, add a fan, and upgrade light fixture below. With lots of photos!
What parts are required to replace RV vent and add a fan?
To make this job quick and easy, purchase an RV vent the same size as the one you are replacing. Fortunately, RV vents are all the same size – 14″ x 14″ square. Just be sure to measure the depth of the “garnish ring” to ensure the shroud/insert fits the space in your ceiling. Ours require a 6″ insert. Since I had a few projects going on, here is my shopping list.
Parts to Upgrade RV Vent and Lights:
- 14″ RV Roof Vent w/ 12 Volt Powered Fan – 6″ Insert
- 12v DC RV Interior LED Dome Lights
- Dicor Self-leveling Lap Sealant
You may also need:
You may prefer a high power Fantastic RV Vent Fan with variable speeds, reverse option, or remote control. We kept it simple. We were also so happy with this LED RV light fixture that we’ve since purchased a two-pack to upgrade our other ceiling light to match. It is very bright has two light warmth settings. But I digress, yet again…
Tools Required to replace RV Vent:
- Portable drill
- Phillips Screwdriver Bit
- Hex Nut Driver Kit
- Scraper or Knife
Step By Step Instructions to Upgrade RV Vent
Follow the simple steps shown in these photos to replace RV vent, add a fan, and upgrade light fixture at the same time.
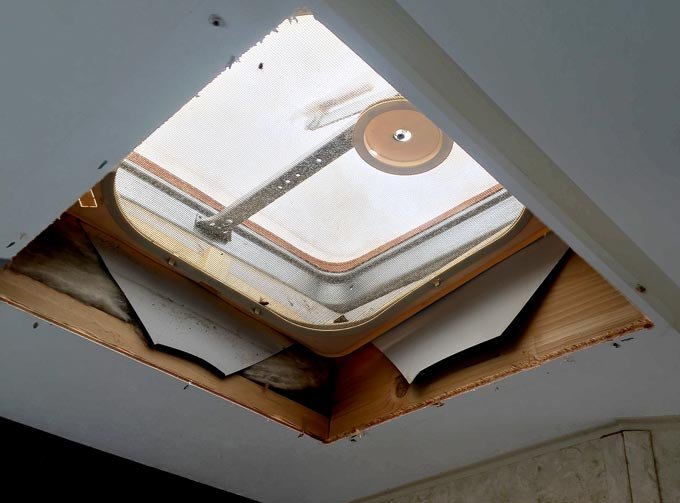
Remove screws holding vent fan ceiling insert in place. Loosen retaining screw holding vent cover crank wheel. Remove crank from spindle so you can remove the screen from the vent cover.
Grab your tools and head up on the roof. If you do not have an RV Vent Cover, get one! If you do, the first step in replacing RV vent is to remove the vent cover. Loosen the four nuts and lift cover off the bolts.
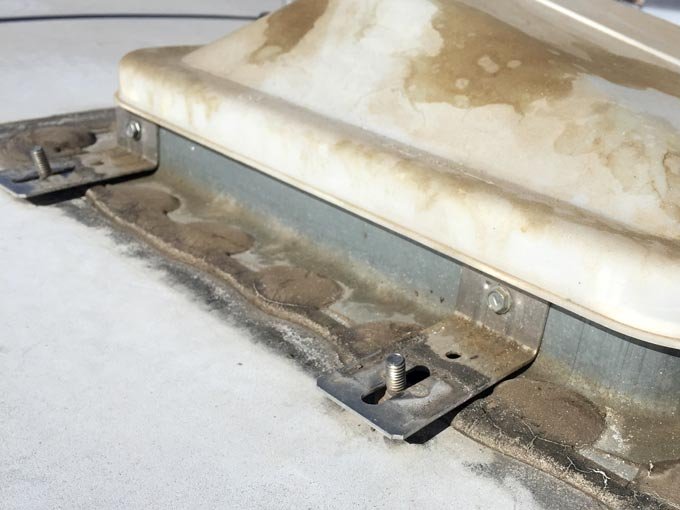
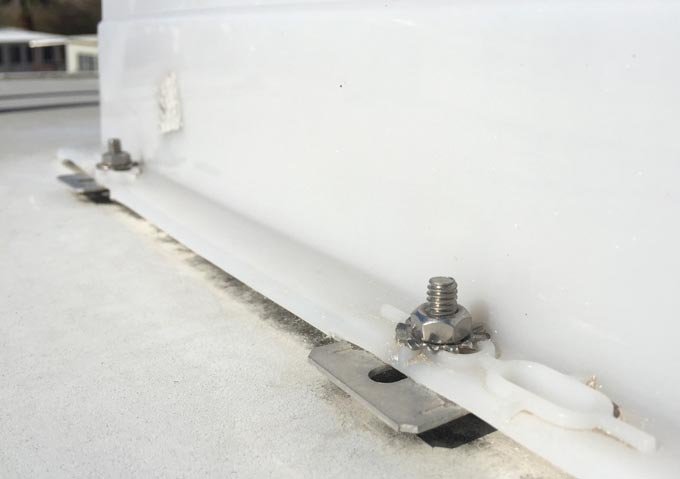
Remove the mounting brackets from the RV vent base. A hex nut driver bit on your drill will save you time and effort.
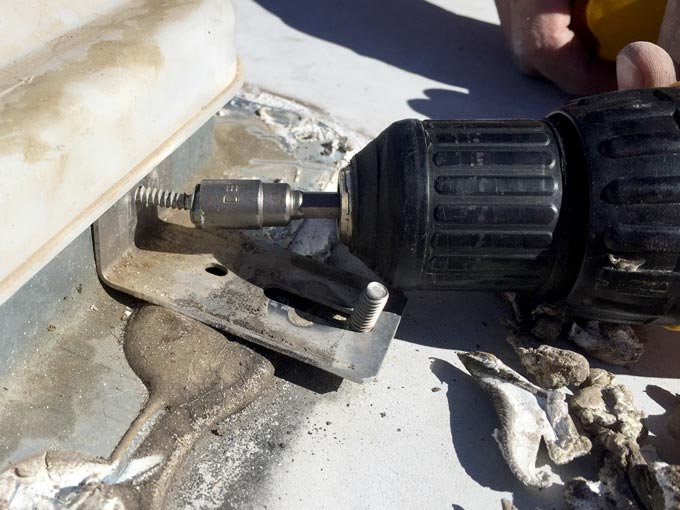
Save the mounting brackets, bolts, nuts, and screws. You will need them later to attach the cover onto the new vent.
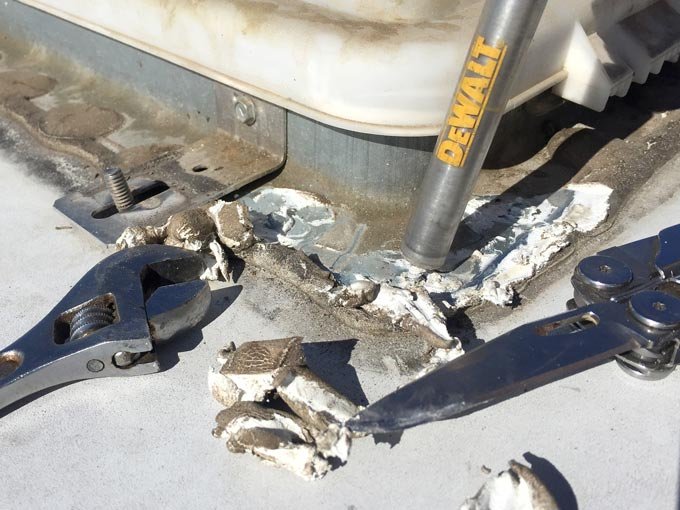
Next, you will need to remove the old Dicor to expose all the RV vent mounting screws. Then remove the screws attaching the vent to the RV roof.
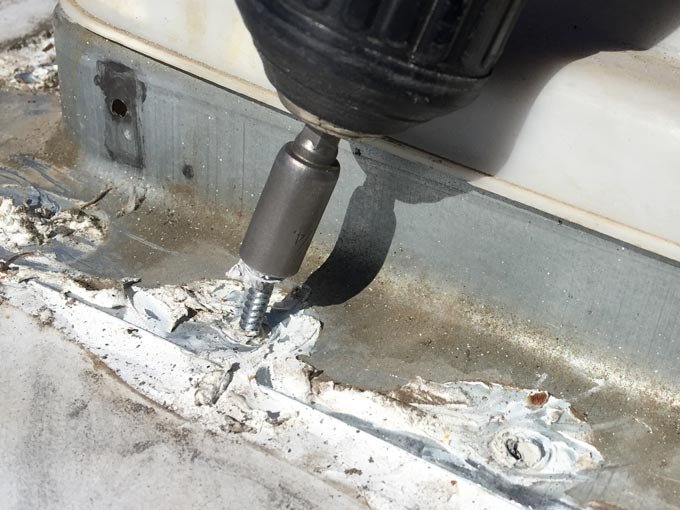
TIP: The mounting screws have a 1/4″ head. Using a drill with hex nut driver works best. A bit tip holder is also the right size.

With all mounting screws removed, clean off any excessive Dicor holding the RV vent base in place.

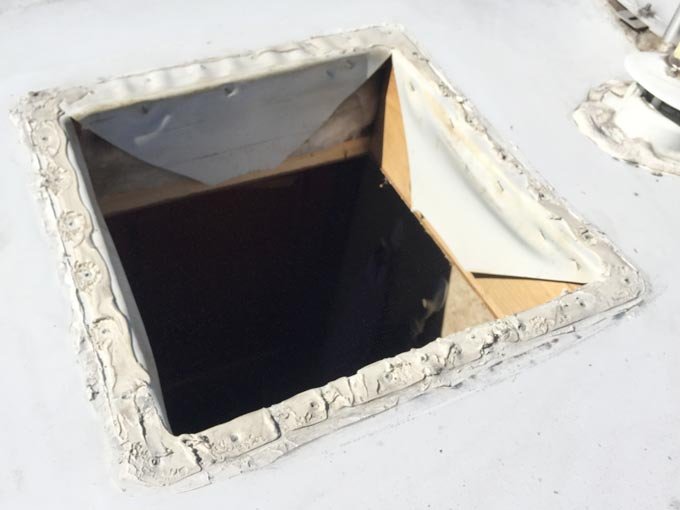
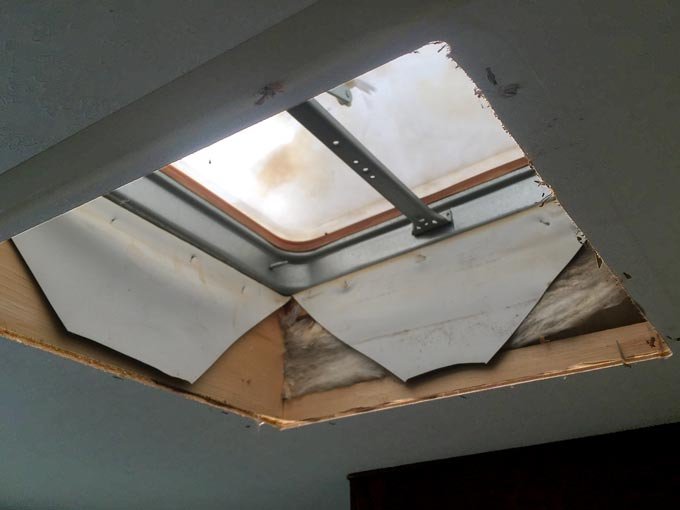
Pry up a corner and remove the old RV vent.
Clean the roof around the perimeter of the RV vent opening. Preserve any plumber’s putty that still provides a suitable seal. Or, clean it all off and lay down a new layer of plumber’s putty tape along the edges of the hole.
Next, we’ll be tapping into the 12v DC circuit to provide power for the new RV vent cover with fan. You will need to locate the nearest source. Mine was the ceiling light fixture I was replacing at the same time. If not replacing the light, cut the positive and negative lines where you will attach wire to route power to the new fan.
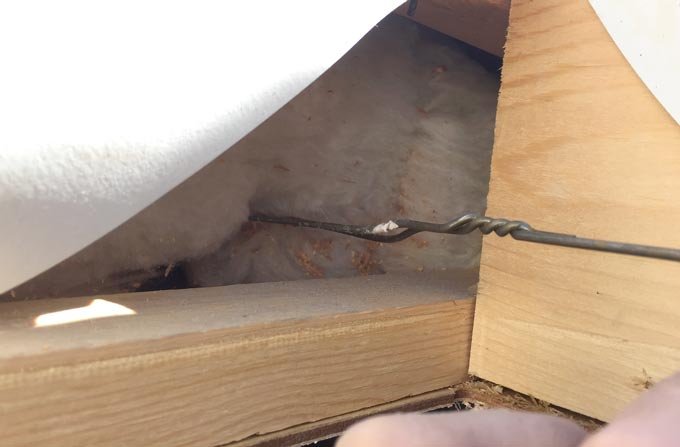
Use a bent wire hanger to push through any insulation to the light fixture opening.
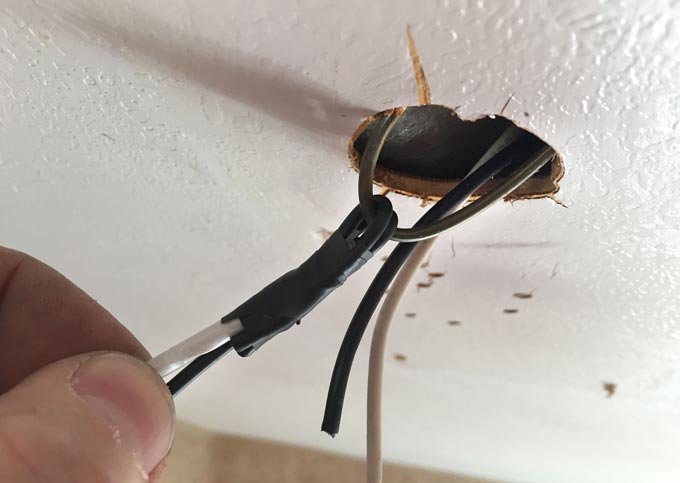
Attach new wiring to the hanger and pull enough through to reach the RV vent fan.
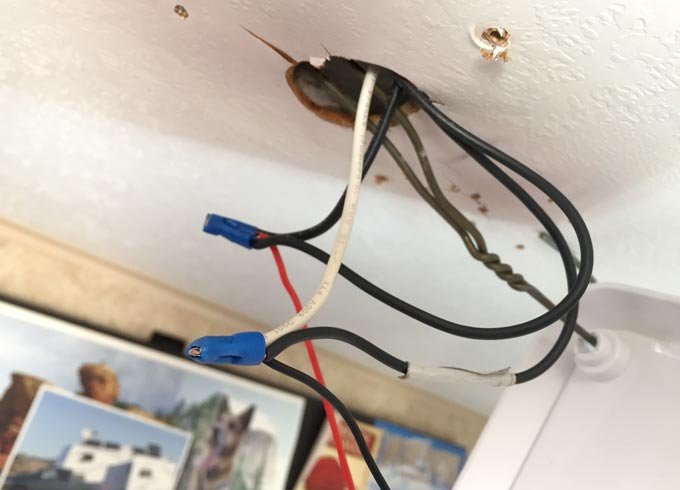
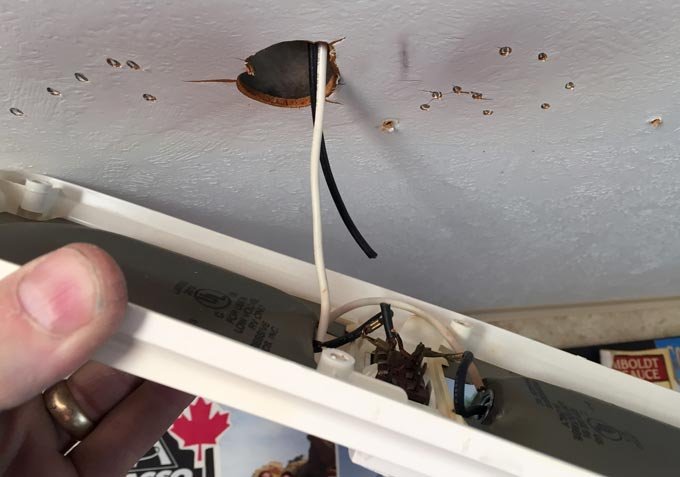
Connect positive and negative wires to the power source, and to the light fixture leads. NOTE: Do not route power to the fan, and then to the light. This would prohibit the light from working when the fan is turned off. Instead, tap into each wire, so both 12v fixtures will work independently. Test new light to ensure it works before proceeding.
(Yes, you see black wire attached to white there. You’ll also notice a bit of white tape around that black wire. I only had a spool of spare black wire on hand, so I marked it at both ends. This allowed me to keep track of which wires were positive or negative.)
Place the new RV vent with fan into the opening on the roof.
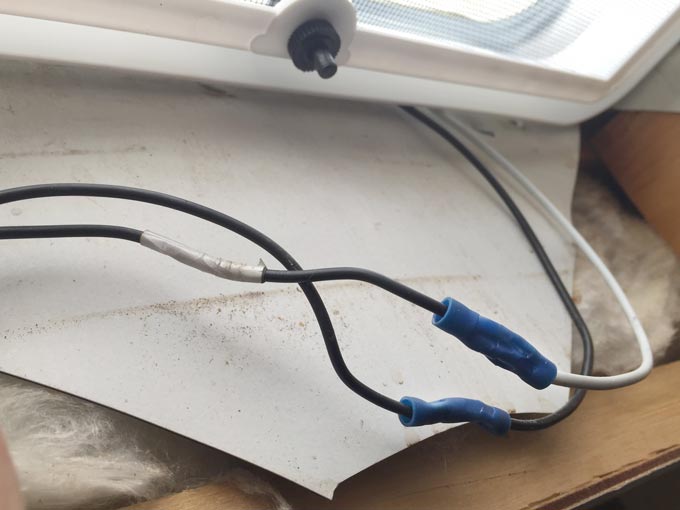
From inside, connect your new wiring to the positive and negative leads of the new fan. Test switch to ensure fan works before proceeding.

Secure any wire connections and tuck them up into ceiling. Attach light fixture and test it again. Replace light covers.
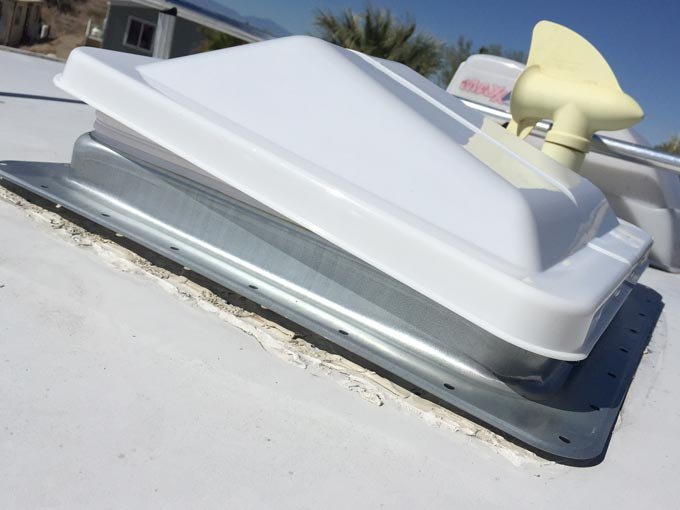
Back on the roof, apply butyl tape or self-leveling Dicor lap sealant to cover all the mounting screw holes. Replace RV vent into opening.
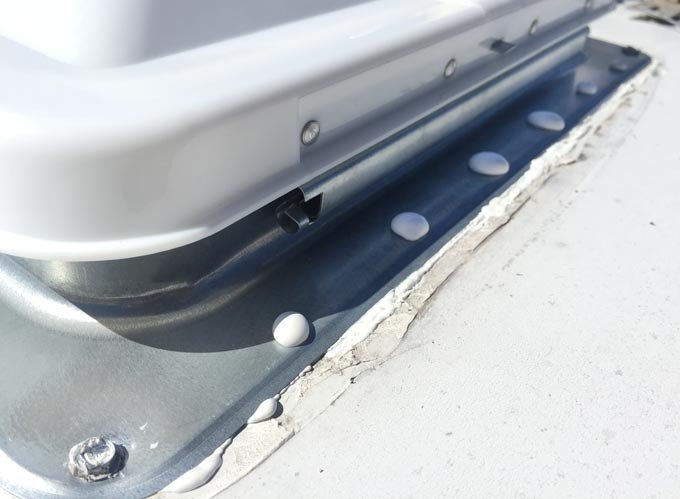
Tighten mounting screws to secure RV vent base to roof.
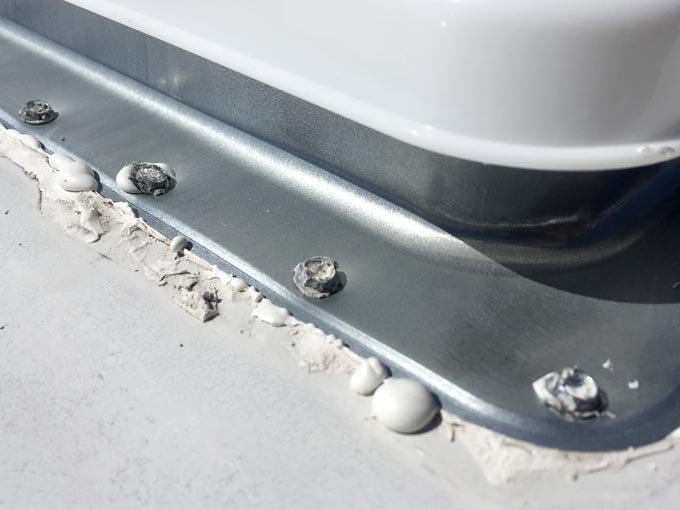
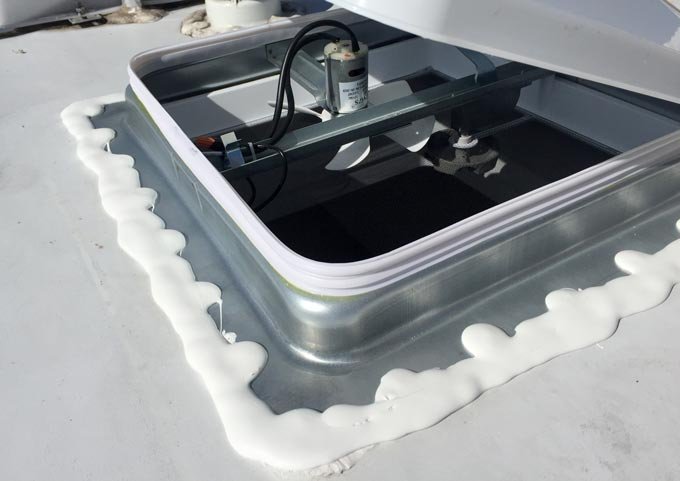
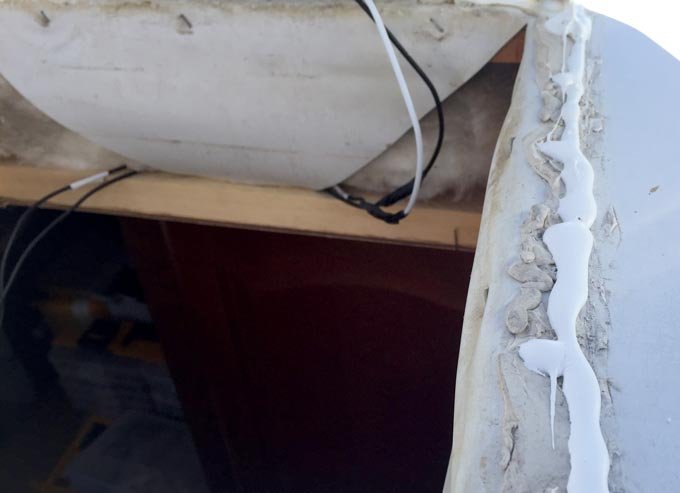
Once new RV vent is securely mounted. Add a dollop of Dicor atop each screw. Then apply an ample amount of Dicor around the entire base.?
Use self-leveling Dicor. This will allow the lap sealant to flow over the screws and base edges to create a watertight seal. Let the sealant dry enough so it is not sticky to the touch, about 20± minutes. Use this time to attach the shroud/insert into the ceiling opening inside your rig.

Re-attach the vent cover mounting brackets. TIP: Place the cover lightly over the vent to identify where the bolts need to line up with the holes in the cover. You don’t want the Dicor still sticky to the touch when you do this.
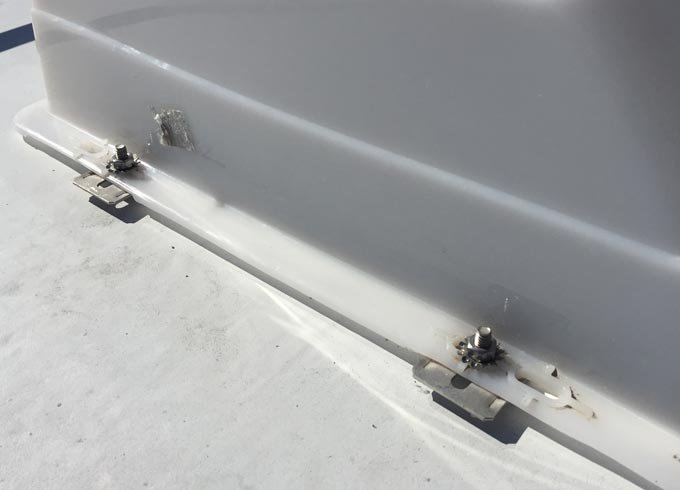
Place the vent cover over the bolts inserted into the mounting brackets. Attach the lock washers and nuts to secure the vent cover in place.
Clean up your mess and enjoy your new fan. You now know how to replace RV vent, add a fan, and upgrade your lighting. Any questions?