When the Sewer Cow reared its ugly head again, I knew we had a check valve going bad. A quick duck under the kitchen sink confirmed the whining noise came from the hot water check valve attached to the RV water heater.
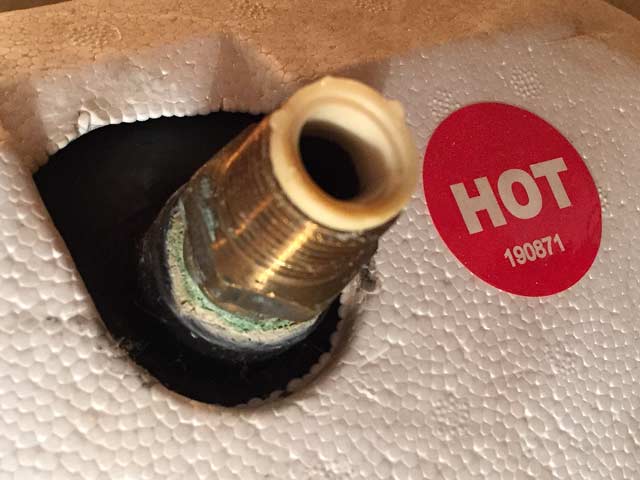
I noticed corrosion around the check valve. No problem! I replaced the same valve in our first rig. Aside from the cramped working space under the sink, that’s an easy fix…or so I thought.* (Jump ahead to my check valve fight, or quickly review steps to replace the anode first.)
NOTE: The check valve on your RV water heater keeps the hot water flowing in one direction out of the heater, while preventing the back-flow of any water from your plumbing to enter back in.
How to Replace RV Water Heater Check Valve
The first step to replacing the check valve is to turn off the water supply and drain your water heater.


This is a good time to read how to replace your water heater anode and why, if you don’t already know. If you do know, have your new RV water heater anode on hand before starting.
Open the outside access door to your water heater and use the pressure release valve to do just that–release any pressure from inside the hot water in the tank. Remove the anode from the bottom of your water heater and let all the water drain out.


Once the tank has drained, use a tank rinser hose adapter to thoroughly rinse out any anode debris and calcium build-up from inside the water heater. Add some plumber’s tape around the anode threads and secure it back in place.


By now you should also have already purchased a high quality check valve for your water heater. That Sewer Cow video will explain why buying quality parts is important! Trust me, spend the extra money for a brass fitting with ball or spring valve–skip the cheap plastic flapper type–unless you enjoy doing this job more often.
FYI: Most RV water heaters use 1/2″ male to male check valves. Inspect yours closely to ensure you find the right replacement part. Or get creative if you can’t. (More on that in a moment.)
With the new anode installed, you are now ready to remove and replace that noisy check valve. This is where it got fun.
*Then I had a hard time removing the old check valve. Then it snapped off, leaving part of the threaded pipe seated firmly inside the water heater. Then I cussed. Then I laughed, and remembered the situation is the boss.
How to Remove Broken Check Valve from RV Water Heater
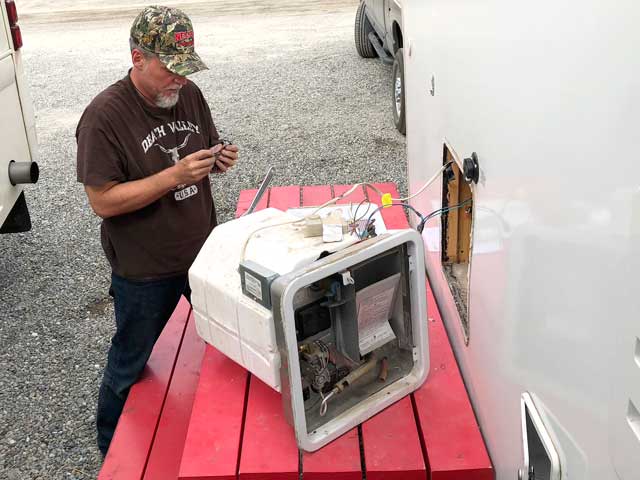
No, you should NOT have to remove your water heater to replace the check valve. But I did. The second that check valve broke off inside the heater connection, I knew I had two choices: Get it out. Or, replace the heater. After boondocking for free at the Whitehorse Walmart, we moved to an expensive but cramped site at the only RV park with any availability–for one night–so I could get this “quick and easy” job done. I was burning daylight, not that it got dark any time soon up here. But stores keep regular hours, so I quickly set out to investigate my options.
RV parts supply options are limited in these parts, to say the least. One shop had one heater our size in stock, and they wanted $1,000 plus something. That was more than twice the price of a typical new 10 gallon Suburban RV water heater. I stopped listening when I heard “thousand” and set out to find the right tool for the right job…that wasn’t so easy in this remote territory either.
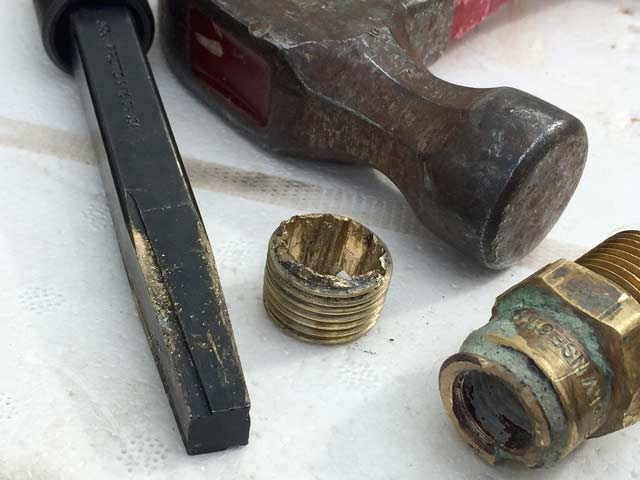
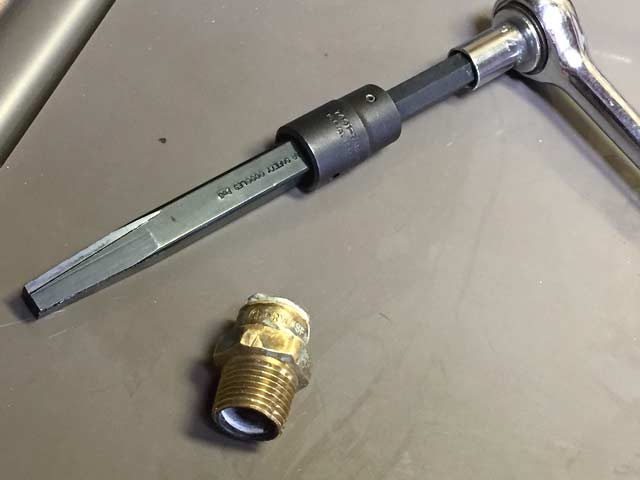
I needed an Easy-Out. To be more specific, I needed a high grade hardened steel 1/2″ screw and pipe extractor. My fourth stop found me at Ajax Steel and industrial supply, where I found the right tool for the right job. I then found that I also needed a 1/2″ drive square socket to attach the extractor to my socket wrench.
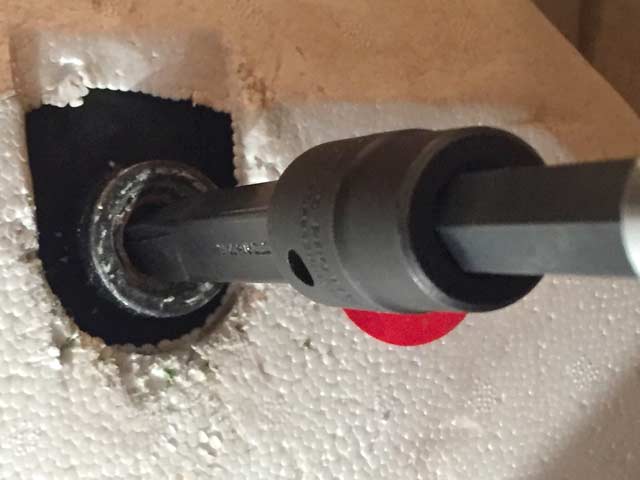
TIP: Align the extractor squarely inside the broken pipe at give it a couple taps to firmly seat it inside the fitting. Attach a socket wrench handle and turn counterclockwise to remove the threaded remnant. Repeat as necessary. Hint, you may need super strength or extra leverage…
After pulling and pushing, and hammering on the wrench handle, I soon discovered I still didn’t have enough room to get enough leverage to break loose the fitting. Only after removing the water heater, and sitting on top, was I able add an extension on my wrench handle and finally break the fitting free.
So where were we? Back to the quick and easy part…almost. I couldn’t find the standard 1/2″ male check valve while tooling around Whitehorse on my bike. On a mission to get all the parts I needed before heading to the RV park, I found a high quality brass female check valve at the local plumbing supply. This required I also get two 1/2″ brass nipple extensions to make it work with our heater.
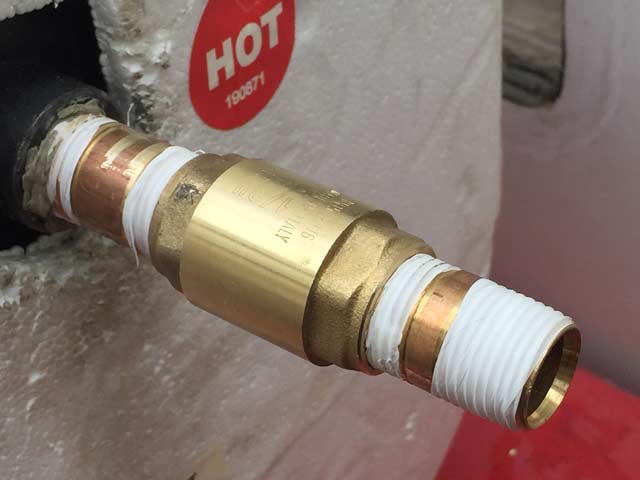
It may not be pretty, but it got the job done! After assembling my new check valve and connecting it, I replaced the heater back in the compartment. Back inside I re-connected the plumbing, filled the water heater and checked for leaks.
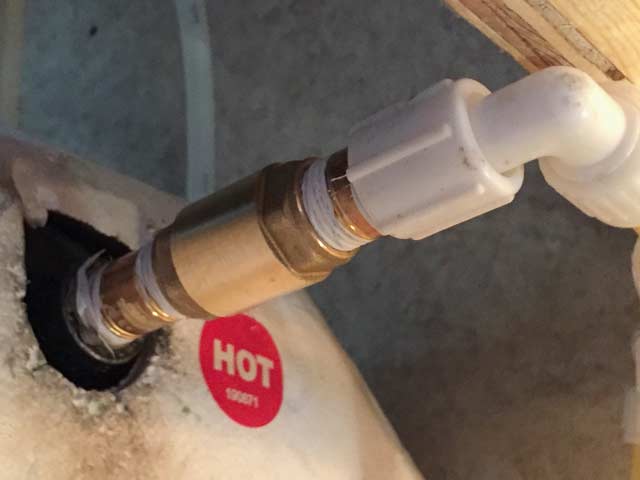
About a half hour later, I took a long hot shower…with no whining sewer cow noise. The next day, I sealed the water heater compartment door with Dicor lap sealant and called the job done! The long, hard way to get an easy job done.
#1 Lesson Learned: Don’t break the check valve when when removing it from your heater!
#2 Lesson Learned: Use the right tool for the right job, and save a more than a thousand dollars on a forty dollar repair.
#3 Lesson Learned: Stay on top of your RV maintenance and use quality replacement parts to keep the sewer cow happy.
Our 2005 Suburban W/H has a clogged internal check valve (located just inside the tank at the hot water exit fitting) The plan is to try to back flush, try vacuumining through the drain hole if possible, then resort to carefully drilling out the valve, flushing,, then installing an external check valve. Any other ideas?
Good luck with that. Seems easier to replace the heater at that point. I’d hate to risk “drilling out” a check valve and have no idea why there would be an internal non-serviceable part like that in any water heater.
Did you consider replacing the check valve system with a second 3-way fitting at the upper T joint (I’m assuming your system is plumbed like mine — a one valve bypass system — a single 3 way t valve down low with a bypass riser to an upper T where the check valve is located ).
Nope.
What would you do different next time to remove a check valve or pipe fitting from the heater, e.g. treatment with?
“treatment with?” …i pretty much did everything I could to remove the broken pipe as described above.