Seasonal weather can take its toll on the exterior molding designed to protect your RV. A couple seasons of freezing snow and desert heat can result in cracked trim that may allow moisture to penetrate ceiling joints and wall panel edges. Read on for tips and photos to replace vinyl trim insert.

We’ve only had our 2010 Artic Fox about a year now, but this Spring we noticed much of the vinyl weather strip protecting the panel edges was cracked and in need of replacement.
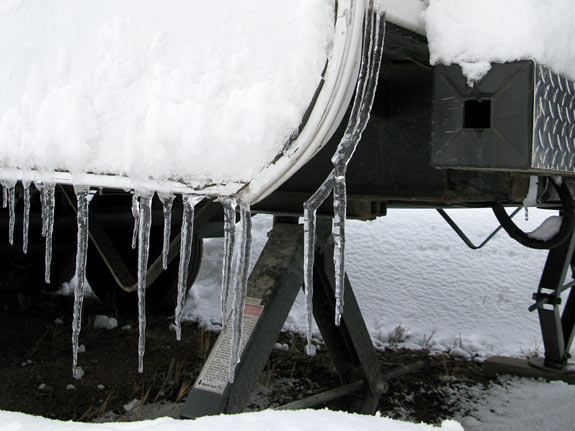
Replacing the molding was one of the easiest RV maintenance tasks I’ve done to date. Finding the right replacement part was the only tricky part, since that required discovering the correct term for the vinyl trim that inserts into the channel molding strips that wrap our fifth wheel’s wall panels and roof edges.
Not one to be taken by some dealership for such an apparently easy job, I eventually found the right 1″ RV Insert Trim on Amazon.
Replace Your RV Insert Trim in 5 Easy Steps
Follow these simple steps, with photos, to make an easy job out of replacing your RV’s exterior vinyl molding.
1. Measure the molding and purchase the correct vinyl trim.
 First, determine the width of your channel molding. Ours is 1″ wide, which is very common. Next measure and add up the total length of all the trim you need to replace. We purchased a 100′ roll of heavy duty white insert trim from the RV Designer Collection.
You may need 3/4″ trim, or choose to select from various brands and colors of insert trim available. I recommend using the Heavy Duty trim which is easier to handle and more likely to last longer.
I used more than half of the roll to replace all the trim that was clearly deteriorating, and now have enough to complete the job when the rest of the trim begins to crack.
2. Remove old insert trim.
Completely remove all cracked trim by running your finger along the metal channel and pulling out the old vinyl. Remove any screws securing the trim ends and clean away any caulk or sealant plugging up ends of channel molding. I used an old tooth brush to ensure no debris remained inside the molding.
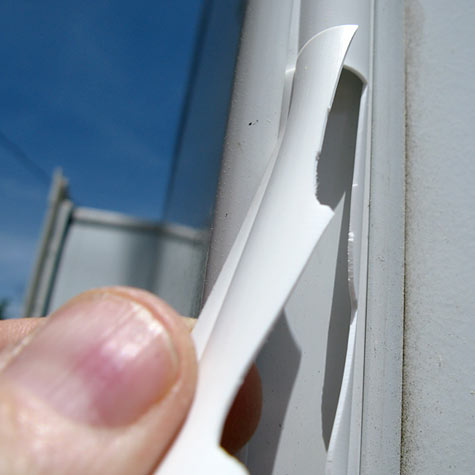
3. Replace new insert trim.
Place the roll of trim on the ground and grab the end in the center. Pull out and untwist a few feet of the trim then ascend ladder to begin inserting it at the top.
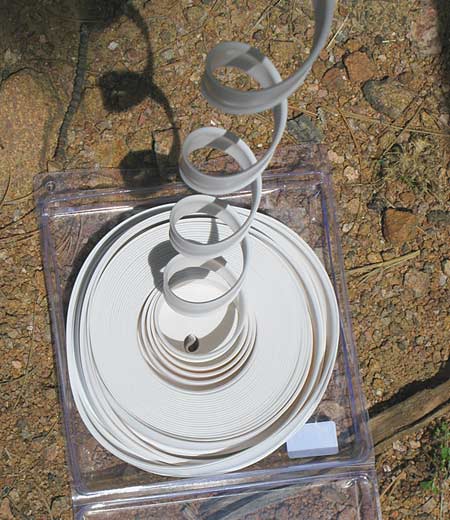
Cut the end of the trim if it is not square. Grasp trim at end and pinch it gently so the flanges fit into the grooves in the channel molding. Insert the trim into the molding, squeezing it together as you go. Gently press the vinyl to smooth out any bumps and ensure it is seated firmly in the grooves.
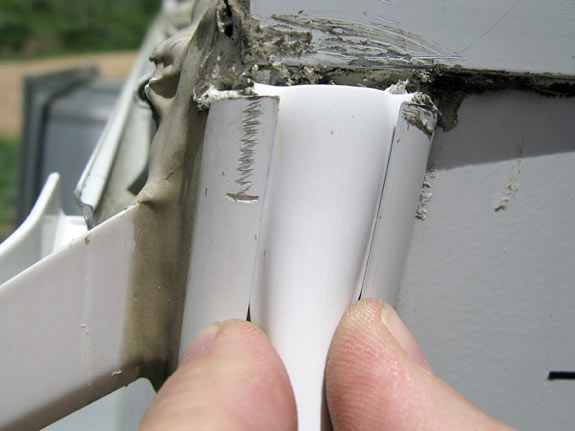
4. Secure ends of trim.
When you reach the end of the molding, cut ends off the inserted trim leaving enough vinyl to secure with a new screw, if necessary. Remove any accumulation of road debris and dirty Sealant.

Only replace screws that you removed. They should only be necessary at the very top of the trim, or where it connects under the wall panel.
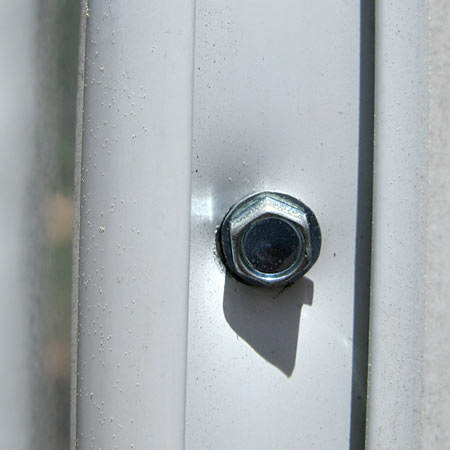
5. Seal ends and gaps.
Cover the top end of the exposed trim with Dicor Lap Sealant to make a waterproof seal around any exposed edges. Add sealant around screws where trim connects under the rig.
Check your RV trim periodically and replace the entire strip if you notice it cracking to prevent further damage.
Did you find this helpful?
Let us know with a comment, and subscribe below to be notified of new blog posts!

How do you know what size to get? Can you find the size by the year, make, model? Do you measure the track that it fits in or do you have to measure the existing seal to get the correct size? Is it a flat piece of plastic that curves up in the middle upon installation?
Measure the track width, not the gap opening in the track. The strip has a slight bend to it. Squeeze it to insert into the track gap, and it will spread out to fit.
“Rubber tape”?
Comes in 2″ or 4″ widths.
Also called, I believe, eternabond tape?
Used on my vent seams as well as roof edges. Works wonders.
Jenny
Eternabond is great stuff. I wrote about using Eternabond to patch our cracked bathtub. But I would not recommend it for any long term permanent fixes. It is incredibly difficult and messy to remove, and could easily cause more damage to a rubber roof when trying to get it off.
My girlfriend and I are working on a 1988 ford falcon rv. Basically itss and E250 econoline van with a camper top above where the van roof would be. Between the van part and the camper part is a little channel where this trim ought to go. There is none there currently.
We are trying to find the right measurement but arent sure whether the dimension is for the visible part of the channel or the whole length under the metal curled over on either end. How do we measure it?
You want the strip to fit snugly inside the trip, so the measurement should be the full width of the channel.
Mine has the trim going around the curved corners as well! When I install the trim it tends to flatten and of course doesn’t stay in the groove seeing that the radius is different from the inside verse the outside of the curve! This is why I’m replacing it as the old strip started doing the same over time!
Thank you so much for your blog on revealing your RV. I own a 50ft 2 bedroom Franklin 5th wheel and was a total novice when I got my place. I am currently replacing all the seals for the first time. As a female I was always pretty handy being a military dependent and wife at one time but being alone with a back problem (not complaining) living in a remote desert town ts been hard to order the exact product or the correct name etc….whether to use a lagging or non lagging sealant etc. I do have one question you might know the answer too. I also have the seam that needs the vinyl replaced but across the bottom of my rig is a seam that looks like it has the removable strip but doesn’t. It appears to be just for decoration. Its put on with the “putty tape” but has a “rubber tape” placed over the exposed putty tape and that is peeling off. It comes off fairly easy but I can’t find out what that tape is called. So you know? It appears to be abt 1/4 inch thick. I currently read where a Rv shop used a type of chalking and taped it off to get a clean line. So, I have some flex paint and tried that but found I have to go back and redo some spots because when I pulled the tape off, the first time, it had not dried enough and I pulled the rubber paint away from the skin of the trailer exposing that edge of the putty tape. So, trial and error, I was able to solve that problem and even took the rubber paint down below that and painted the portion above the triple axial to see how that holds up. Everything has been a learning experience that’s for sure and it’s you and other RV diyers that have saved my life. I thank you for your help, as well. If anyone can help with the name of that tape, I would appreciate it. Thank you, again!
Uhhh…having a hard time picturing exactly what you mean. Maybe others may chime in.
Thanks for sharing!
I have a Flagstaff Forest River 28-foot trailer. The molding that meets the side panel I need to take off because the panel on the side has blown loose and there is a section that is not meeting the molding anymore. I will attach a photo so that you can see what I’m talking about and how to slip the side panel back in to the molding. What I need to do is slipped that side panel back into the molding however I do not know how to detach the molding that’s there that goes into the corner molding.
It seems that I cannot attach a picture to this type of message so I hope you know what I’m talking about. Or if you have a phone number I could send a picture to that would be helpful. Thank you
Good luck with that Allen! It is pretty hard to decipher exactly what it is you’re trying to explain.
Can the incorrect vinyl trim really cause problems with the RV? The trim is coming off of ours right now and I want to cover that so I don’t have to worry about the RV having problems. I hope that we get the work done soon.
Good question. But just think about it…if the trim is functional, as in it prevents moisture from entering seals in exterior walls or around panel edges, then an incorrectly sized insert may not prevent leaks that can cause serious damage.
Good luck with that!
How do you cut where 2 pieces meet at a 90degree angle?
Thanks
I didn’t have a corners like that, the insert molding around our door is a radius. If I did, I would cut each piece at 45º and seal them well with lap sealant.
Thanks for your article on replacing the trim on the RV. I do have a question that I have been having trouble with. I am replacing the small trim around the compartments, The compartments have a “rounded” corner instead of a 90 degree corner. Do you have any suggestion for how I can work this corner into the metal frame?
Thanks
Interesting, we don’t have trim around the compartments. But if it’s the same type, I’d recommend trying a heat gun or hair dryer on high to soften the trim while inserting it into the molding. Hope that helps.
Thanks for asking!