Preventative maintenance is important to keep your RV in the best condition possible. Many such tasks are not as difficult as they are tedious and time consuming. But the alternative is an expensive trip to the shop to get it done—or worse yet, an even more expensive trip if you don’t do them! Case in point: re-sealing the exterior seams on your RV.
Previously, I’ve described How To Replace Exterior RV Weather Molding. Recently, I took the time to remove and replace all the Dicor used to seal the seams on our exterior walls, roof and trim.
Why Dicor Instead of Caulk?
On our previous rig, I had once used silicone caulk to seal an exposed area of trim that was allowing moisture into the wooden wall. I regretted that later when I had to remove it and do the job right.

Yes, silicone caulk is waterproof. But it will eventually dry hard and crack over time. And it is a serious bitch to clean off!
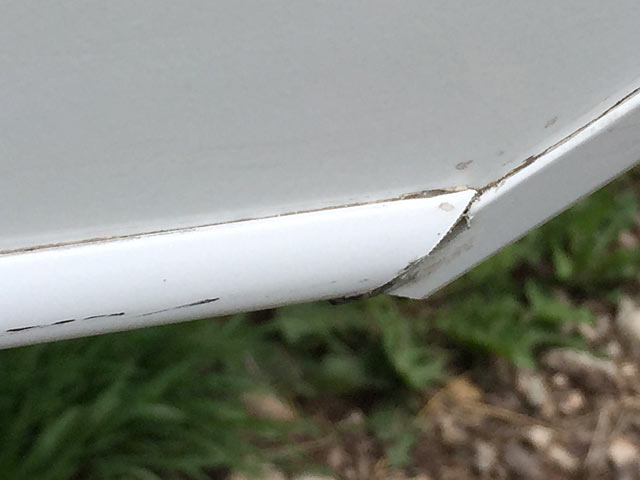
Dicor Lap Sealant will never harden. It remains flexible and water-tight as it ages. It can, however get ugly and dirty, and after many years it may have a tendency to shrink and separate. That’s why it’s important to frequently inspect all exterior seams—around all trim and any vents or light fixtures.

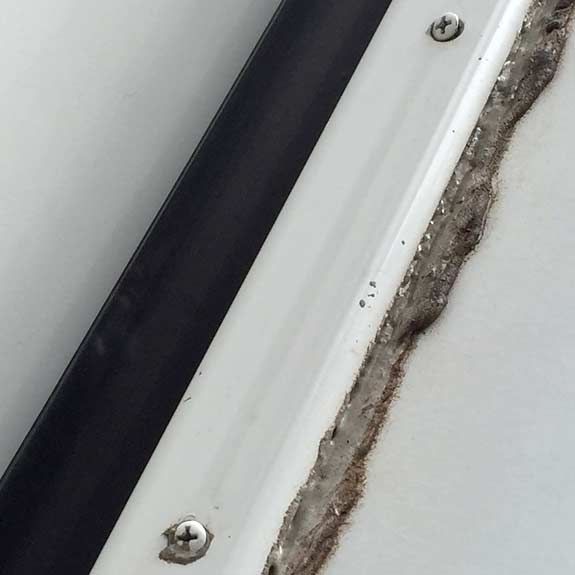
Depending on the RV manufacturer, Dicor is often applied rather sloppily. Once you are fed up with the droopy looking brown goop, take the time to remove it and replace it with the right stuff.

Caulking tools or some sort of dull plastic blade is great for removing the bulk of any old Dicor. Use a rag or sponge and some alcohol to get rid of remaining residue.

Make sure you have plenty of Dicor on hand before you get started. I used four tubes to reseal our rig, and always like to have some on hand for any emergency repairs.
 What Kind of Sealant is Best for RV Trim
Be sure to use the right type of lap sealant too! Dicor is the most popular brand name. It is available in a few different shades, but there are two kinds you want to pay attention to when ordering Dicor.
Self Leveling Dicor is more fluid, it is best used on the roof or flat surfaces where even spreading of the sealant is desired.
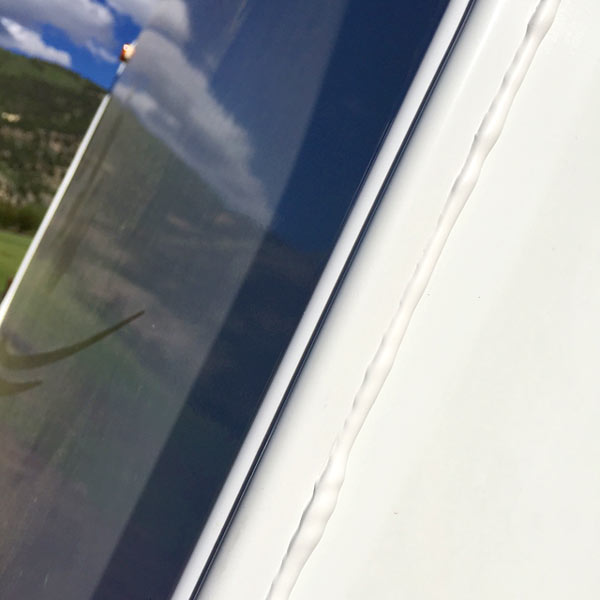
Non-Leveling Dicor is best for trim on vertical surfaces since it will not sag as much. Like so…

See what I mean by sloppy application?
TIP: Use a steady hand with a 3/8″± bead of sealant and apply long smooth strips at a time. Do not try to smooth out the sealant with your finger, as you might when applying caulk. Before it dries, Dicor is very sticky!
Resealing the trim on your RV is a time consuming job, but the reward is a clean looking rig without the potential for water damage.

Any Questions?
Leave a comment with any related suggestions below. See all our RV Maintenance Tips, and subscribe here to be notified of future blog posts.
Do you think this could also be used for rv plumbing? I have the inlet between the grey tank and the ABS piping. The manufacture used a tacky black substance and I’m trying to replicate it. Thanks!
I doubt it, I wouldn’t use Dicor to try and repair any sort of leak. Eternabond would be a better solution, at least until you can replace the fitting.
You should not have to do this at all. More RV crap that we just tolerate and get used to. $40K and you have to put this junk on it.
Yes, as a matter of fact – IF you want to protect your investment!
I used the dicor to caulk my camper. In th heat, leaves have stuck to the caulk. Will this damage the caulking?
Sounds messy! Repeated cleanup would certainly compromise the seal. Be sure to use non-sag non-leveling Dicor lap sealant.
No it won’t, I have been sealing RVs professionaly for 25 years mobile, when doing them outside this happens often, specially on roofs. Once it’s dry they will usually wash off, if not, it’s only.cosmentoc at worst, but you should be able to pick them off. I never try to pick them out wet, that will.leave a mess. Also in the pictures in this article it looks.like he just ran the bead and left it the way it came from.the tube, always run your finger down the bead.like any silicone to push it in to the joint and smooth it. Use a bit of mineral spirits on a rag to dampen your finger every few feet at first is usually nessasary, as you become goof at it you can generally do a whole seam in one wipe.
Can Dicor 551LSW be used for horizontal & vertical trim seams on the sidewalls?
Yes, 551SLW non-sag Dicor can be used on horizontal OR vertical surfaces. While self-leveling Dicor (501LSW) should only be used on flat (horizontal) surfaces. Self-leveling may be easier for certain roof applications where spreading of the goop is preferred.
Hi Jim, I’m planning on resealing and coating my 2008 Winnie Access WF29T roof with the Dicor Fiberglass roof coating. You mentioned the Dicor Lap sealant is for EPDM and TPO sheeting but there website says it sticks to Fiberglass. Have you seen less then satisfactory results there or do you feel there product will work/stick well on fiberglass roof material?
We have a rubber roof, but the sides are all skinned in fiberglass and the Dicor hold up with an ideal seal.
You did not mention any additional tooling to the freshly applied sealants? Should you or can you smooth it out?
I only smooth where necessary, if no solid seam is formed. And I only use my moistened finger. I watched the Artic Fox factory crew use the same, but they had rubber gloves and a spray bottle, likely filled with soap or alcohol.
Usually mineral spirits I’d used, and you should ALWAYS wipe it, it’s not just to smooth it is to push it in to the seam to complete the seal. It’s very important. I’ve been doing it 25 years. Put a small.ampunt of mineral spirits on a rag and dampen your finger, wipe your finger down he bead use the rag to clean any extra off your finger and re-dampen. The beads in the article are not finished and will very likely leak over time.
what is dicor lap sealant made of is it silicone or some type of edpm..I am getting ready to remove some.
Dicor is not silicone based. It is an EDPM sealant compatible with EPDM and TPO sheeting. Primary components in Dicor lap sealants include Calcium Carbonate and Naphtha, petroleum.
Hi there. Thanks for writing this article. Any tips for how to remove layers of goopy Dicor on the upper corner trim on my travel trailer? It looks like my trailer has some weird growth on the top.
That’s a messy job. I use plastic caulking tools to prevent damage and alcohol for cleanup, with lots of elbow grease and plenty of patience.
Thanks!
Hi Jim,
What method you recommend to smooth the dicor bead?
Thanks,
Juano.
For best results, the least messy method is to not smooth the bead at all. Just apply an ample consistent amount. When necessary, I have found a moistened finger works best.
Hey Jim. What do you think about the trim typically facing front or rear that has the long vinyl piece covering the screw holes; in respect to whether it is water-tight or not? My vinyl shrunk and ripped loose from the screw “designed” to keep the vinyl in place. I am thinking taking off the vinyl and fill the groove/ screw hole … I need black. I just found your site and was just reading Rene’s satanic experiences. What I have heard about working there was a good gig. I realize this was during the dark days of 2009, but awful, huh? The Dicor seam you reworked looks nice.
Thanks for the comment Clint! I would replace the trim, and wrote a post all about that: How To Replace Exterior RV Weather Molding
As far as Amazon Camperforce goes, based on Rene’s experience and what I hear in the Workampers Facebook Group, you will either love it or hate it. Only one way to find out! But the Fernley warehouse is no more, and I’ve heard other locations were managed much better.
Thanks Jim, we can all use your suggestions
Thanks for the feedback Stan! 🙂