If you’ve ever had your RV fresh water overflow and wondered why, I have answers for you. And a simple fix. After 18 years of full-time RVing, this is the first time we’ve encountered this issue. And, it’s a mystery indeed. So, why would our freshwater tank overflow when hooked up to city water? Think about it. This took me a while too.
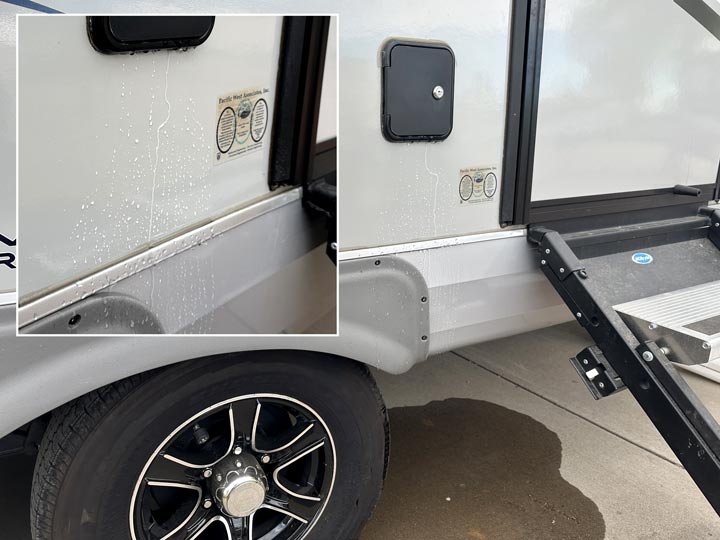
No, the freshwater tank isn’t leaking. Technically, the fresh water overflow is leaking. Just like it’s supposed to. But, why would the tank be filling up?
Why RV Fresh Water Overflow Leaks
When I first noticed our freshwater tank burping, I thought it was a fluke. It was hot out. So, maybe the freshwwater tank had heated up. Water expands, right? Not that much. Once is a fluke. Twice is a coincidence. Three times is a pattern.
Once you understand your RV plumbing, this fresh water overflow fix will make more sense. The RV has two water sources, supplying the same plumbing with pressurized water. The pressure part is the key here.
Your city water connection provides pressure to the system when hooked up to a spigot with a hose. The water pump pressurizes the system, drawing water from the onboard freshwater tank to push it through the same plumbing. One key part plays a critical part in separating the city water supply from the pump. That is the check valve.
Check Valve Prevents RV Fresh Water Overflow
The check valve is a one-way plumbing fitting that only allows water to flow in one direction. A spring-loaded stopper will only open when force is applied from pressurized water on one side. Check valves are used to prevent water from flowing back into the water heater. And, in this case, a properly functioning check valve will prevent city water from flowing back into the RV water pump. Or, more importantly, a faulty check valve allows pressurized water to flow back through the pump and down into your freshwater tank.
So, a bad check valve is likely the source of the problem if your RV fresh water overflow tube is dripping after being hooked up to city water for a while. That drip means your tank has filled up. Replacing the check valve is the logical fresh water overflow fix, and it’s fairly simple. That is, if you get the right part, and can easily access your water pump. Easier said that done in some rigs.
Thankfully, our pump is conveniently located beneath our kitchen cabinet. It was just a matter of removing one drawer. And that is easier said than done on some rigs, if you’re not aware of my bonus tip.*
What Size Check Valve for RV Plumbing?
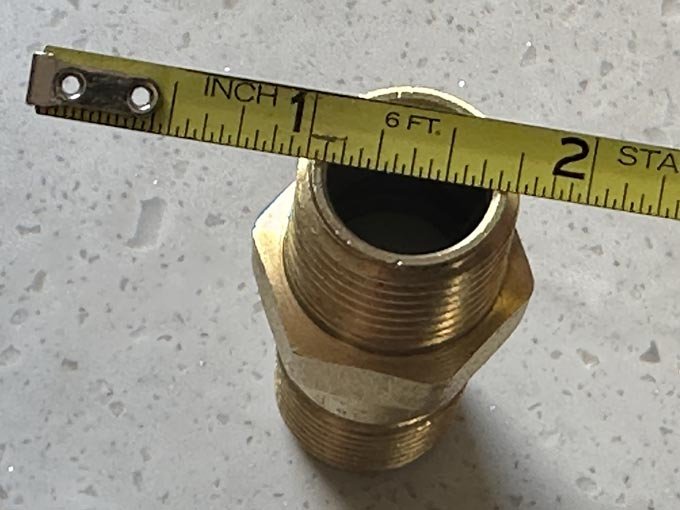
Most RVs use half-inch PEX plumbing lines for interior water distribution. So, if you need to replace the check valve, you probably need a 1/2″ Check Valve replacement. That is, if it looks like ours here. It’s best inspect yours more closely. But don’t get distracted by the physical measurement.
The outer dimension of 24/32″ is approximately 0.82 inches. That falls right in the expected range for 1/2″ pipe threads (NPT). But you also must consider the thread type to get the right check valve:
- 1/2″ FIP x 1/2″ FIP
→ both ends are female, so it accepts male threaded pipe on both sides - “1/2″ MIP x 1/2″ MIP”
→ both ends are male, for connecting to female fittings
How to Replace RV Water Pump Check Valve
Once you have the correct part, and the right tools for the job, this fresh water overflow fix is quick and easy. Good thing, considering you’ll have no water at the faucets until you’re done. And, whatever you do, don’t turn the hose or water pump back on until the job is complete.
You’ll need:
- 1/2″ NPT Check Valve (Likely MIP)
- Wrench(es) and/or Channel Lock Pliers
- Teflon Tape
- Towels & Pan
Follow these simple steps to replace the check valve for a simple RV fresh water overflow fix.
1. Turn Off The Water!
Shut off city water at the hose spigot, or valve if you’ve installed one on your filter. Make sure the water pump is turned off. Drain any pressurized water from the system by opening your faucets. Remember to turn the faucets back off.
2. Drain Water Pump
(OPTIONAL) If your water pump is set up for winterization, turn the inline valve to prevent flow from the freshwater tank. Run the pump for just a few seconds to empty it and de-pressurize the line. This will prevent excess water from dripping out when you disconnect the check valve.
3. Disconnect Onboard Water
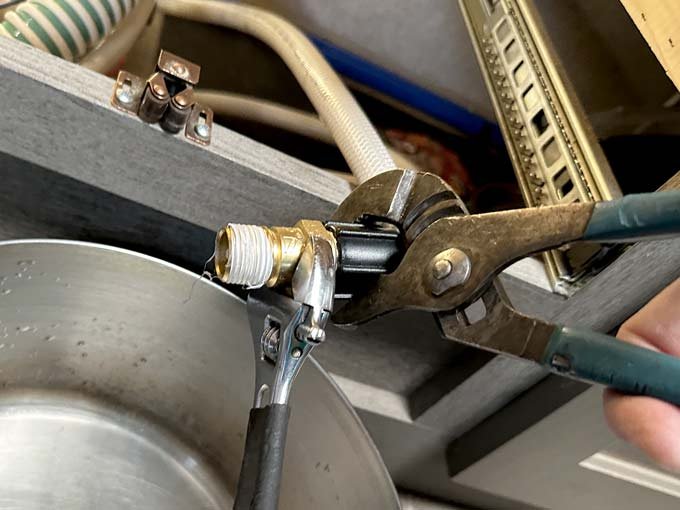
Locate the check valve. This will be found on the outlet side of the water pump. Place towels beneath the connection, and loosen the plastic fitting. Hold the valve with a wrench, while loosening the plastic fitting. Use pliers if necessary, but do not grip too tight. You don’t want to crack the connector!
4. Remove Check Valve
To avoid additional spillage, hold the check valve over a pan while removing it from the distribution line.
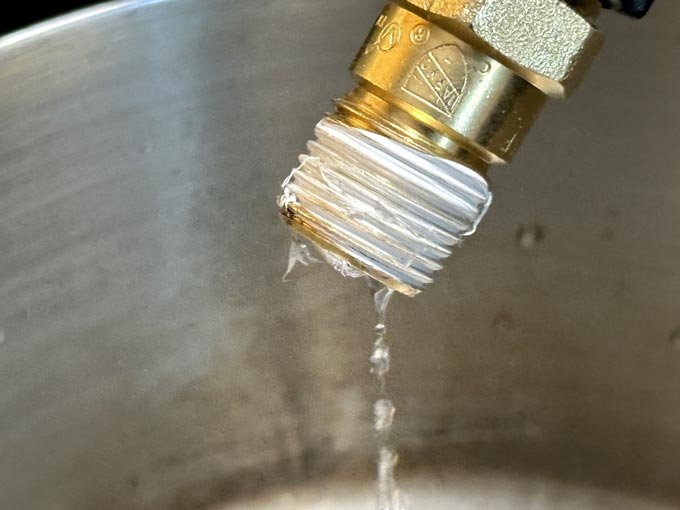
SIDE NOTE: At this point, you can confirm if the check valve is indeed bad. Have someone turn on the hose while holding the valve over a pan. Once the system is pressurized, you may notice water dripping from the valve. It shouldn’t do that. Even if no water drips, replace the valve anyway. You’ve already purchased the replacement, right? Besides, the valve may be seating improperly only intermittently.
5. Replace Check Valve
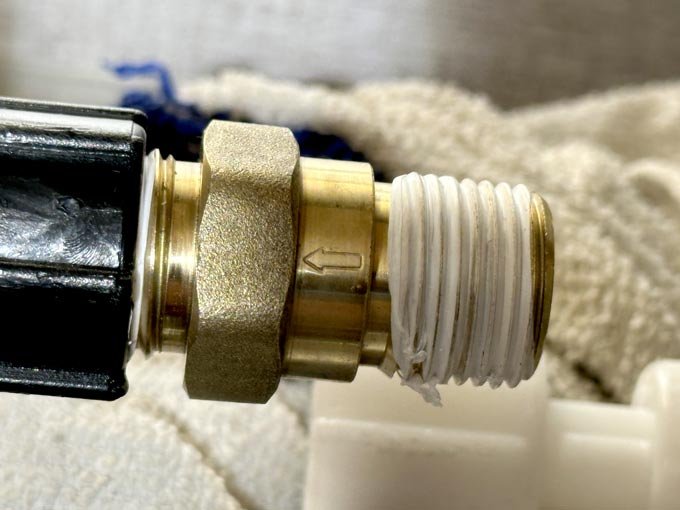
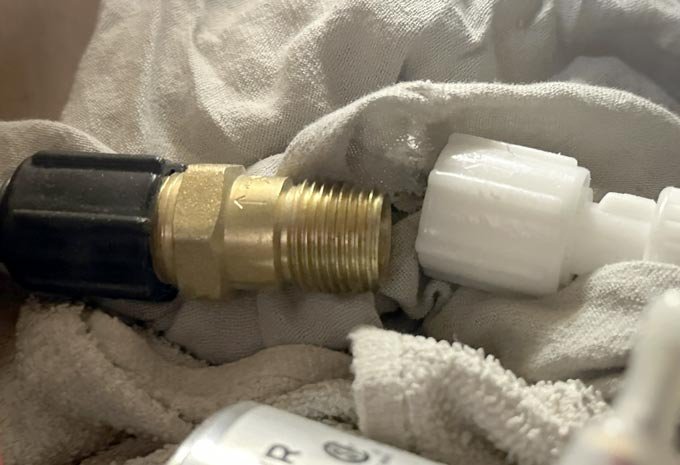
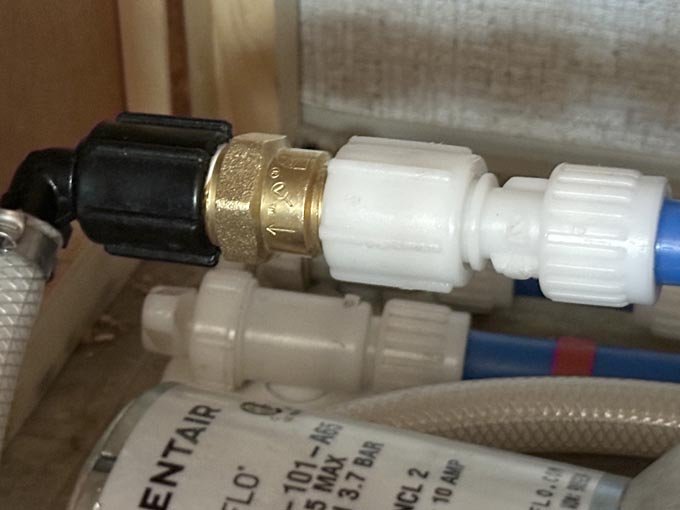
Wrap threads of check valve with Teflon tape after confirming you bought the right size. Important: Note the direction of the arrow on the fitting. This indicates the water flow direction. Be sure to install the valve with the arrow pointing away from the line connected to the water pump. Installing the valve backwards will prevent the water pump from delivering pressurized water to the faucets. And, your freshwater tank will fill up and overflow pretty quickly!
Connect the valve with the arrow pointing toward the water distribution lines. Hand tighten, then give it a slight twist with a wrench to secure the seal. Don’t over-tighten. Connect the other end of the valve to the pump supply line.
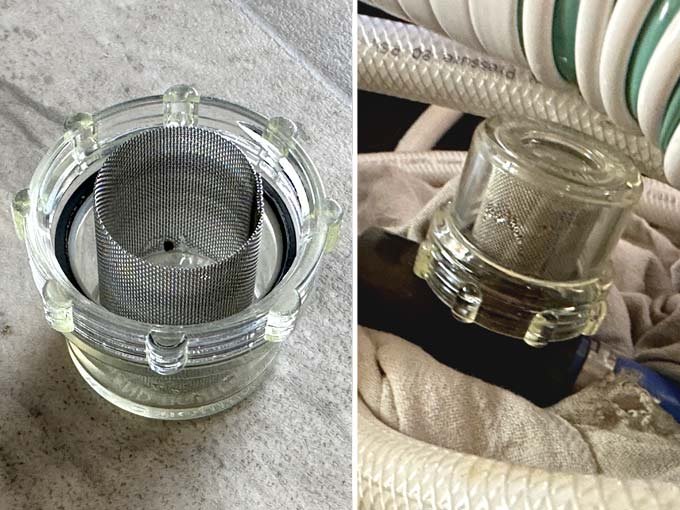
6. Check Pump Filter
While you’re at it, now is a good time to check and clean the water pump filter. Before turning on the water, remove the filter housing found on the inlet side of the pump. Remove any debris from the screen filter. Such particles could cause the check valve to fail by preventing a good seal. Or worse, damage your pump.
6. Check Your Work
If you ran the pump dry using the diverter valve, turn that back to allow water to be pumped from the freshwater tank. Turn on the pump and watch for leaks. The pump should pressurize the lines and stop running. If it keeps running, you probably left a faucet on. Run water from all the faucets to cycle the pump a few times. Check for leaks.
Turn off the pump. Turn on the city water supply, and check for leaks at the check valve. Run water again, and check for leaks. Finally, check for leaks. Then check again. A dry paper towel or tissue is an easy way to identify the tiniest drips.
Once you’re certain the your fresh water overflow fix is not leaking, pat yourself on the back for another DIY RV repair job well done. Be sure not to leave any rags or tools by the pump when sealing up the cabinet or replacing the drawer. Don’t ask me how I know to do that.
And, in case you didn’t figure it out when removing the drawer…
How to Remove RV Cabinet Drawer
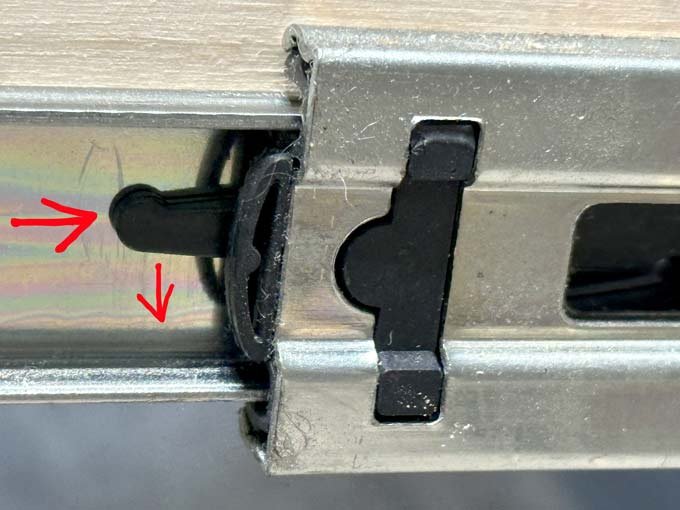
*BONUS TIP: To remove some RV pantry drawers, push down the release lever on one side, while pulling up the lever on the opposite side. Apparently the manufacturer produces only one slide rail. Then, builders can just install one upside down on the other side of the drawer. Makes sense, in terms of cost and logistics, I suppose. But some people might get frustrated not knowing this when first attempting to remove the drawer. 😎
Any questions?