I didn’t expect to do any camper solar upgrade so soon, but it turned out to be a simple job. With an important lesson learned. If you’ve got a pop-up camper with a failing panel or you’re thinking about improving your off-grid setup, don’t panic. This is a very easy DIY project that delivers immediate results. If you pay attention to polarity!
We had to cut our Mexican adventure short once we realized our battery in the Project M wasn’t charging. The Red Arc controller was doing it’s job with the truck running, but we were not getting any power via solar. Before I tore apart the wiring, I started at the beginning. The original Overland Solar panel had no output at all. Working under the full sun at FOY, I should have seen ~18–20V.

At least I had an answer, and a simple solution. Replace the panel. So why not seize the opportunity for our camper solar upgrade while I was at it.
Project M Camper Solar Upgrade Parts:
Bad Flexible Panel = Camper Solar Upgrade
Four Wheel Campers installed a flexible 150W solar panel on a custom rack mounted to T-track rails on the roof of our Project M. After less than two years, the sudden loss of power came as a surprise. But apparently this isn’t so surprising.
Flexible panels are are lightweight and low profile, but that comes at a cost. They tend to run hotter, which reduces efficiency over time, and their construction makes them more vulnerable to internal damage. It’s not uncommon for them to degrade or fail much sooner than expected. Now we know. So I chose to complete our camper solar upgrade using a rigid residential panel with higher output.
Why We Switched to a Rigid Panel
Switching to a rigid monocrystalline panel was an easy decision. The output was greater at a similar size. It was easy to install, and we noticed the power difference immediately. Rigid panels are built with a solid frame for better airflow underneath. This helps them stay cooler and operate more efficiently throughout the day.
They also tend to last much longer and provide more consistent output. For a fixed roof installation, especially on a camper that sees a lot of sun exposure, a rigid panel is a more durable and reliable solution. To keep things simple, I just needed to make sure the panel fit on top of our rails.
Rigid Solar Panels:
- Run cooler → better real-world output
- Last longer → more durable construction
- Produce more consistent power throughout the day
Simple Mounting to Camper Roof Rails
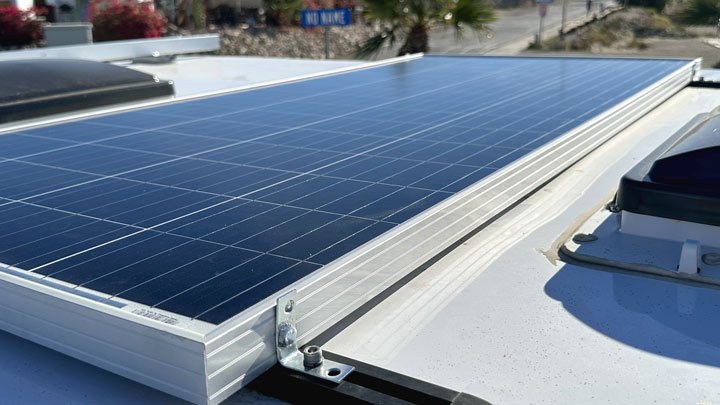
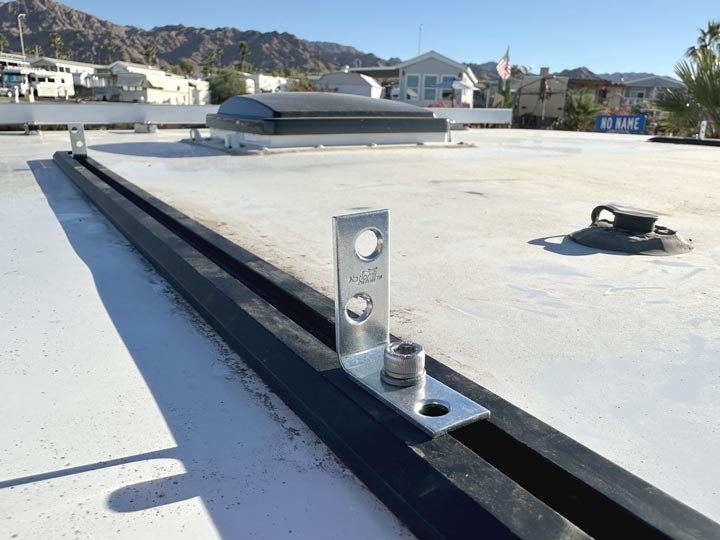
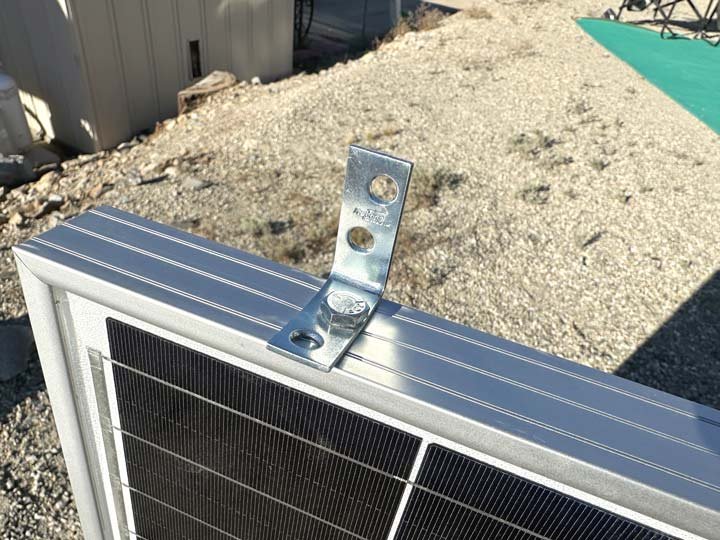
The Project M has rooftop T-track rails with sliding inserts to secure the original mounting bracket in place. By using a rigid panel, I was able to ditch the rack and keep the install low-profile while still allowing airflow. This also made mounting very affordable, with a simple solution. Instead of using any specialized mounting kit, I bought four cheap L-brackets with some bolts and lock nuts at the local hardware store. The existing T-nuts fit the brackets perfectly and slide along the track, allowing you to position everything exactly where you need it.
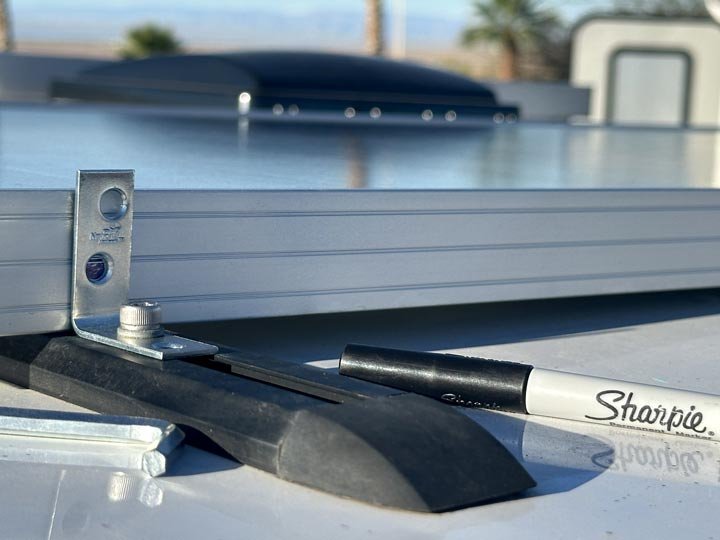
First I placed the panel across the tracks. Once the position was perfect, I attached brackets to the rails and slid them snugly into place. Marking the frame of the panel through the brackets showed me right where I needed to drill holes for the bolts.
Important Tip: Attach the angle brackets to the panel frame first! It would be pretty hard to attach the panel once the brackets are screwed down to the roof. Set the panel in place, line the brackets up with the T-nuts in the rails, and bolted and bolt them downs. It’s easy enough to slide the nuts in the rails to line up with the mounting bolts. Nothing fancy here, no complicated fabrication. Just a clean, low-profile install that feels solid and secure.
Basic Camper Solar Upgrade Steps:
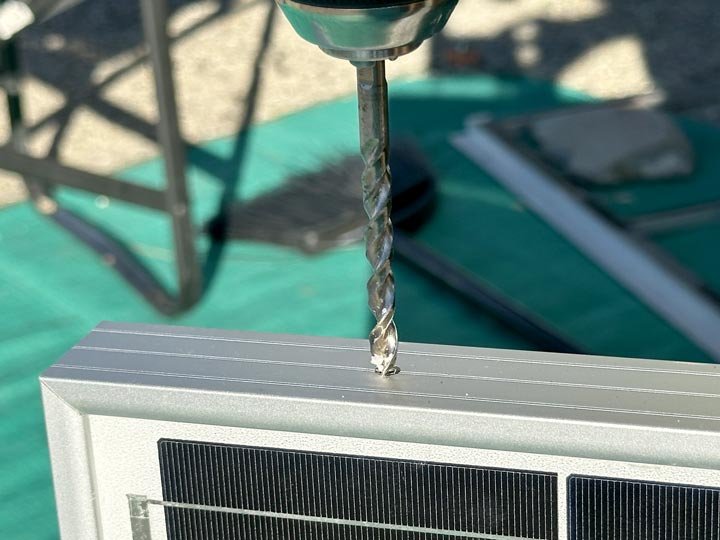
- Mark solar panel and drill bolt holes in frame.
- Attach angle brackets to the frame.
- Align panel brackets with T-nuts and attach to roof track.*
- Bolt the panel down through the brackets into the track.
- Tighten everything securely.
*NOTE: If the power port in your camper roof sits beneath the panel, connect wiring first!

Connecting the Wiring (Important Part)
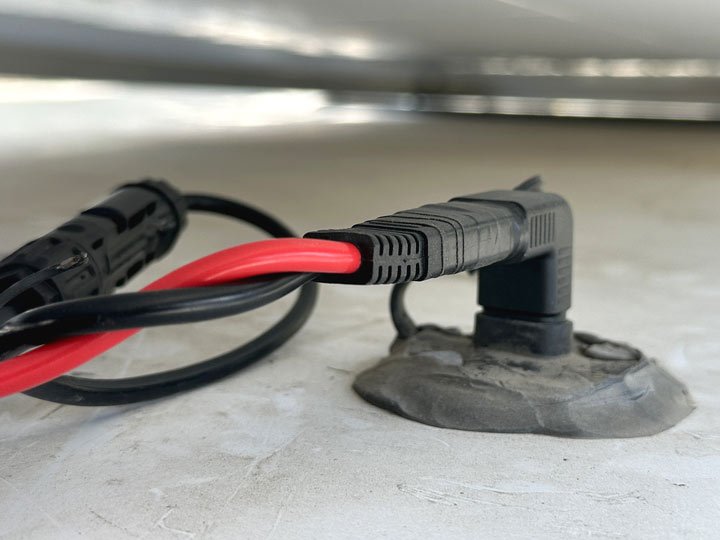
Most modern solar panels, including our NewPowa 18W PV Module, come with MC4 connectors. However, most RVs and campers use a standard SAE port on the roof. So, you’ll need a simple MC4-to-SAE adapter cable to connect everything.
This part is straightforward, but there’s one very important detail you don’t want to overlook.
Confirming SAE Polarity
Not all SAE ports are wired the same way. Many RV and camper manufacturers wire solar power connections in reverse polarity. Typically, that means the exposed pin is negative and the recessed socket is positive, which is opposite of the standard configuration.
If you connect your panel without accounting for this, your system won’t charge. Or worse, you may damage some charge controllers. Fortunately, the fix is easy. And I found the best part for completing our camper solar upgrade.
How to Check Polarity
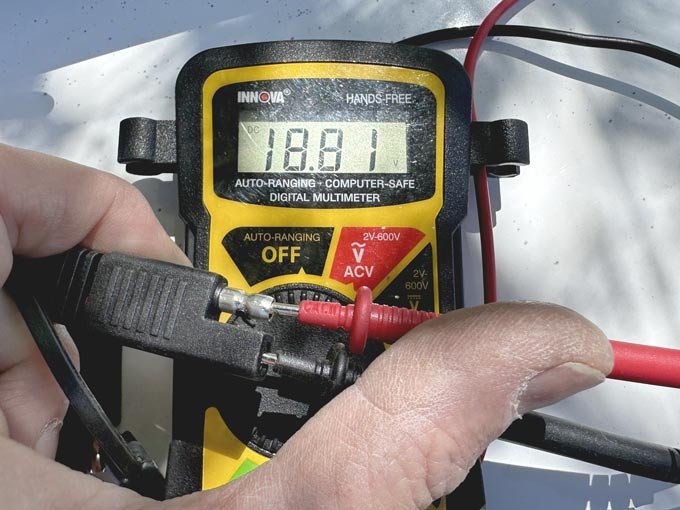
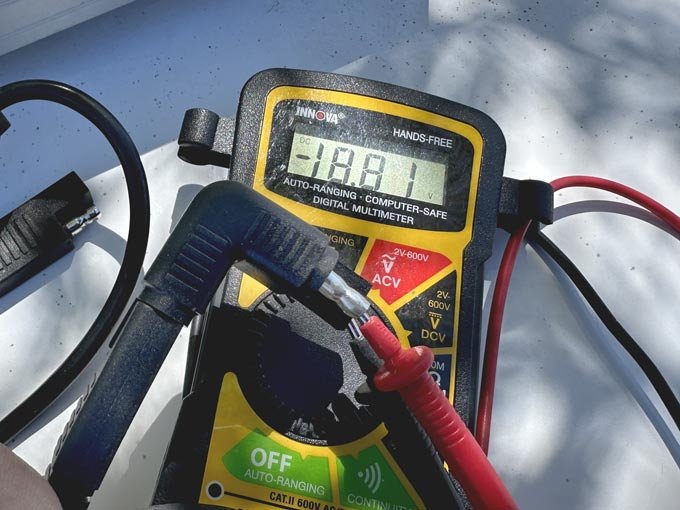
You can quickly confirm polarity. Set your multimeter to DC volts, connect your panel and probe the MC4 connectors attached to the panel. You will likely get a positive voltage reading. With typical RV and camper systems, the rooftop port requires reverse polarity. Many panels come with a reverse polarity adapter. Again, to keep things simple, I got a 90º SAE Polarity Reverse Adapter. To confirm the SAE output polarity, I tested the connector and got negative value. This tells you the polarity is reversed.
This simple check only takes a minute and ensures everything will work as expected, without damaging any equipment.

Final Thoughts
This unexpected upgrade ended up being one of those projects that was both easy and rewarding. We originally thought this might be another troubleshooting nightmare and expensive repair. Instead, it turned out to be a common issue with a simple solution. In the end, we’re now getting better power output from the roof, with a panel that should last much longer.
Mounting the panel to our existing rails only required some basic hardware and minimal effort. And, the wiring was just as simple, with the right parts for the right job.
The result is a more reliable solar setup with better performance and longer lifespan. If your flexible panel is starting to fail or already has, replacing it with a rigid panel is a straightforward upgrade that’s well worth the time. Hopefully your camper solar upgrade won’t bring an unexpected abrupt end to your adventure.