tl;dr Our long overdue Dodge Ram door wiring harness repair project is finally complete! And, it’s easier than you may think with this video I found and some step by step photos – with a few essential tips to remember.
Oh, and this post includes affiliate links. As Amazon Associates we earn from qualifying purchases via links. Thank you for your support!
Why Repair Dodge Ram Door Wiring Harness
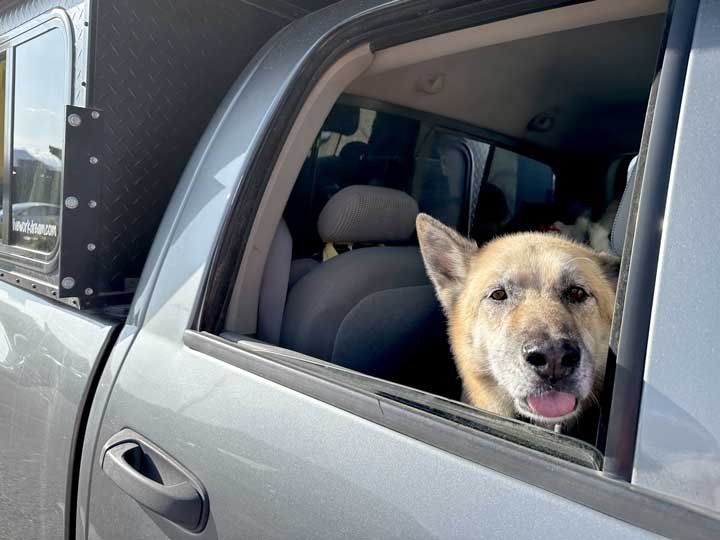
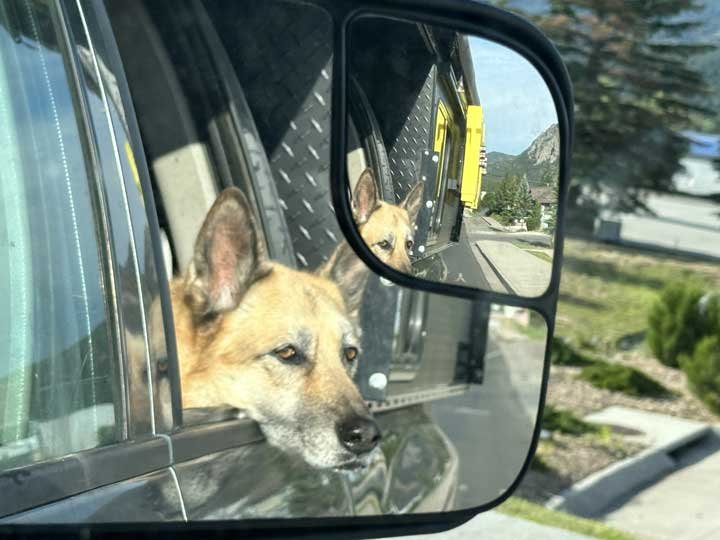
Sometimes it seems that everything we do is all for the dog. And that’s okay, she deserves it. It’s been more than a year since Nellie has been able to look out her window. Yeah, the rear seat is all hers. After all, we purchased our Dodge Ram 2500 with the fold flat back seat for Jerry way back when we hit the road. But I digress.
This isn’t a Live Work Dream history lesson. This is about how I replaced the wiring harness in the rear passenger door of our Dodge Ram 2500. It just helps to know why sometimes. And this time, the DIY repair saved us nearly 700 bucks. Shortly after the rear window stopped working, the lock on that door no longer functioned.
After some tricky troubleshooting, we had a favorite shop give us an estimate. Shocked at the price, I was happy to get the diagnosis. I was even happier to discover this Dodge Ram Door Wiring Harness on Amazon (#ad) cost less than $30! In addition, detailed steps in the repair video I found gave me confidence I could complete the job myself ? and save hundreds of dollars
How To Replace Dodge Ram Door Wiring Harness
This Dodge Ram door wiring harness repair project might sound daunting. But it is simpler than you may think, if you have the right part and the right tools. This video is very helpful. But I discovered a few important things to note that will save you time and frustration.
So, follow along with these step by step instructions and you should be able to replace the door wiring harness in about an hour. First, do yourself a favor. Get this Auto Trim Removal Tool Kit (#ad) to make the job go quick and easy. The panel clip pry tool made it really easy to remove and install the door wiring harness without any damage, or bloody knuckles.
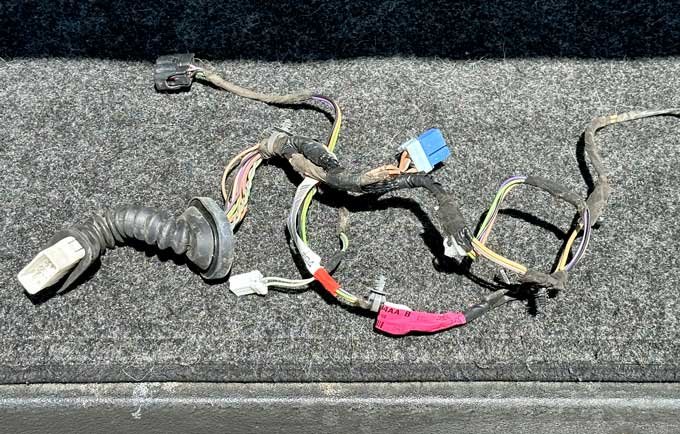
The wiring harness routed through the door panel has all the wires and connectors to power the widow and lock. It also includes the speaker cable, and a multi-pin connector that
Step by Step Repair Photos
What will you need to replace the rear door wiring harness? You just need the right part, the right tools, a little bit of confidence and a couple hours of your time. Here are the only items I needed to purchase. In our case, the part fits our 2006 Dodge Ram 2500.
PART: Rear Door Wiring Harness (#ad)
TOOLS: Car Panel Trim Pry Tool Set (#ad)
NOTE: Your door wiring harness may be different based on the year and model of your truck.
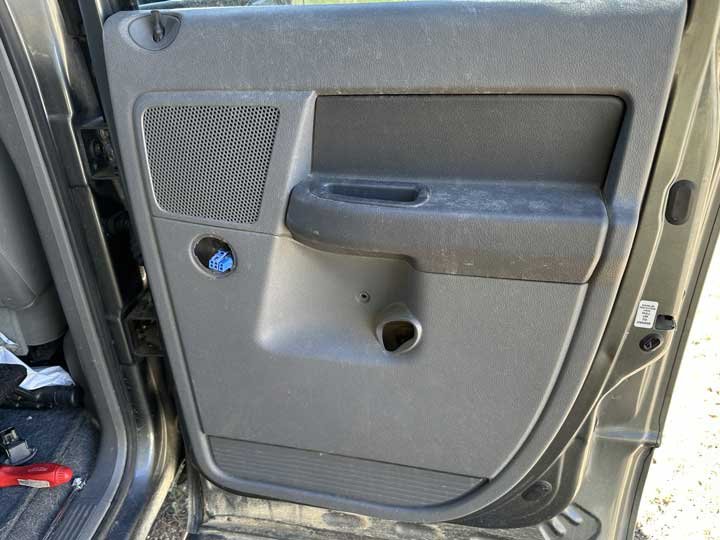
Remove Door Panel
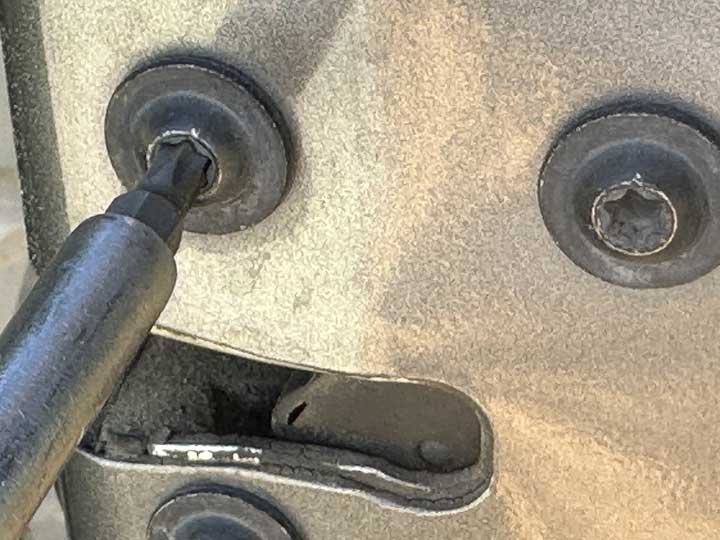
Your first step when replacing the wiring harness is to remove the door panel. And, the first thing you must do is remove the door handle. So, my first important tip is to know which screw to remove for releasing the handle.
Our door handle doesn’t use a Torx screw like mentioned in the video. A small socket does the trick. Lift up on the handle to access the mounting screw. Don’t remove the first screw you might see which holds the handle mount assembly in place. The correct screw to remove attaches the handle to the lever mechanism.
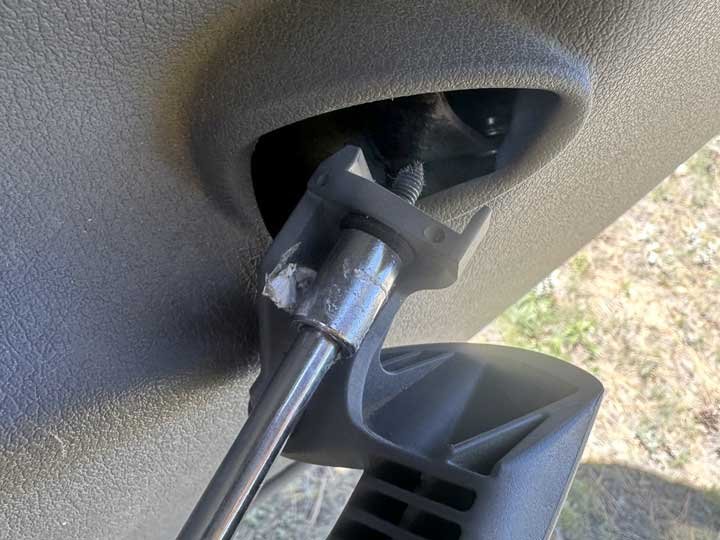
When removing the handle, keep pressure on the driver to avoid dropping the screw inside the door. Remove the center screw that holds the interior panel in place. Unlike the video, I also recommend disconnecting the window switch prior to removing the panel. This prevents putting any stress on the wires while holding the panel in place and reaching to disconnect the switch.
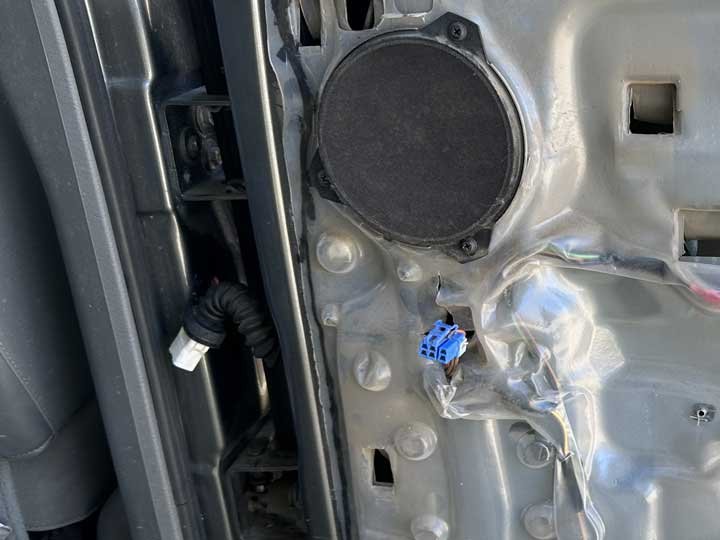
Remove Speaker and Wiring Harness
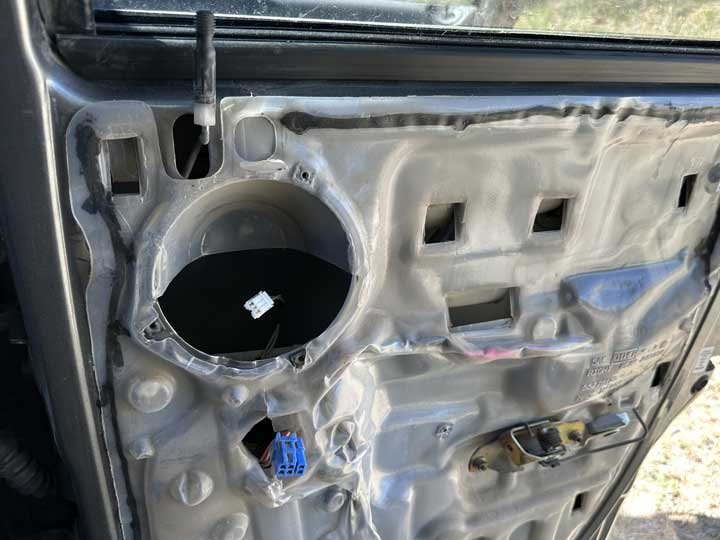
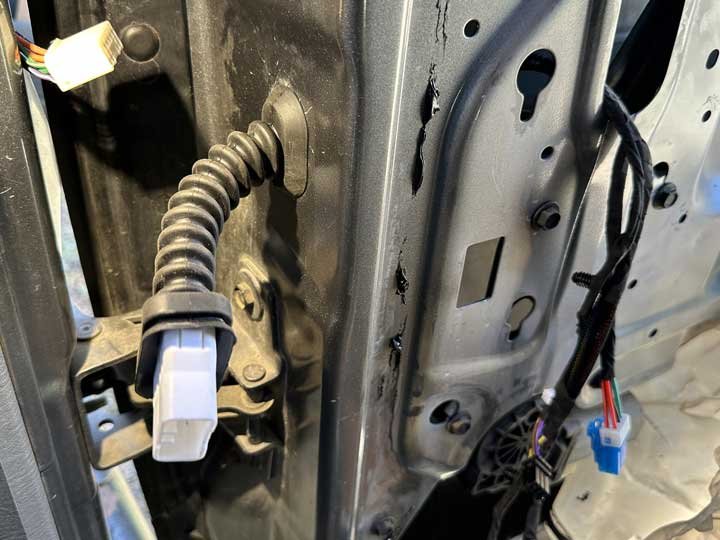
Now you’re ready to remove the entire door wiring harness. This is where that pry tool set (#ad) comes in handy. Use one of the panel tools to pry loose the multi-pin connector from the truck chassis. This can also be used to push the rubber gasket into the door panel. Remove the speaker mounting screws and disconnect the speaker wire before proceeding.
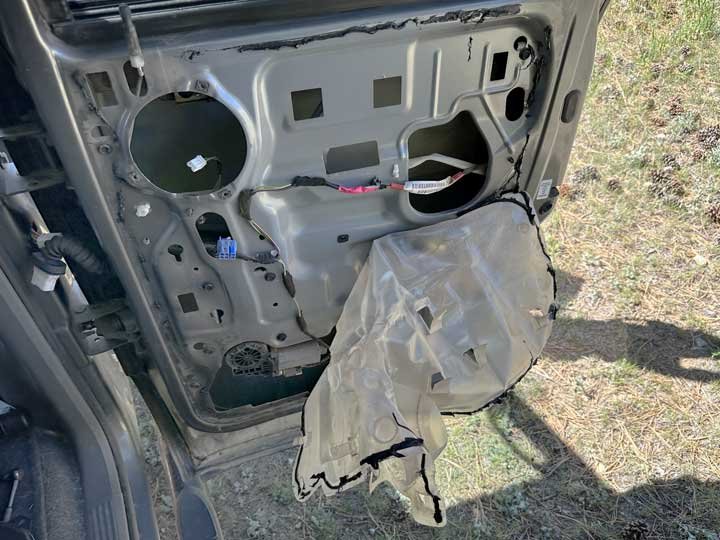

Next, release the plastic vapor barrier to expose all the wiring. You do not need to remove the entire piece. It is held in place under the door lever mechanism. Be careful not to tear it, and stay clear of the black butyl tape. It is very sticky and will ruin your clothes. Once exposed, you can access the window motor at the bottom of the door. Slide the retainer clip back before attempting to disengage the power connector. Remove the connector from the motor and note how all the connectors on the door wiring harness look different.
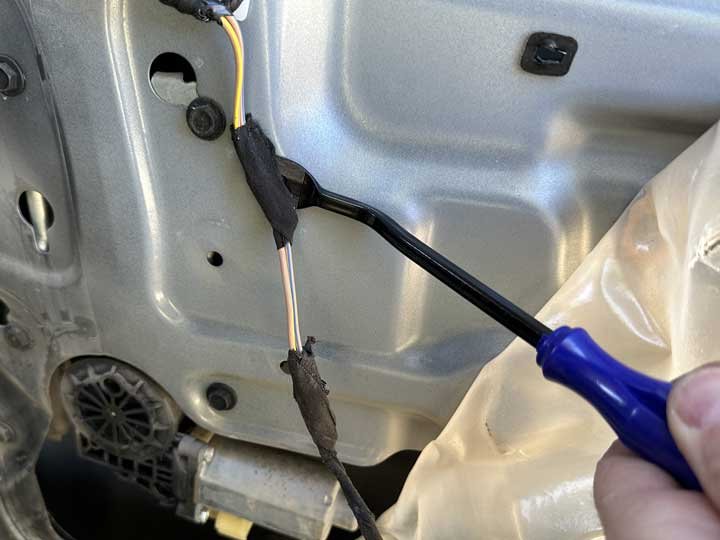
Removing the wiring harness retainer clips is easy with the pry tool. Installing the new door wiring harness will be easy if you make a mental note of which clips go where. Knowing which connectors go where is easy because each one only fits for its intended connection. Continue removing all the visible panel clips. But note, that’s not all of them!
Remove Door Latch Connector
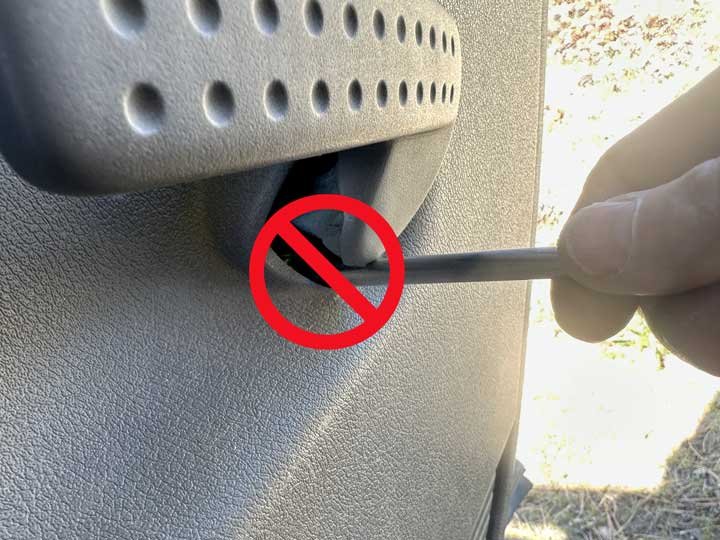
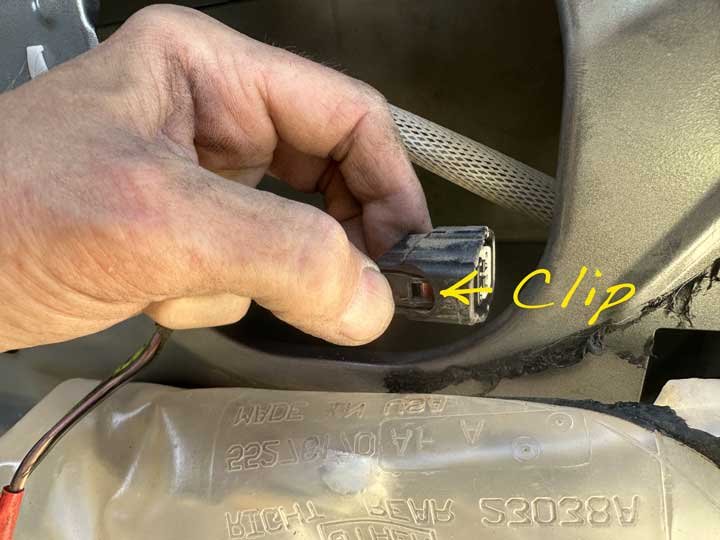
My only critique of that door wiring harness repair video above is how simple the tech makes it look to remove the power connector from the door latch mechanism….
Just get our fingers on it, so we can relieve it!
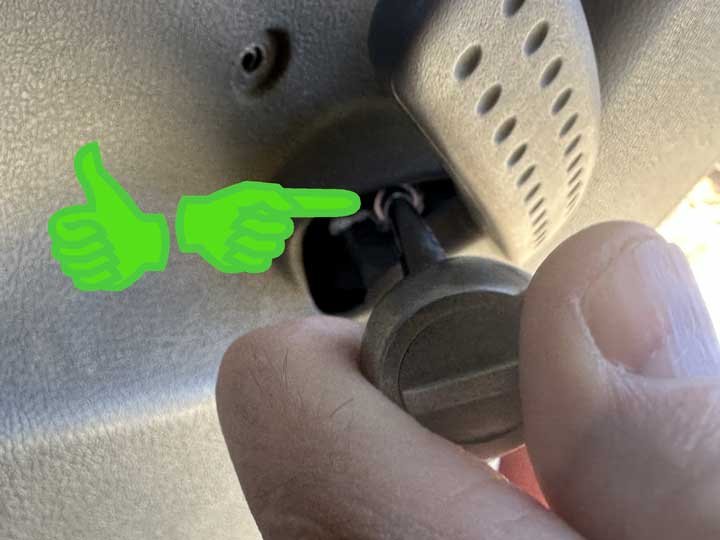
It’s not that simple. Small hands help. And it takes a strong grip to remove the power connector. You must depress the pin on the side and slide the clip of the mount. And, you can’t see what you’re doing. So, it help to know the orientation of that clip. And identify where the pin is. This should help…
Removing the power connector from the door latch mechanism was the most difficult part of this door wiring harness repair job. However, once I knew the correct position of the clip, and where the retainer pin was located, reinstalling the new harness was much easier. You should now have all the panel clips removed and power connectors disengaged. Your now ready to install the new wiring harness. Or, are you?
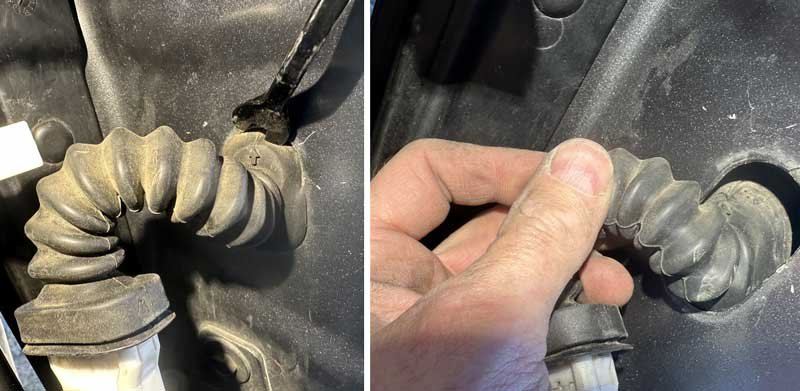
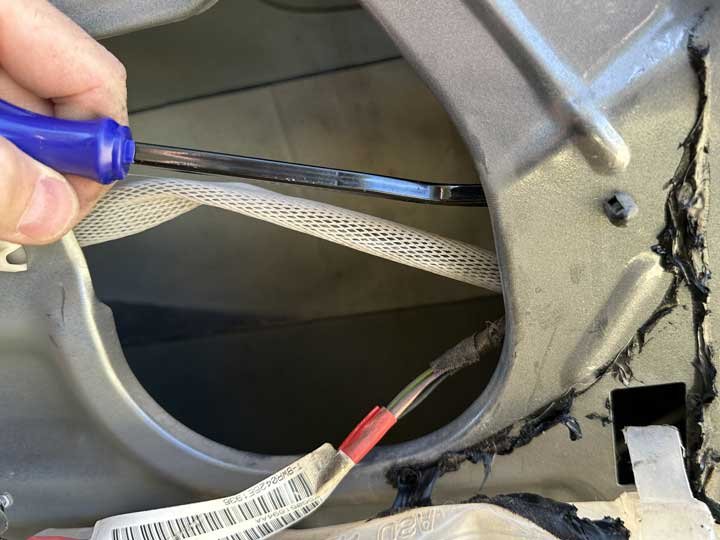
If you did not already disconnect the multi-pin connector from the truck chassis earlier, do that now. Use your pry tool or screwdriver to push the rubber boot into the door panel. You can now remove the wiring harness through the speaker opening. Then, all you need to do is repeat this process in reverse to complete your new door wiring harness repair.
Install New Door Wiring Harness
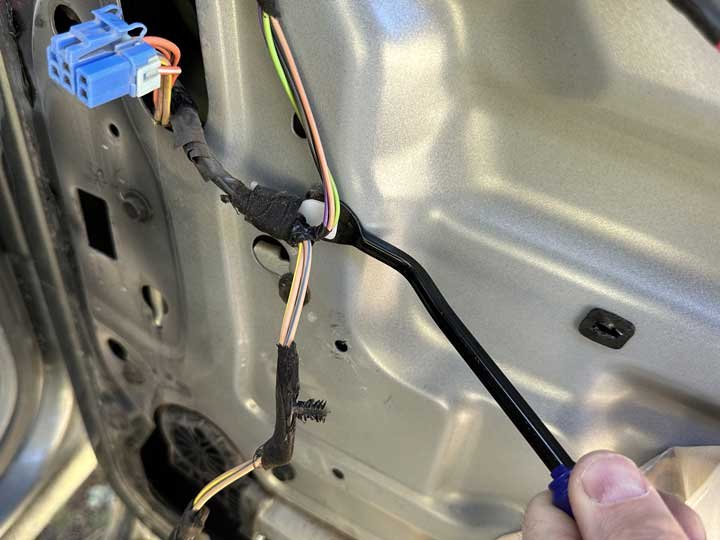
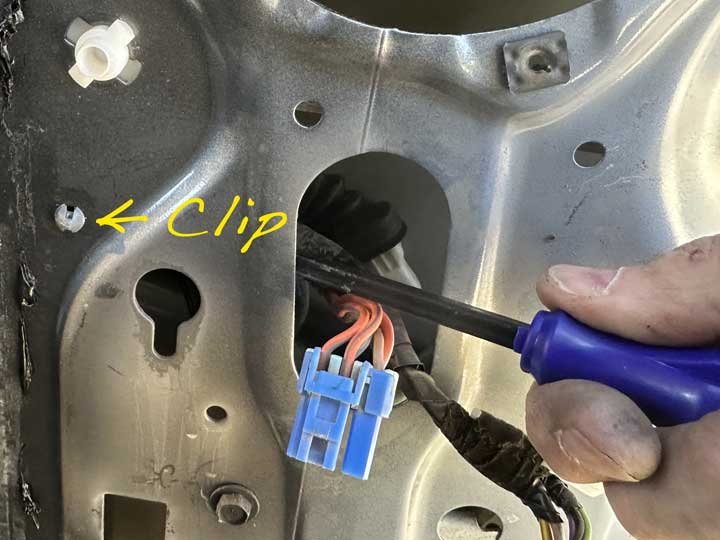
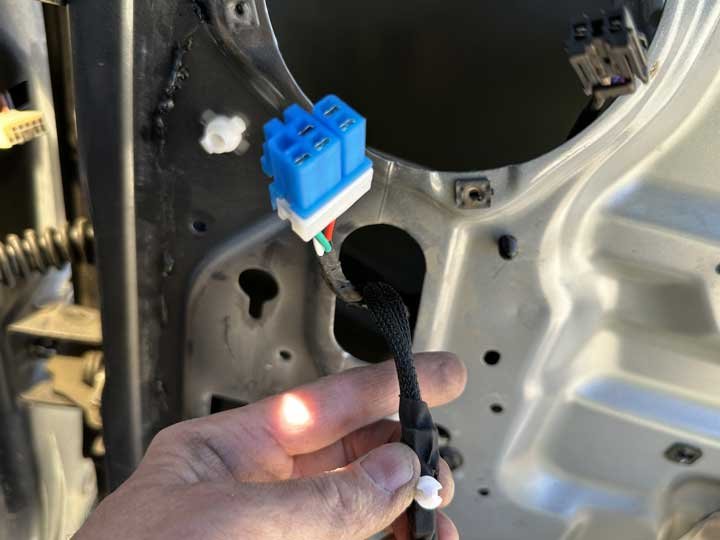
OOPS! Did you miss that tricky wiring clip? Don’t yank on any wires if they don’t come loose. Be sure to remove all the harness clips from inside the door panel. Spoiler Alert: They may not all be black. 🙂 Now, you’re ready to install the new door wiring harness. Insert the multi-pin connector through the speaker opening and push it through the opening inside the door. Do not connect it yet. Reconnecting the power should be the last step. Who knows, you may need to pull the connector back through and re-route some wires. Just sayin’…
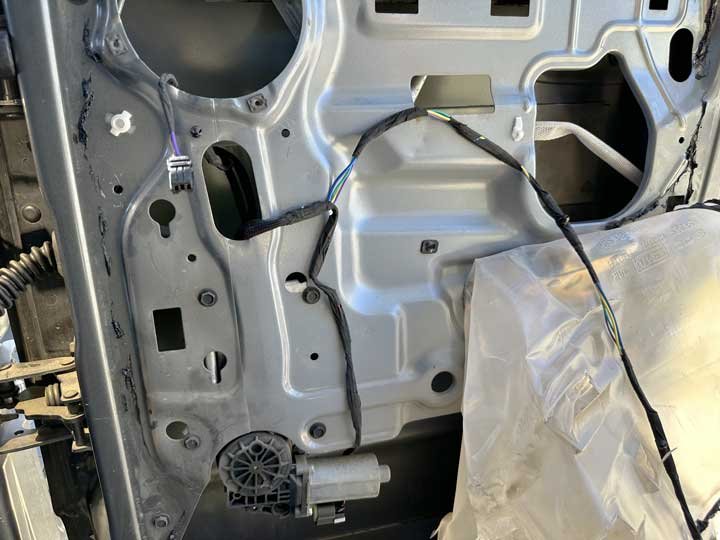
Reroute the wiring harness the same way it was prior to removal. Perhaps take a picture for reference. Though it may be a bit late for that now if you’ve been following along. 😉 Connect power to the window motor before connecting wires to ensure you have enough slack. Refer to the door latch image and notes above to connect that power. Then, screw the latch back in place.
Final Notes
NOTE: Ensure there is no excess slack in the wiring inside the door panel! Before putting everything back together, be sure to test all the power. Connect the multi-pin connector and use the master switch in the driver’s door to control the window and lock. If the window doesn’t go up, don’t panic like I did. The passenger door switch must be connected, to complete the circuit.
Finally, put the window all the way up and down. Don’t be an idiot like me. :-\ I didn’t check all my work before reinstalling the door panel. I was so excited to see the window go down for Nellie, I didn’t put it back up. That is, until I had the door panel mounted and handle installed. Only then did I discover the window slowed to a halt before reaching the top. Did you catch that note about removing any excess slack from wiring inside the door? Yeah, well, I wish I thought of that before I put everything back together and cleaning up my tools.
In the end, we’re all happy with another DIY project mission accomplished. Especially Nellie.