After repairing the broken D3 control cable connection and getting our satellite internet system back online, the next step for our new fifth wheel was to finalize the installation of our dish and networking hardware.
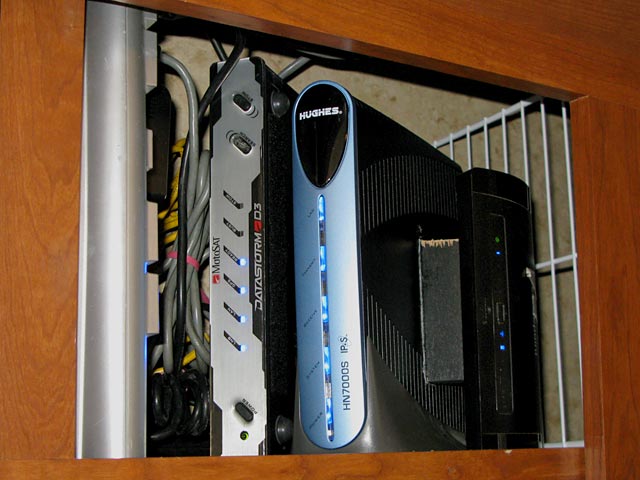
This entailed tightening and tidying up the mount then securing all the cabling—running it through the roof and into a cabinet where I installed and configured the various components.
Satellite Internet System Components:
[unordered_list style=”star”]
- MotoSat F2 Satellite Dish w/ Motorized Mount
- Datastorm D3 Controller
- HughesNet HNS7000s Modem
- CradlePoint Wireless Router
- 2 Laptops (1 Mac & 1 PC)
- iPad & iPhone
[/unordered_list]
First Things First
Before drilling any holes or cutting any cables (again), I made certain that the system was operating properly by connecting the controller and modem directly to the mount by just draping the wires over the edge of the rig. Care must be taken when doing this to ensure the dish does not crimp or stretch any wires as it turns.
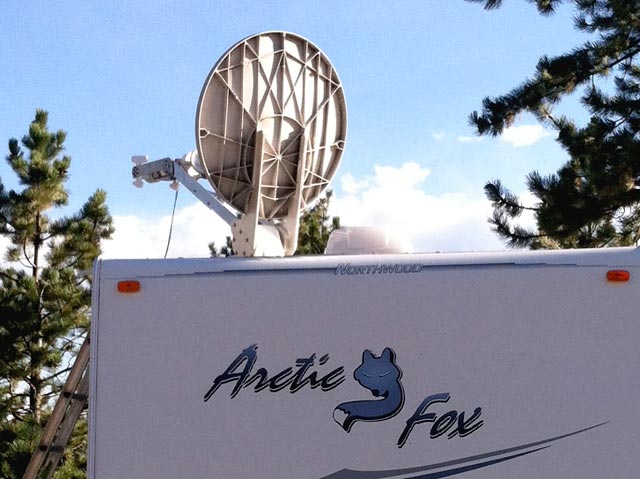
You may notice the Receive cable attached directly to the LNB at the end of the arm in this photo above. This is a common troubleshooting step to take when trying to isolate any cabling issues inside the mount. Extra special care must be taken when doing this, since you must hold and feed slack to the cable as it turns with the dish.
Why did I do this? I was concerned that my rewiring job might have been the cause of our system not being able to lock on to any satellite. By bypassing my repaired Rx cable connector, I was able to confirm it was not. The issue was related to our D3 controller and/or its satellite tables. After a few days spent on the phone with MobilSat Support and in the Datastorm Users Forum, I was convinced to upgrade our controller with the new RF Mogul Software Update available for the MotoSat D3.
?
First I sent my controller to Don at Oregon RV Satellite for testing. He confirmed that our D3 had some sort of hardware problem causing odd power-cycling behavior. It was in need of repair and further diagnostics, which RF Mogul does, so I just had them upgrade the software too.

I was immediately impressed with the new controller software, but it too had a couple kinks we needed to iron out before getting online. I may write a more detailed review of the upgrade at a later date, but to make a long story short—once we got online, it was time to finally complete the dish wiring and call ‘er done!
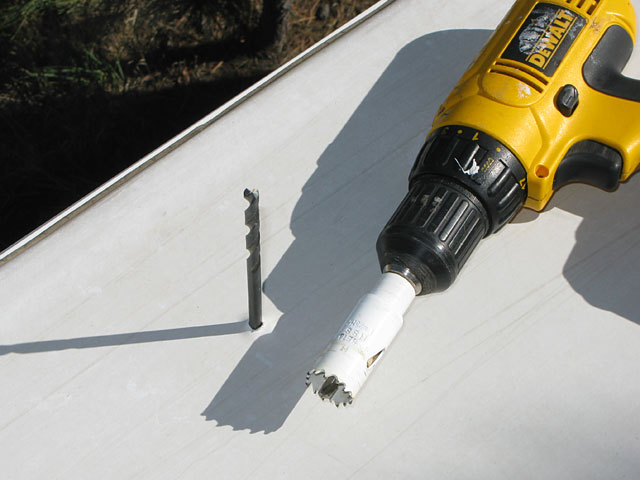
The type of roof on your RV will determine the kind of screws and drill bits you may need to install your dish mount and wiring. We have a rubber roof. The Datastorm Installation Guide provides more detailed information.
?
 First, I determined the location for the hardware in the cabinet and added a new RV electrical outlet
 by running Romex through the wall to the nearest circuit which happened to be an outlet about a foot below the radio. I was able to use some existing stereo wiring to pull cable to the new outlet box.
Next, I drilled a pilot hole up through the roof from inside the cabinet with a 18 inch installer drill bit. After removing that bit, I then used a Deep Cut 1″ Hole Saw
to drill down through the first layer of roofing plywood.
[box type=”note” style=”rounded” border=”full” icon=”https://liveworkdream.com/wp-content/themes/memorable/functions/images/ico-info.png”]Do not use a spade bit or Forstner bit on a Rubber roof![/box]
From back inside the cabinet, I drilled up through the ceiling and lower layer of plywood using the pilot hole as guidance.
Back on the roof, I ran the cabling in a straight line toward the hole securing it every 12″ with Screw Mount Cable Ties.
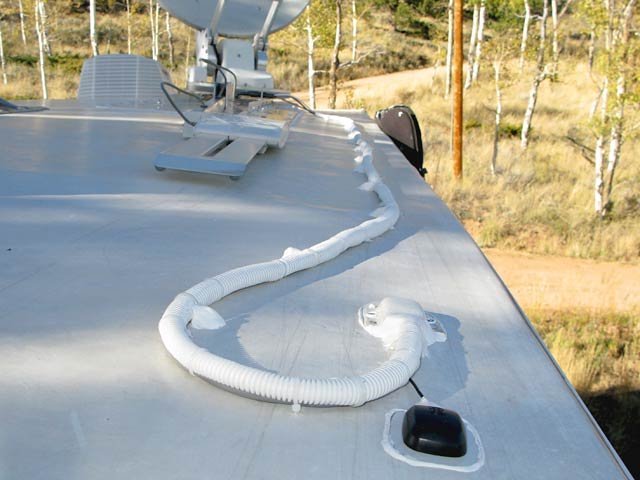
After noticing that our previous control cable insulation had cracked over the years, I decided to protect the new cables with white split loom wire wrap and sealed all the screws with Dicor Lap Sealant.
We had an extra XM satellite radio magnetic car roof antenna, so I decided to mount that to a small metal plate I adhered to the roof with sealant. I ran that wire down into the cabinet with the others and sealed everything up with more Dicor and the plastic shroud I kept when removing the system off our old rig.
Say what you will about Satellite Internet, but as much as we hate it sometimes, we love it! This all may sound like a hassle, but it is the only solution that allows us to work from anywhere since many of our favorite locations have no cell service.
Any Questions?
If you have additional satellite internet installation tips, or any questions, please leave a comment below! If you would like to be notified of our future full-time RVing blog posts, subscribe below. We will never send you spam, you can unsubscribe anytime, and we’ll even send you a Thank You gift.
Jim,
I’m glad to hear that you are up and running with the new controller software, this is a welcome breath of fresh life for many MotoSAT antennas. Please let us know if there is anything at all that we can help you with.
Kirk Williams
Mobil Satellite Technologies
http://www.mobilsat.com
Thanks for the comment Kirk. Your Support team has been a big help!