Our top concerns when designing and building my new RV workspace were comfort, cost, and aesthetics while preserving as much storage space as possible after removing the RV couch. After researching numerous options, I decided to purchase two desk drawer cabinets and build a custom desktop from wood we milled up while workamping at Vickers Ranch.
That wasn’t the first plan, however. I found Ikea had great prices on DIY desk parts. But while their online build your own desk planner was handy for designing my workstation, shipping costs were outrageous for the desktop. It was only $9.95 to ship the Klimpen Drawer Units, and they wanted $199 to ship the 6-foot long desktop.
See RV Office Remodel Part 1 post for details about removing our jack knife sofa to make room for my new workstation.
Custom RV Office Desk Remodel
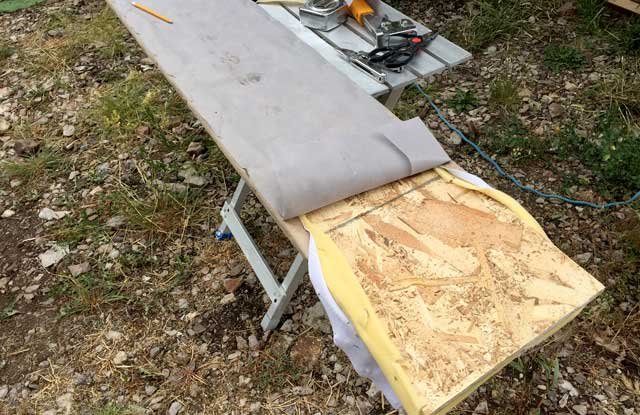
While I waited for the cabinets to arrive, I got to work on my new custom wood desktop. Our slide is 76″ wide, and I needed a 24″ deep slab to cover the cabinets and provide ample workspace. The old Woodmizer mill won’t slice logs that large, so we milled up a couple 1.5″ thick pieces of pine approximately 18″ by seven feet long.

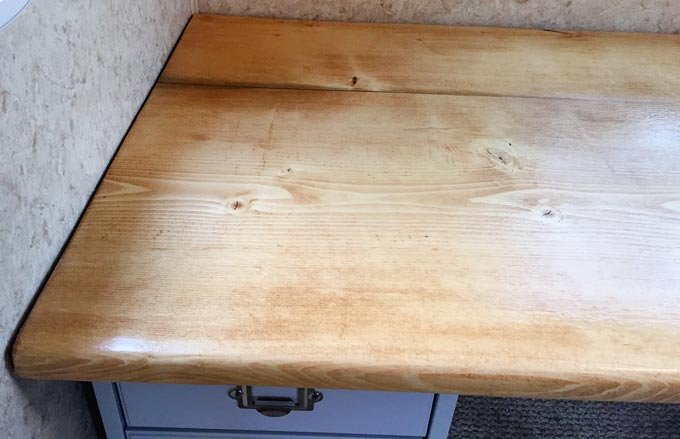
I used a biscuit joiner and plenty of wood glue to create a blank for my desktop at the perfect size to fit snugly in our slide. A couple hours of sanding, and some natural stain with polyurethane varnish did the trick.
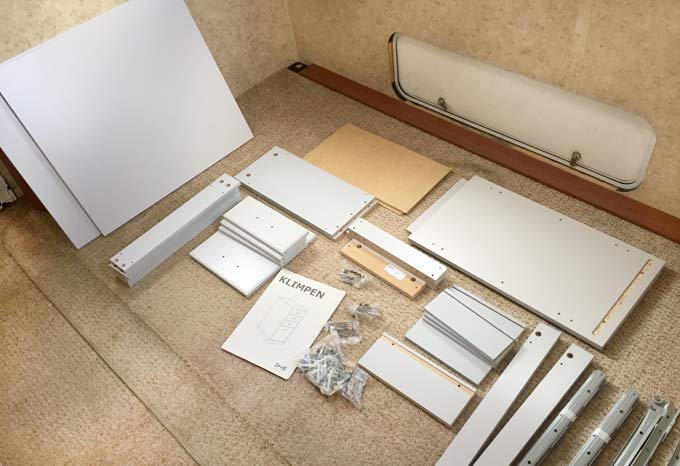
With the ugly RV sofa gone, I had plenty of space to assemble the Ikea cabinets. The instructions were easy to follow, and their construction is sturdy.
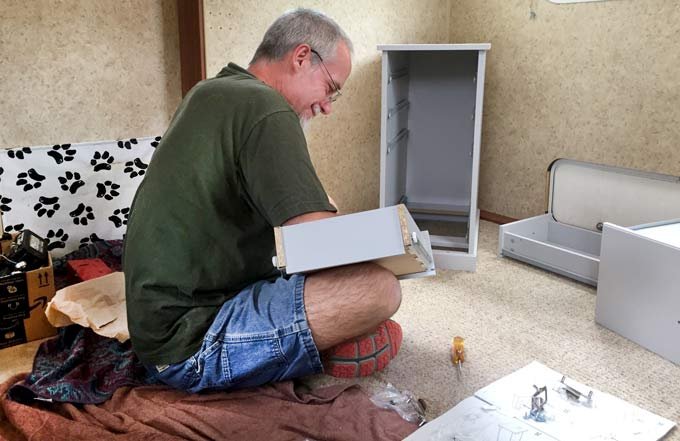
One of the heavy packages, however, did arrive taped up and was missing one of the drawer rail sets. After two days of trying to reach Ikea customer support, they did finally agree to send replacement parts at no cost.
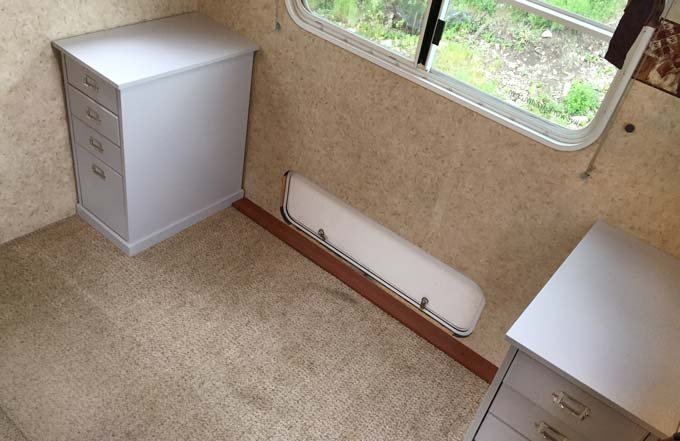
With the drawer units in place, I had to figure out how to hide the storage bay door.

I decided to use the padded front from the ugly couch since it was still in decent shape, and it was (almost) the perfect height.
After removing staples to peel back the fabric and padding, I cut it to the perfect length and stapled the covering back in place.
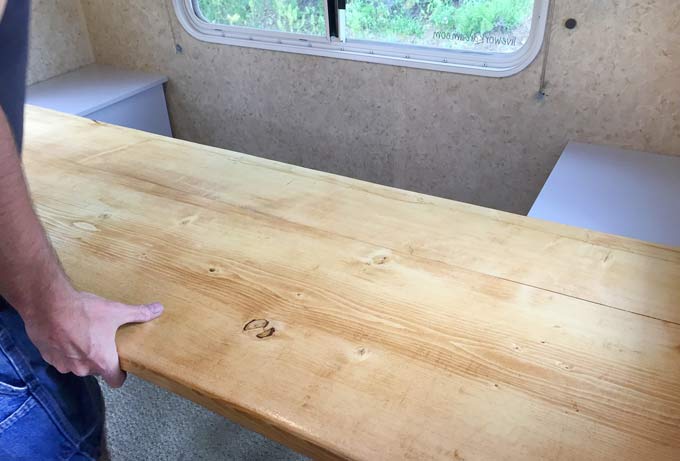
The moment of truth came when it was time to see if my desktop fit. It did, like a glove!
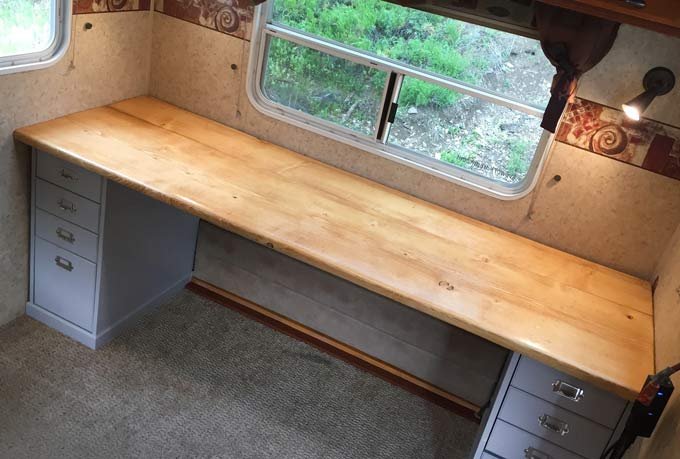
The cabinet drawers offer ample storage space for our canned goods and the finished pine wood is much more pleasant than any store-bought desktop I found, and I have the honor of building it myself from scratch.
The final step was to run some AC power to a convenient location for charging my laptops. Since the slideout only provides DC power for the lights via flexible wiring, I decided to install a new outlet in the wall near the bathroom on one side or under the refrigerator on the other.
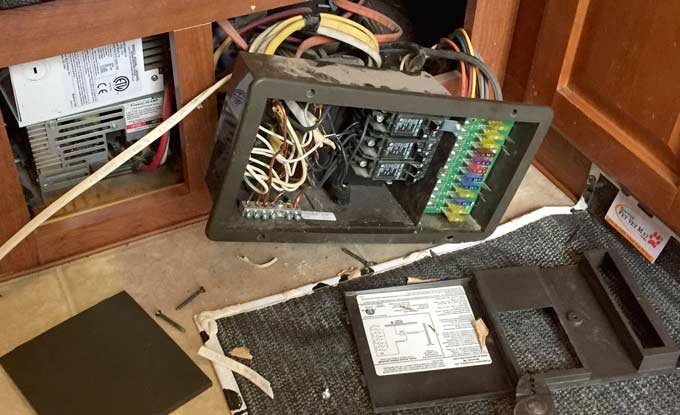
The latter position was ideal since it was near the power distribution center and required fewer holes in the walls.
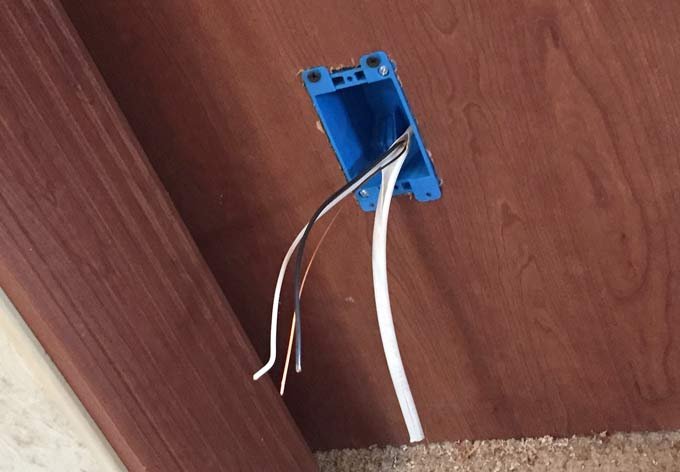
I used an open breaker slot and ran new wire to a hole I cut for a remodel box in the paneling beneath the fridge. There may be a Part 3 to this project post series, as I still need to insert some adhesive weatherstripping inside the storage bay door to prevent drafts. I’ve also decided to build a nice desktop shelf and charging center out of some matching wood and this nifty DC powered USB charging outlet I found. So stay tuned for details, and subscribe here to be notified of future posts! Or, check out all our other RV upgrades and remodels.
Don’t Miss:
RV Office Workstation Remodel – Part 1: Couch Removal
Nice job Jim,
Ten years ago when we bought our current coach, I went to Loew’s kitchen cabinet dept. ordered two cabinets in cherry and a custom cherry counter top so the wood would all match the wood in our moho, and did the same thing you did without removing our couch. We had room opposite the couch. The cherry counter top was the most expensive portion of the project. I wish I had access to a wood shop as you did. You saved a ton of money.
Thanks! it was a fun project too.
I was wondering if anyone else was interested in having an office desk in their RV. Before we even left our last domicile 3 years ago we knew we would never plan to have someone staying with us and using the foldout sofa so that was ditched. I did exactly as you had planned to do but i had the good fortune to be within 10 miles of an IKEA store. I bought the same drawers (2 @ $89 ea.) and the 6′ desk top. Wish i could have your desk top as the IKEA is thin (very thin) veneer with honey comb cardboard center. Made it hard to attach the desk top to the cabinets with L brackets. I also made a shelf below the top to hold the printer. I don’t know how much your table top weighs but hope that doesn’t throw your weights and balance off. Also the back of the rig gets a lot of action due to the fulcrum effect and your tight fit might cause chaffing on the walls. My desk top doesn’t touch any walls and is secured to the floor with 2×2 lumber on three sides (not the front). Have not had any “walking” of the cabinets. I am so happy with my finished project. As full timers this is the heart of our operation with route planning, computer work, paying bills, etc. I know you will wonder how you did without it once you start using it.
Brilliant minds think alike…thanks for the feedback!
We did the same thing only removed dining area, the desk was multifunctional as an eating bar looking out windows under awning. Put in 2 office chairs that also served for eating and 2 people working on computers. Did not miss the u shaped eating area at all and actually increased the walk space.
Nice! Rene has no desire to sit next to me all day.